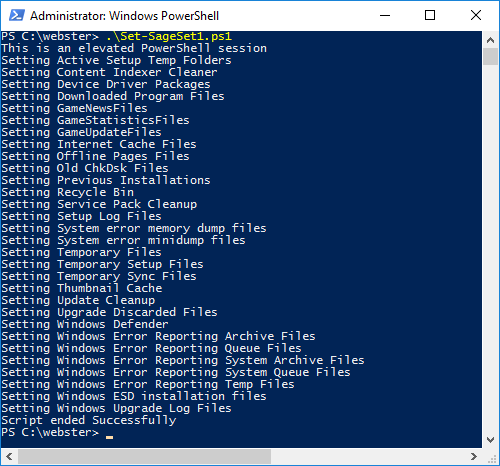
A Windows utility I am surprised that a lot of admins don’t know about is Disk Cleanup. Running the Windows app doesn’t provide as many options as running the same program from the command line. I use the command line option when finalizing master images before the provisioning process. You can also run this on manually provisioned Citrix XenApp servers. This script automates setting all the options for running cleanmgr.exe.
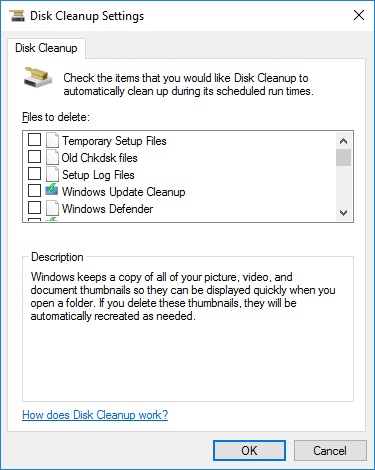
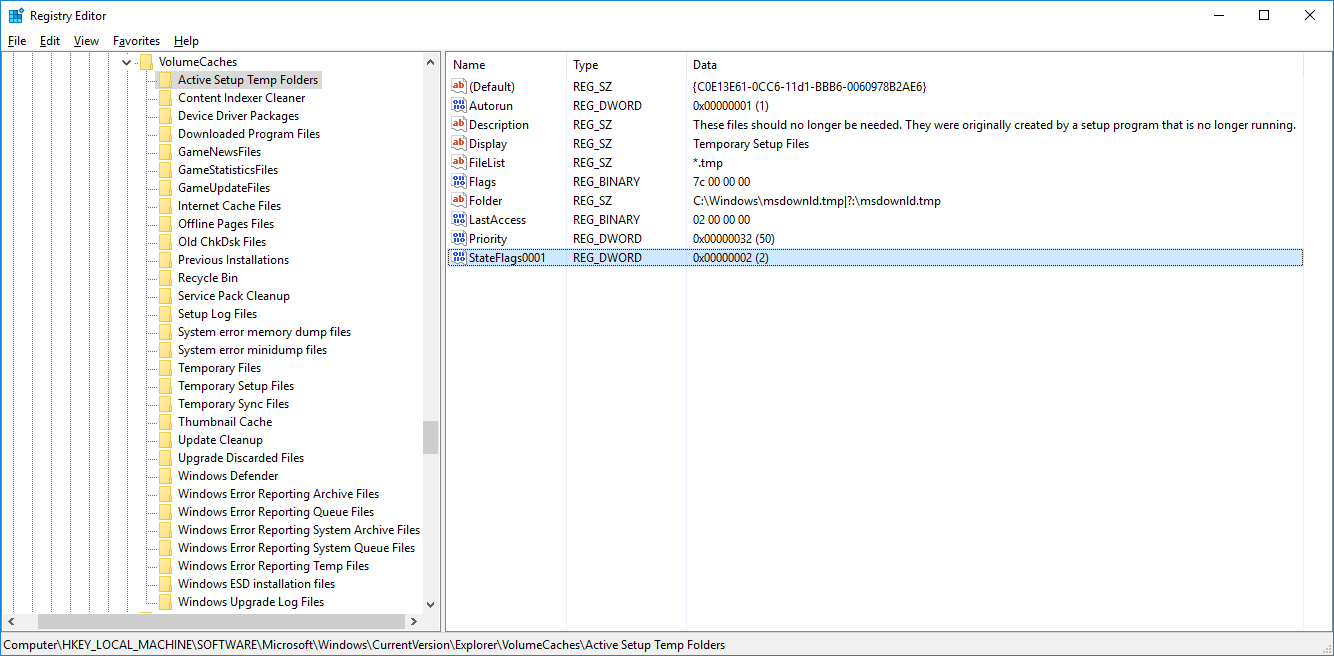
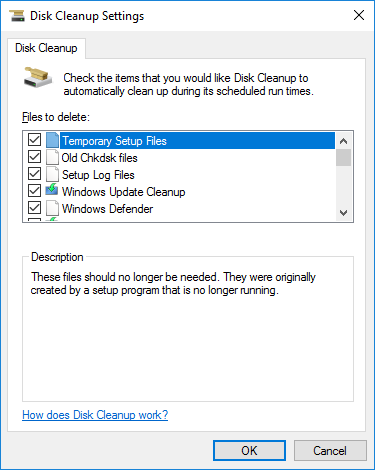
In Windows 10 1803 and Server 2016 with all updates, running cleanmgr.exe /sageset:1 shows 24 options for items that can be cleaned up. These items are called Disk Cleanup Handlers. Full details can be found at Creating a Disk Cleanup Handler. The Handlers are registered in the registry at Computer\HKEY_LOCAL_MACHINE\SOFTWARE\Microsoft\Windows\CurrentVersion\Explorer\VolumeCaches. The number of entries in VolumeCaches varies by Windows version and which updates are installed. Instead of spending a couple of minutes manually selecting every item in the dialog for cleanmgr.exe, I decided to script the process. On my test virtual machines, setting all 24 entries takes less than one second.
The “magic” is in the entry named StateFlagsnnnn and setting a REG_DWORD value of 2. This is explained in the MSDN article:
<quote>
By running the disk cleanup manager’s executable file—Cleanmgr.exe—from a command line, you can declare cleanup profiles. These profiles are composed of a subset of the available handlers and are given a unique numeric label. This allows you to automate the running of different sets of handlers at different times.
The command line “cleanmgr.exe /sageset:nnnn“, where nnnn is a unique numeric label, displays a UI allowing you to choose the handlers to be included in that profile. As well as defining the profile, the sageset parameter also writes a value named StateFlagsnnnn, where nnnn is the label you used in the parameter, to all of the subkeys under VolumeCaches. There are two possible data values for those entries.
- 0: Do not run this handler when this profile is run.
- 2: Include this handler when this profile is run.
For example, suppose that the command line “cleanmgr.exe /sageset:1234” is run. In the UI that is presented, the user chooses Downloaded Program Files, but does not choose Temporary Internet Files. The following values are then written to the registry.
HKEY_LOCAL_MACHINE
   Software
      Microsoft
         Windows
            CurrentVersion
               Explorer
                  VolumeCaches
                     Downloaded Program Files
                        StateFlags1234 = 0x00000002
                     Internet Cache Files
                        StateFlags1234 = 0x00000000
The command line “cleanmgr.exe /sagerun:nnnn“, where the value of nnnn matches the label declared with the sageset parameter, runs all of the handlers selected in that profile.
A generic StateFlags value is written to the registry when Disk Cleanup is run normally. This value simply stores the state (checked or unchecked) of the handler the last time it was presented as an option to the user. There are two possible data values for those entries.
- 0: The handler was not selected.
- 1: The handler was selected.
</quote>
Depending on how long the master image (or computer) has been in production and how many Windows updates have been installed/replaced/superseded, running cleanmgr.exe /SageRun:1 can take from a minute to many hours. The longest I have seen is on a XenApp 7.5 Windows Server 2012 manually provisioned server that had been in production for a couple of years and was fully patched. The cleanup process took 4.5 hours and reclaimed over 40GB of hard drive space on the almost full C drive.
As I stated at the beginning of this post, I am really surprised by how many admins do not know about this handy tool and how to use it to free up space on their computers and images. For manually provisioned computers, you can also use Task Scheduler to schedule running this process at a regular interval.
The script is very simple to use. Let me know what you think.

You can always find the most current script by going to https://www.carlwebster.com/where-to-get-copies-of-the-documentation-scripts/
Thanks
Webster
Script works great but after i run cleanmgr /sageset:1 it just lets me hit ok and closes without clearning anything.
To run the cleanup you run cleanmgr /sagerun:1
Webster
hi, i fail to comprehend microsoft guidance to add a custom location in the cleanmgr. I need to add handler for every third party app i can find across hundreds of computer. Doing a test with a c:\test\ folder where i can delete *.* i dont understand which CLSID I must include in the registry key
Victor,
I am NOT a programmer or developer, so I asked a couple of my friends who are. Here is the info I gathered from their responses.
1. “CLSID” is literally the name of the registry key below which COM objects are registered. As for the GUID, it comes with the (handler) COM object that performs the actual cleanup, i.e., if you create a COM object you need to “name” it by providing a new GUID – any GUID.
2. He just needs to register the clsid of his own extension dll that implements the disk cleanup interface(s).
If these responses do not give you the information you need, I would recommend going to StackOverflow.com and asking there as I am not equipped to answer developer related questions.
Thanks
Webster
Great script. Is there anyway we can activley exclude some options. i.e. I would like to cleanup all options except the recycle bin for example.
Not at this time but that is an excellent suggestion. I will add it to my every growing list of things to do.
You can always, for now, manually run “cleanmgr /sageset:1” and deselect the Recycle Bin item.
Webster