[Updated 4-Sep-2021]
With the Connection Server installed and configured, it is time to build master images. The first image is Windows 10. For this article, I used Windows 10 1909 Enterprise Edition.
UPDATED 15-Jun-2020
Note: Every person has their opinion on how a master image is built, optimized, and delivered to users. There are also different opinions on when the master image should join the AD domain, what OU the image should reside in, and what GPOs (if any) should be applied to the OU and master image. I am using the minimum number of options and steps so I can build and test quickly. You should follow the processes required for your environment. Never blindly take the information from any website, article, or blog as gospel. You should always follow the policies, processes, and procedures required for your environment. Your users, applications, and requirements are unique to your environment. Therefore, you should always lab, test, and learn BEFORE you put anything into production.
In vCenter, create a new VM using Microsoft Windows 10 (64-bit). Use the following options.
For CPU and Memory, use what works for your environment. For me, I used 2 CPU and 4 GB of RAM.
The hard disk controller must be SCSI.
If you have the options, remove any floppy drive and serial ports.
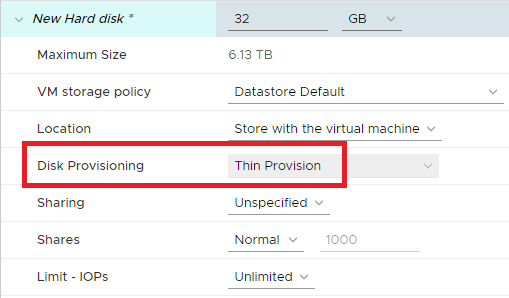
Make sure the hard disk is Thin Provisioned, as shown in Figure 1. I used the default size of 32 GB.
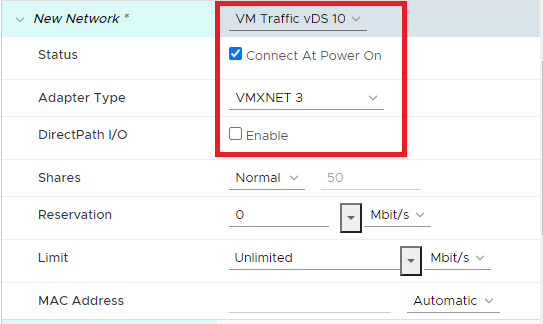
For the network card, select the correct network, verify Connect At Power On is selected, Adapter Type must be vmxnet3, and deselect DirectPath I/O, as shown in Figure 2.
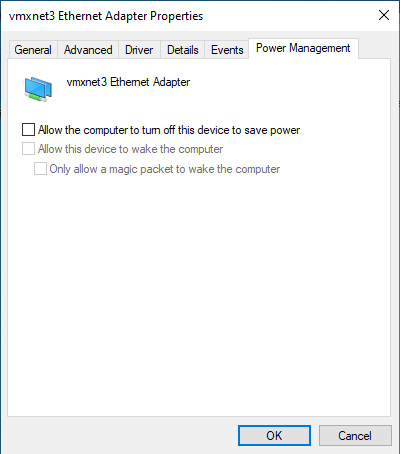
Once the VM build is complete, make sure Power Management is disabled for the NIC, as shown in Figure 3.
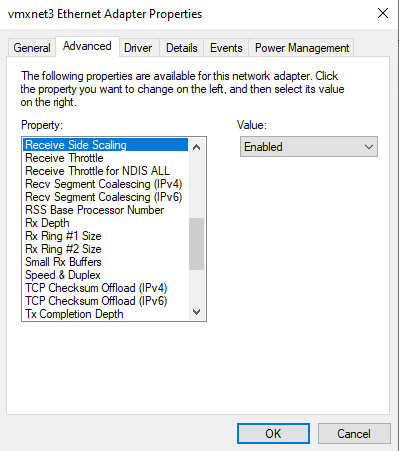
Make sure Receive Side Scaling is Enabled, as shown in Figure 4.
Give the computer a name, join the AD domain, and restart the VM.
Copy the Horizon Agent installer to the VM.
Virtual Windows 10 Agent Install
Right-click the Agent installer and select Run as administrator, as shown in Figure 5.

If UAC is enabled, click Yes.
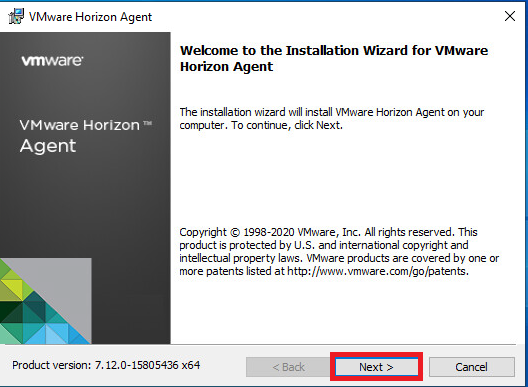
Click Next, as shown in Figure 6.
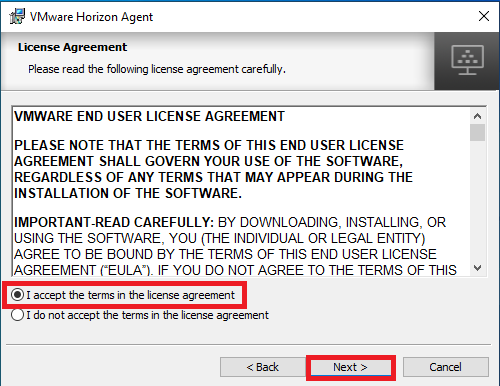
Select I accept the terms in the license agreement and click Next, as shown in Figure 7.
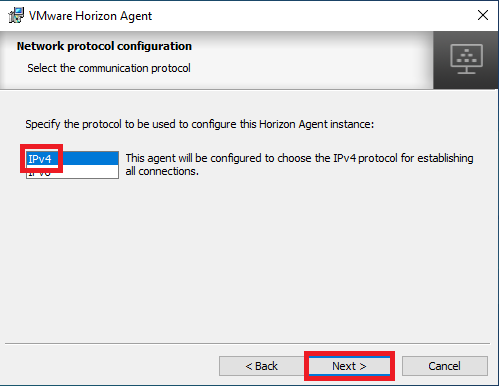
Select IPv4 and click Next, as shown in Figure 8.
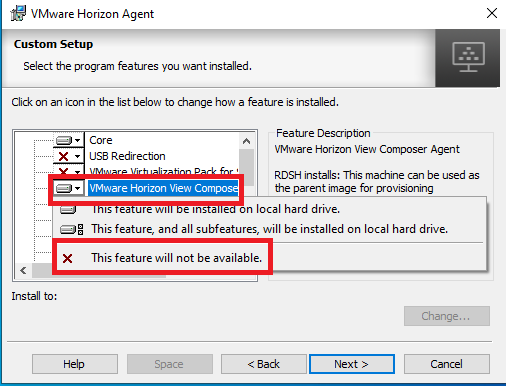
Click on VMware View Composer, select This feature will not be available, as shown in Figure 9.
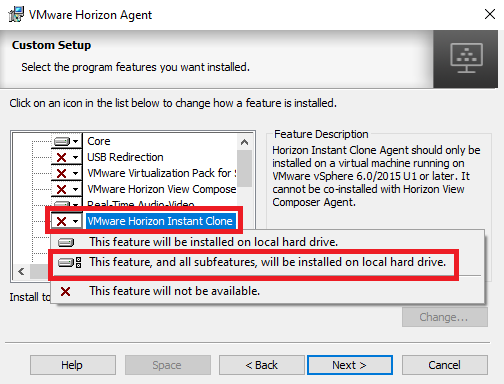
Click on VMware Horizon Instant Clone and select This feature, and all subfeatures, will be installed on local hard drive, as shown in Figure 10.
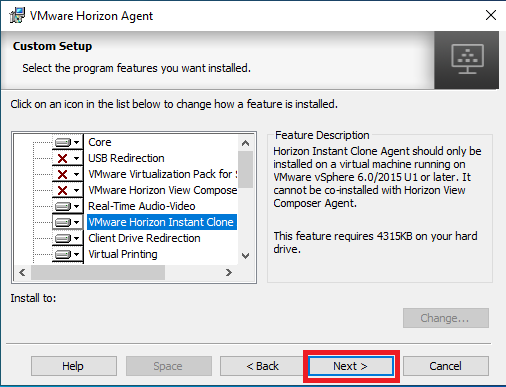
Click Next, as shown in Figure 11.
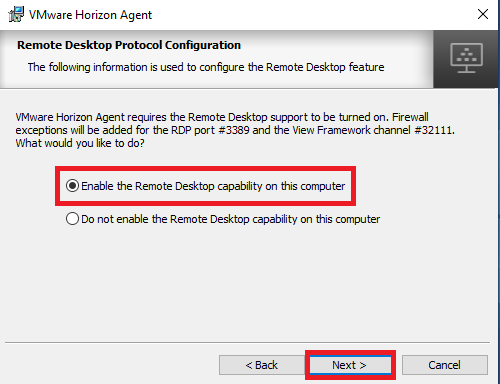
For this lab, select Enable the Remote Desktop capability on this computer and click Next, as shown in Figure 12.
The VMware documentation states that if you do not enable the Remote Desktop capability, you must enable it manually later. VMware doesn’t state WHY you must enable it or what happens if you don’t and then build a desktop pool with Remote Desktop still disabled. Since, at least for me, this master image was built with Windows 10 Enterprise, the Blast Extreme protocol should be used for everything, not the Remote Desktop Protocol (RDP). But I have no clue. If I MUST enable Remote Desktop capability, which I assume enables RDP, why does VMware show a way to Prevent Access to Horizon 7 Desktops Through RDP?
After this series is complete, I will test what happens with the Remote Desktop capability not enabled, build a desktop pool, and attempt to access the desktop and applications.
UPDATE 15-Jun-2020: In my testing, RDP does not appear to be required for anything I tested: Agent install, printing, USB Redirection, or Single Sign-On. In my case, and done throughout this lab, everything uses the VMware Blast protocol. In the link above to Prevent Access to Horizon 7 Desktops Through RDP, VMware states:
Remote Desktop Services must be started on the virtual machine that you use to create pools and on the virtual machines that are deployed in the pools. Remote Desktop Services are required for Horizon Agent installation, SSO, and other Horizon session-management operations.
This is no longer true IF you use what I use in this lab: Windows 10 Enterprise and VMware Blast. If you are using other protocols or other versions of Microsoft Windows, your experience may be different. If you have issues, VMware Support may require that you enable Remote Desktop.
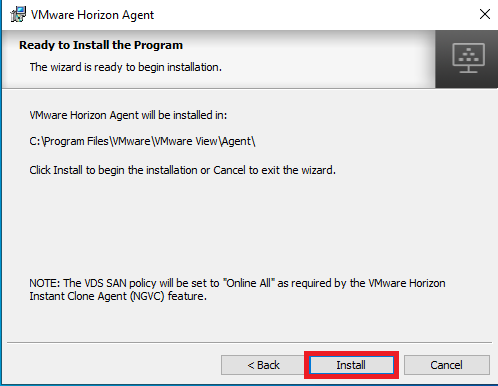
Click Install, as shown in Figure 13.
The Agent installs.
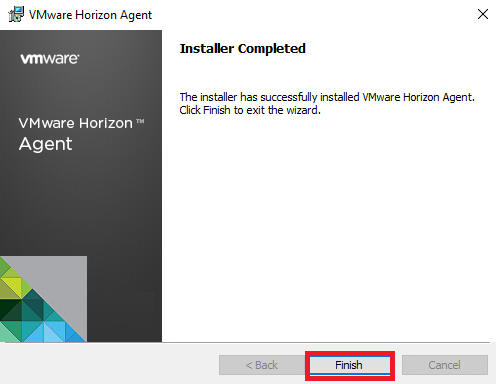
After the agent finishes installing, click Finish, as shown in Figure 14.
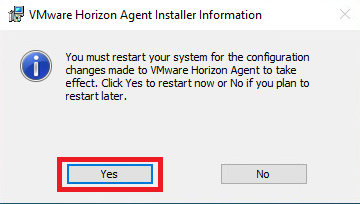
Click Yes to restart the Windows 10 VM, as shown in Figure 15.
After the VM restarts, verify the CD/DVD drive 1 is set to Client Device, as shown in Figure 16.

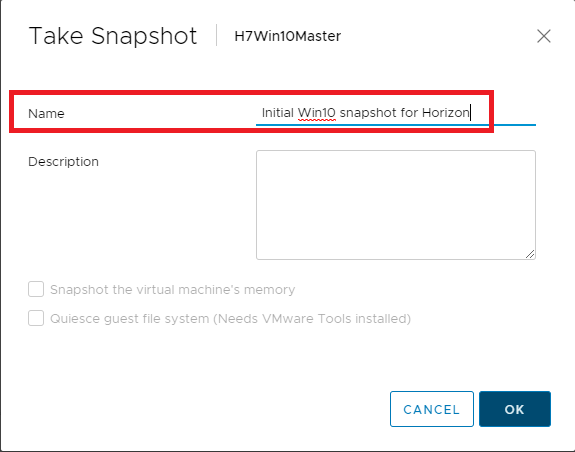
Shut down the VM and take a snapshot, as shown in Figure 17. Make sure to give the snapshot a useful Name.
Up next: the Server 2019 master image.