[Updated 4-Sep-2021]
There are several steps needed to have a completely installed and configured Horizon Connection Server. In this article, the following steps are completed:
- SQL preparation
- vCenter setup
- SSL Certificate
- Install Connection Server
- Connection Server configuration
- Fix SQL table missing index
- Install ControlUp Agent
- Configure the ControlUp and Horizon integration
Updated 18-Jun-2020
SQL Preparation
We need a Microsoft SQL database for the Connection Server’s events database. The SQL Server must use SQL Server and Windows Authentication mode.
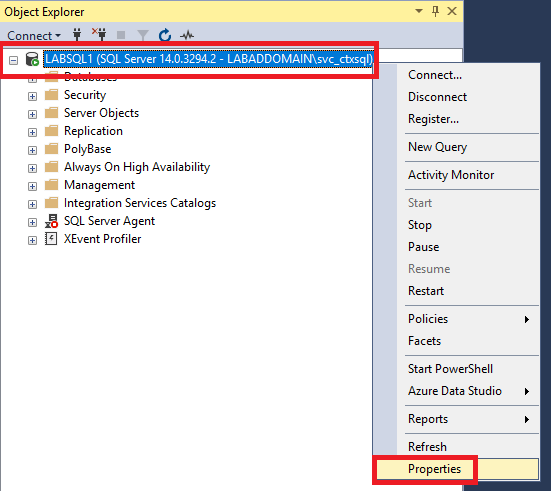
In the SQL Server Management Studio, right-click the SQL Server and click Properties, as shown in Figure 1.
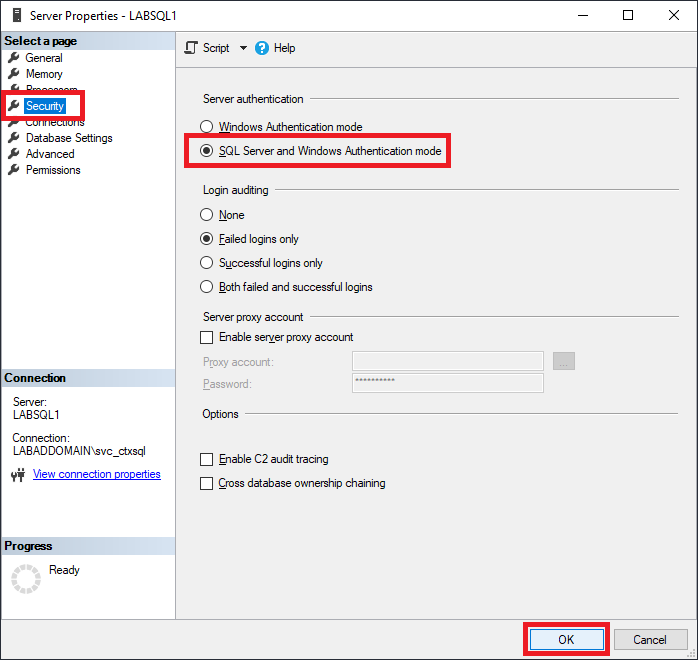
Click Security, select SQL Server and Windows Authentication mode, and click OK, as shown in Figure 2.
Note: You mustn’t skip this step. Assuming the SQL Server uses SQL Server authentication costs you a lot of troubleshooting time later (not that I know anything about that).
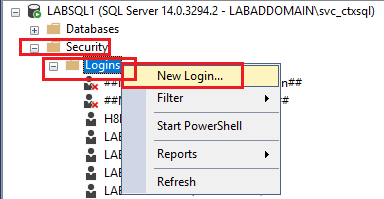
Still in the SQL Server Management Studio, expand Security, expand and right-click Logins, click New Login…, as shown in Figure 3.
As shown in Figure 4, enter a Login name, select SQL Server authentication, enter and confirm a Password, deselect Enforce password history, and click OK.
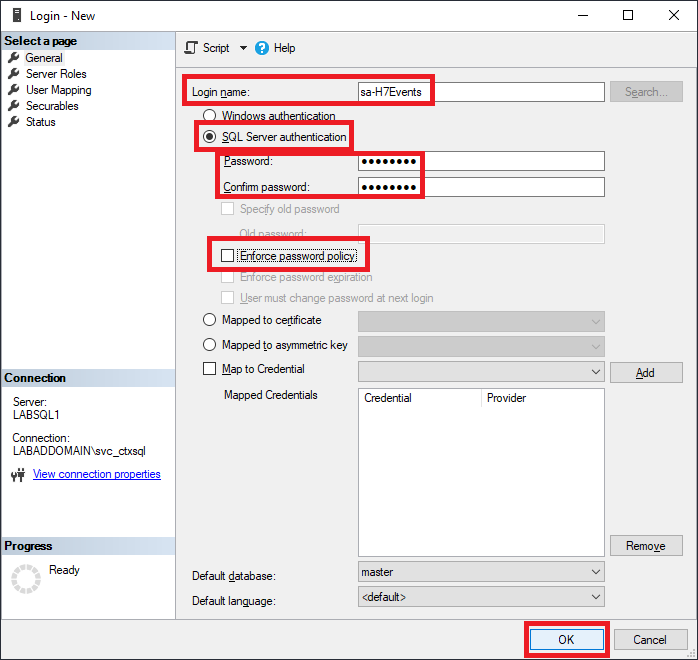
Note 1: Even if the SQL Server uses only Windows Authentication, you can still create a SQL Server authentication account and assign it as a database owner. Please verify that SQL Server authentication is enabled.
Note 2: Why must the account use SQL Server authentication? This old VMware KB article, KB 1029537 (article no longer exists), suggests because VMware based the connection string on old Oracle (Sun) Java Database Connectivity (JDBC). Modern JDBC does support Windows authentication, but I assume VMware doesn’t want to invest the time and money to update their code and go through all the testing and QA time.
Note 3: Why deselect Enforce password policy? The previously mentioned VMware KB article says to, and every how-to article I found on the internet says to. But why? Because if the password changes, you could have issues connecting to the database. But is that an issue with this specific user account? Not really. I show and explain later in this chapter why it isn’t an issue. Thanks to Stephen J. in the vExperts Slack EUC channel for the explanation.
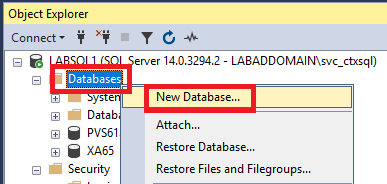
Still in the SQL Server Management Studio, expand and right-click Databases, and click New Database…, as shown in Figure 5.
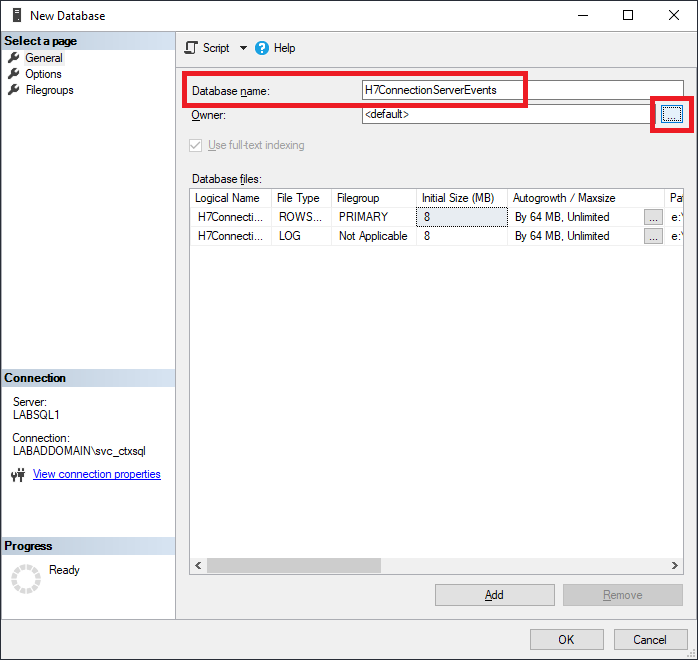
Enter a Database name and click the browse button to the far right of Owner, as shown in Figure 6.
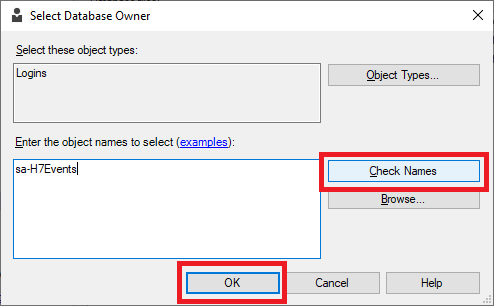
Enter the SQL account name, click Check Names and click OK, as shown in Figure 7.
In the left frame, click Options, change the Recovery model to Simple, and click OK, as shown in Figure 8.
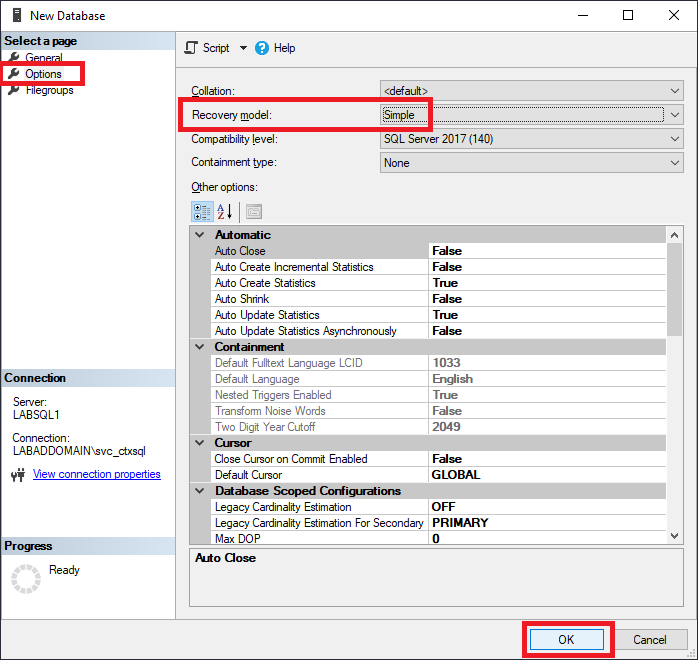
Leave the SQL Server Management Studio open. It is needed later to add a missing index to the database just created. We can’t add the index until the Connection Server connects to the database.
vCenter Setup
In vCenter, create two VM and Template Folders. Figure 9 shows the two folders in my vCenter.
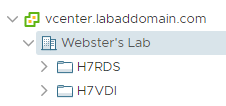
These folders are used to place the VMs created by the Connection Server for the RDS and VDI desktop pools.
Connection Server
Update 18-Jun-2020: Don’t suffer as I did. Don’t use the default IE11 browser. Install a modern browser like Chrome or the new Microsoft Edge. The Connection Server console is many, many times more responsive on a modern browser than on IE11. I wish I had done that at the beginning of this series.
The domain’s Root and Intermediate certificates and a personal certificate automatically install on the Connection Server with a Group Policy.
Start -> Run -> MMC -> Add/Remove Snap-in… -> Certificates -> Add -> Computer account -> Local computer -> Finish -> OK
Expand Certificates -> Trusted Root Certification Authorities -> Certificates. Figure 10 shows the domain’s Root certificates.

Collapse Trusted Root Certification Authorities.
Expand Intermediate Certification Authorities -> Certificates. Figure 11 shows the domain’s Intermediate certificates.

Collapse Intermediate Certification Authorities.
Expand Certificates -> Personal -> Certificates
Figure 12 shows the Connection Server’s SSL certificate installed as part of the auto-enrollment policy.

Double-click the Connection Server’s SSL certificate.
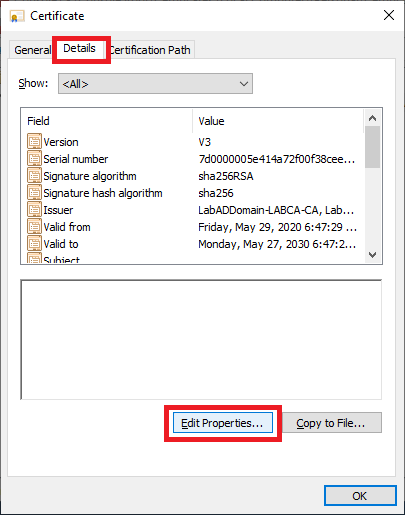
On the Details tab, click Edit Properties…, as shown in Figure 13.
Type in vdm (all lower case) for the Friendly name, as shown in Figure 14, and click OK twice.
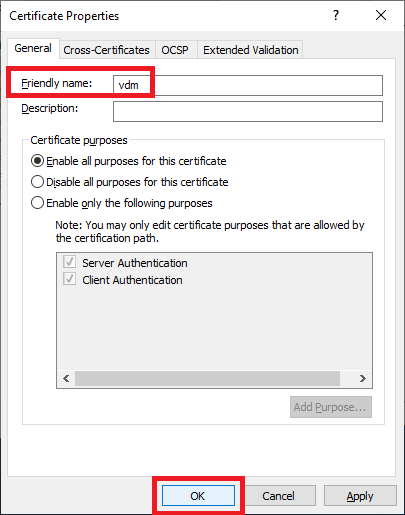
This step prevents the Connect Server installation from creating a self-signed certificate with “vdm” for the friendly name.
If the self-signed certificate is created, you have to remove the “vdm” friendly name from it, give it to the CA-signed certificate, restart the Connection Server service, and relaunch the Horizon Management Console.
Figure 15 shows the Friendly Name vdm.

Exit and save the mmc console. The console is needed after the Connection Server installation finishes.
Copy the Connection Server install file to the Connection Server.
Right-click the Connection Server install file and select Run as administrator.

If UAC is enabled, click Yes.
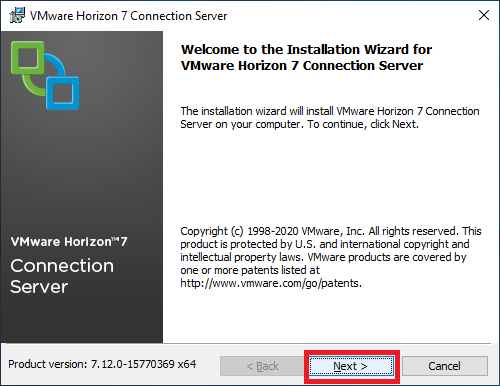
Click Next, as shown in Figure 17.
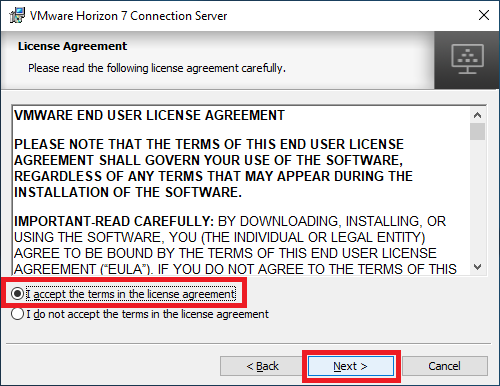
Select I accept the terms in the license agreement and click Next, as shown in Figure 18.
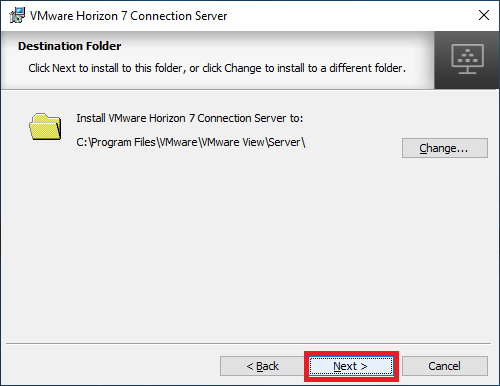
Click Next, as shown in Figure 19.
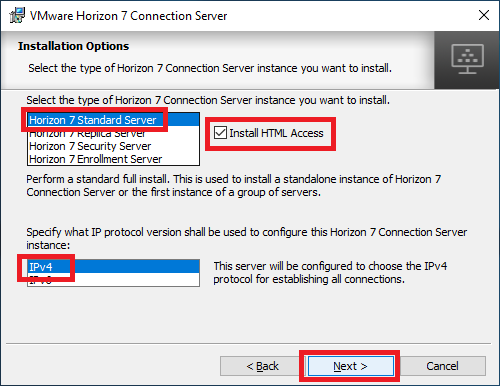
Keep the three default selections and click Next, as shown in Figure 20.
Enter the required information and click Next, as shown in Figure 21.
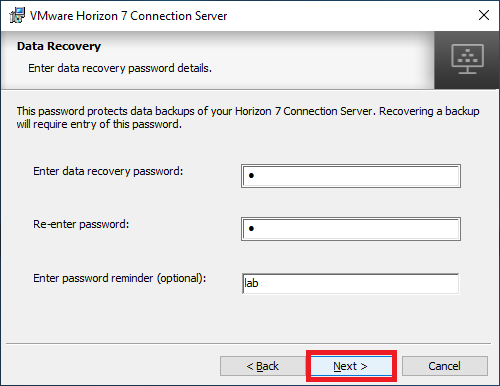
The Horizon database is an LDAP database. When you back up the Connection Server, the Horizon LDAP configuration exports as encrypted LDIF data. To restore the encrypted backup, you must provide the data recovery password.
The password must contain between 1 and 128 characters.
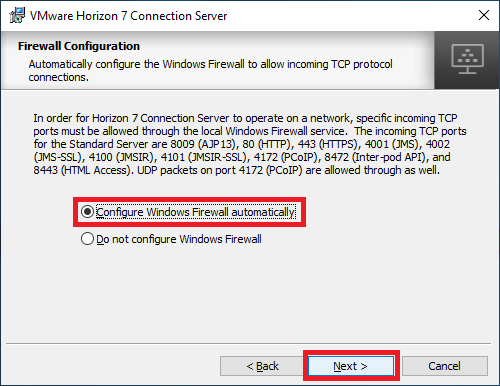
Select a Windows Firewall option and click Next, as shown in Figure 22.
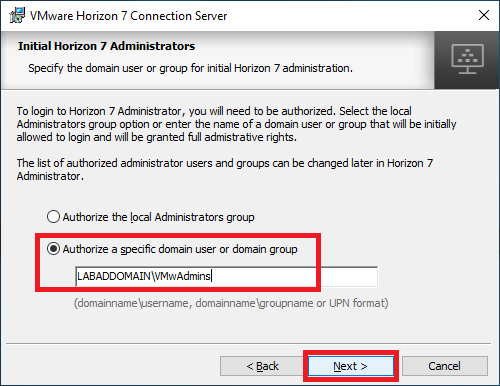
Select or enter the initial administrator(s) for Horizon 7 and click Next, as shown in Figure 23.
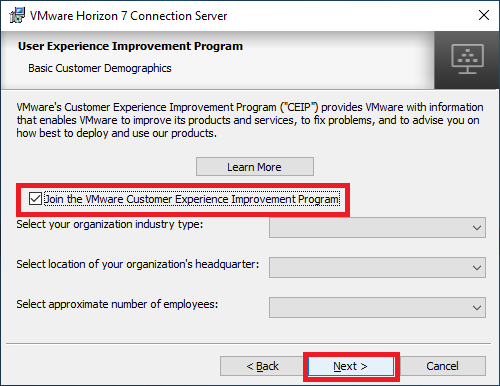
Select whether to Join the VMware Customer Experience Improvement Program and click Next, as shown in Figure 24.
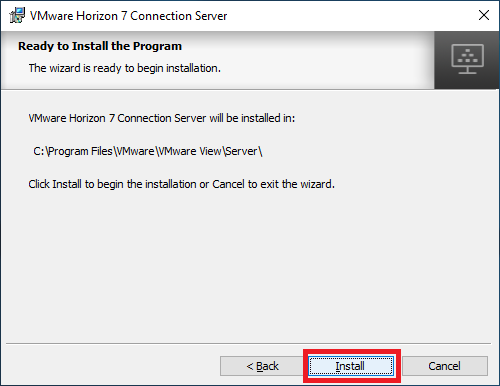
Click Install, as shown in Figure 25.
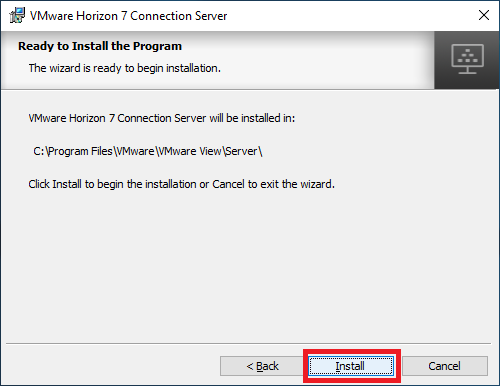
The installation of the Connection Several takes several minutes.
Deselect Show the documentation and click Finish, as shown in Figure 26.
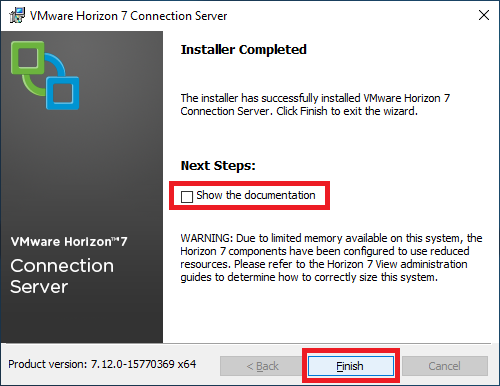
Let’s look at the SSL certificates created by the installation.
Open the MMC console with the Certificates snap-in saved earlier.
Expand Certificates -> Personal -> Certificates. Figure 27 shows there are now five SSL certificates.

There would have been six certificates if we had not changed the Friendly Name of the domain’s server certificate. If we use the self-signed certificate, any HTTPS connection made to the Connection Server would be untrusted.
If you are using IGEL, leave the MMC console open. Otherwise, exit the MMC console.
Connection Server Configuration
There is a Horizon 7 Administrator Console icon on the desktop, as shown in Figure 28.

Because the icon is using “localhost” and not the FQDN of the server, you will get an invalid SSL certificate error, as shown in Figure 29.
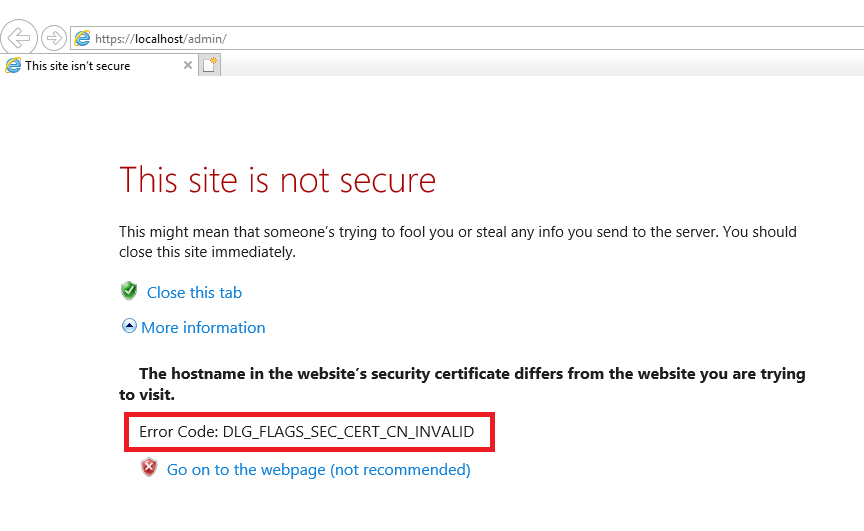
I prefer to browse the FQDN of the server. For example, https://ConnectionServer.domain.com/admin/. For me, that is https://h7connection.labaddomain.com/admin/, as shown in Figure 30.

Under Horizon Console (HTML5), click Always use this option and click the Launch button, as shown in Figure 31.
Note: The Flex console is deprecated, so don’t use it.
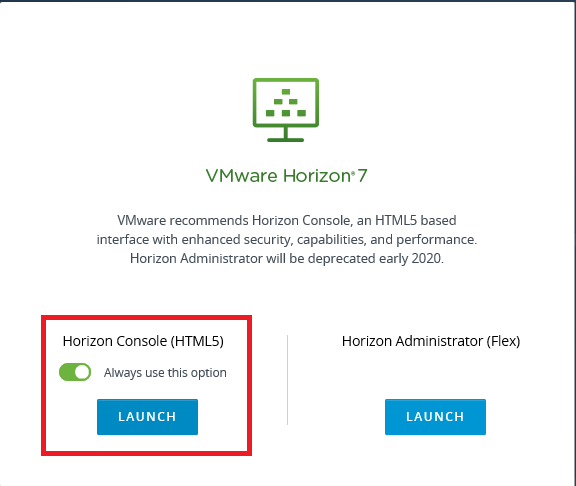
I increased the size of the browser so I can see more.
Enter the initial Horizon 7 Administrator account configured during the installation and click Sign in, as shown in Figure 32.
If you have multiple domains or trusts in place, select the correct domain from the dropdown list.
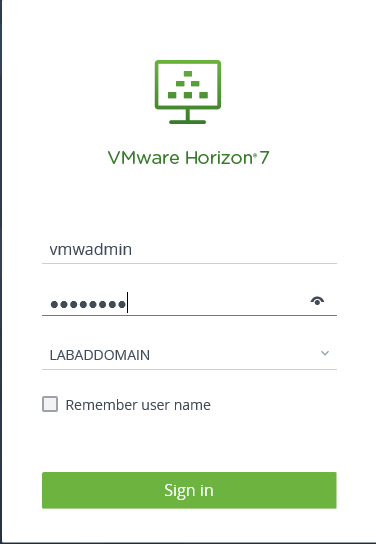
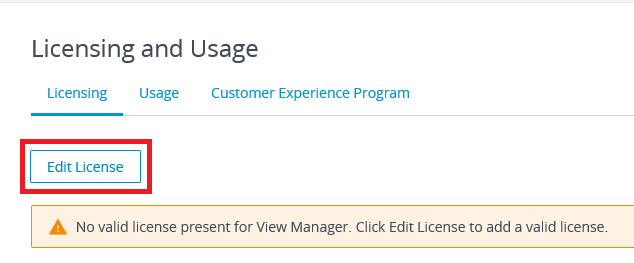
Click Edit License, as shown in Figure 33.
Enter or Copy & Paste the Horizon 7 License Serial Number and click OK, as shown in Figures 34 and 35.


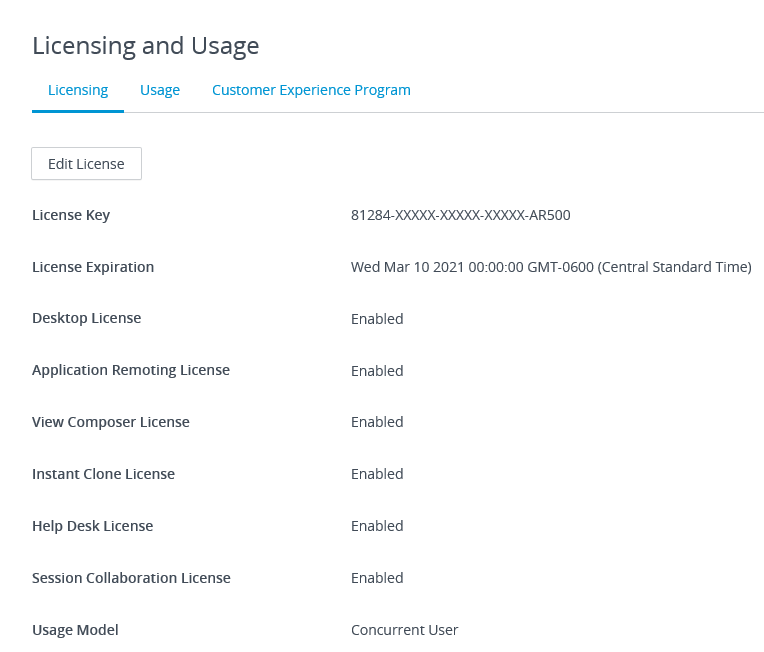
Horizon 7.12 is licensed, as shown in Figure 36.
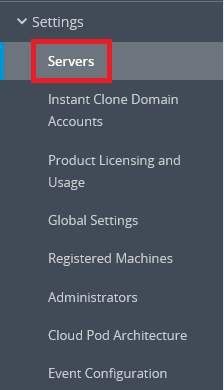
In the left frame, under Settings, click Servers, as shown in Figure 37.
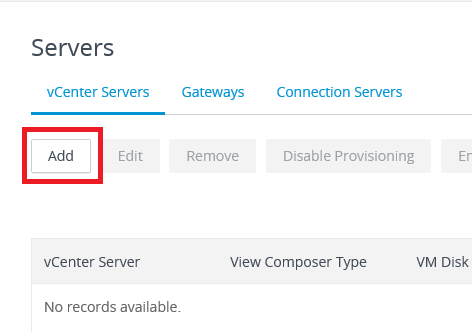
Under vCenter Servers, click the Add button, as shown in Figure 38.
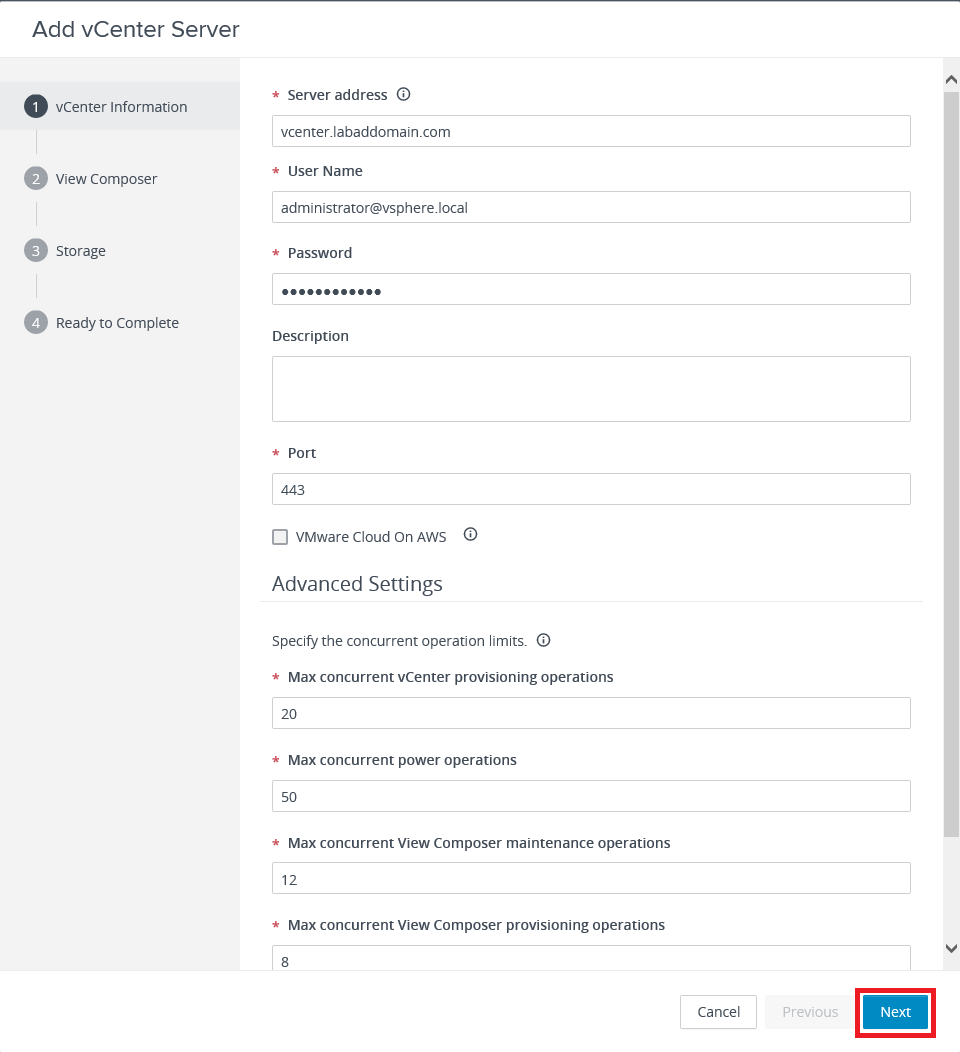
Enter the required information and click Next, as shown in Figure 39.
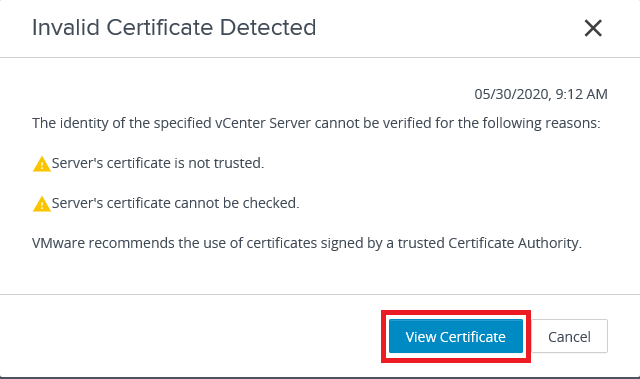
My vCenter uses the default self-signed certificate. Click View Certificate, as shown in Figure 40.
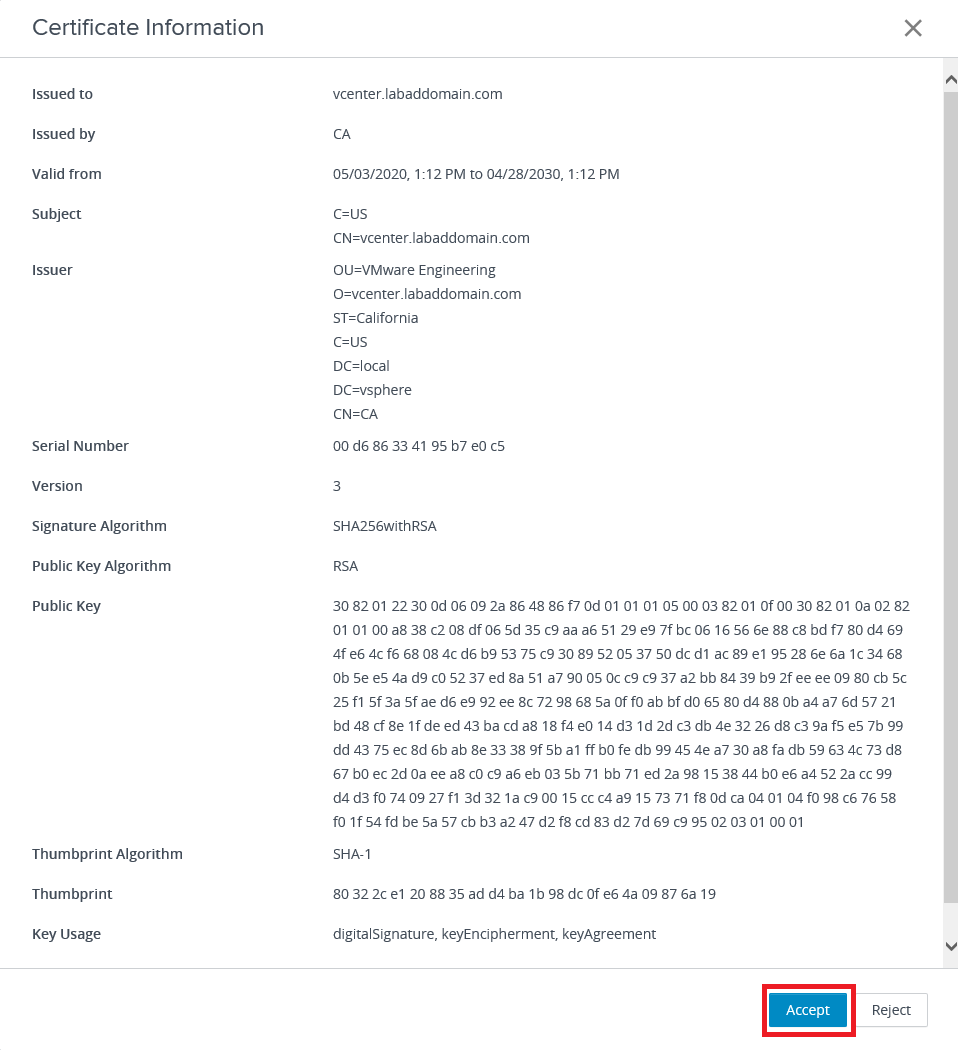
Click Accept, as shown in Figure 41.
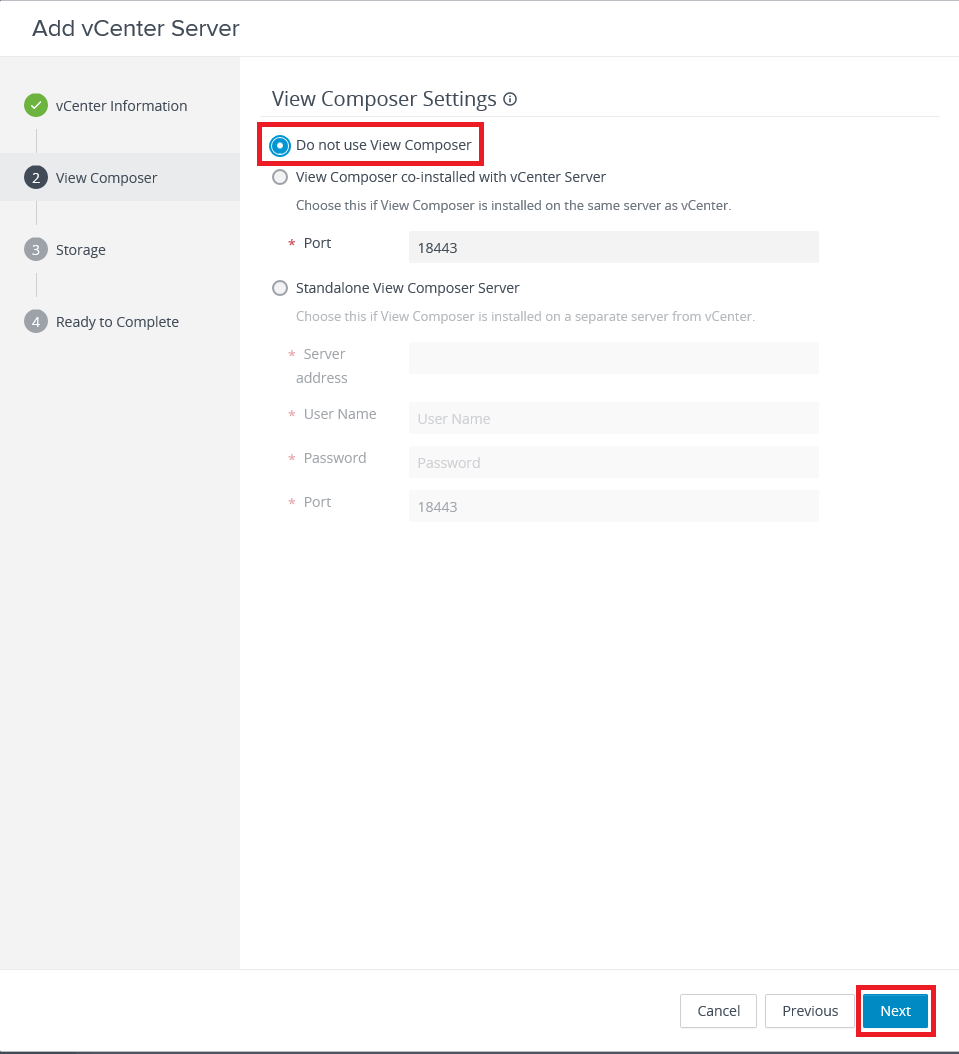
We only use Instant Clones for this lab, not Linked Clones, so make sure Do not use View Composer is selected and click Next, as shown in Figure 42.
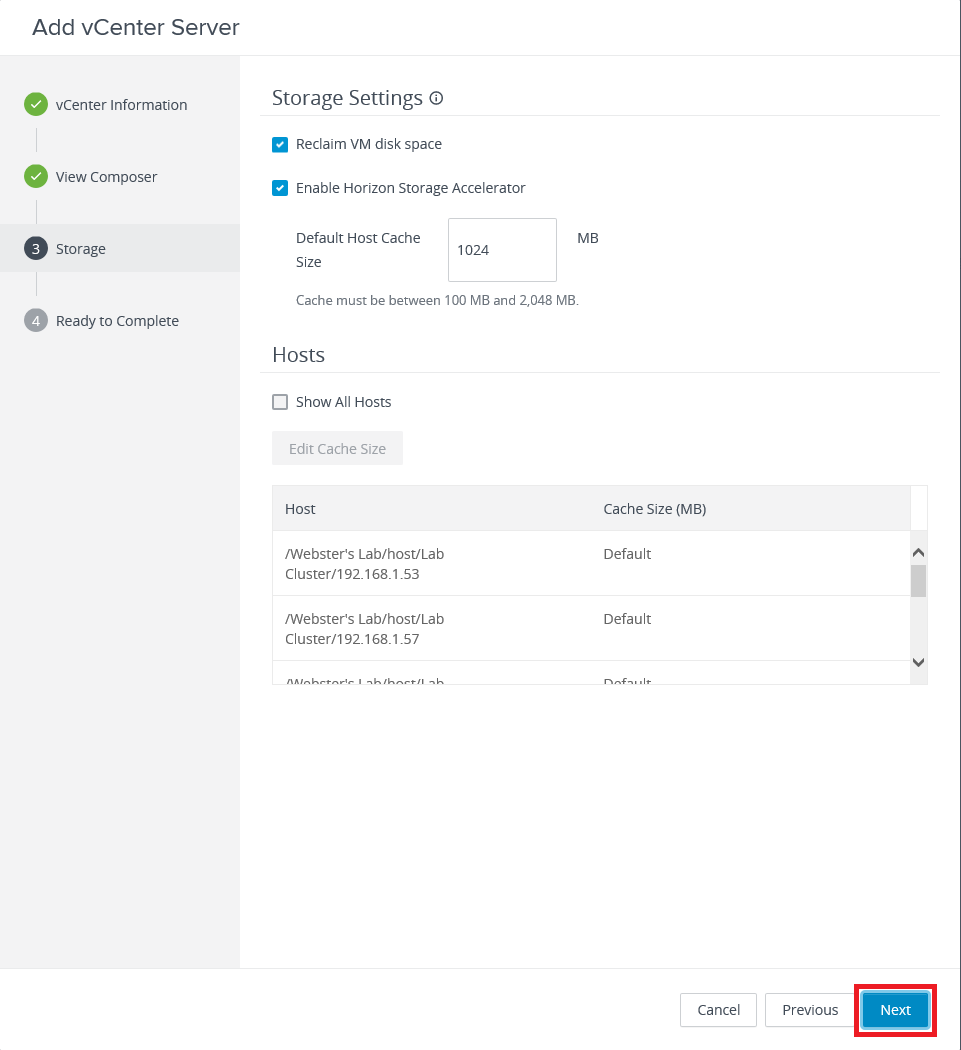
Accept the defaults and click Next, as shown in Figure 43.
Click Submit, as shown in Figure 44.
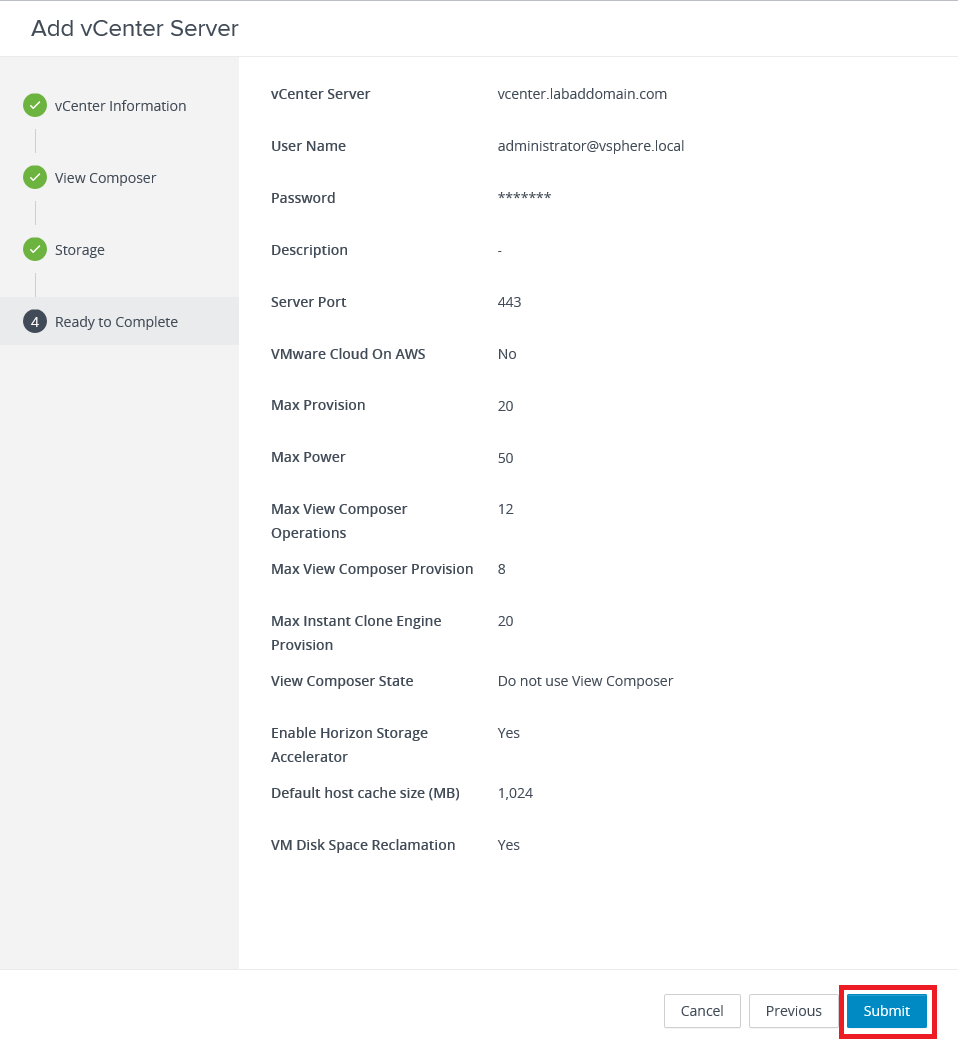
Figure 45 shows the vCenter server is added.

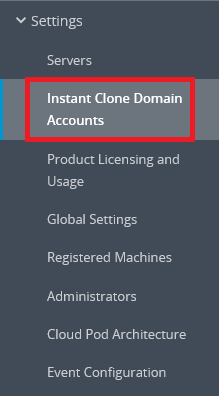
Under Settings, click Instant Clone Domain Accounts in the left frame, as shown in Figure 46.
Click Add, as shown in Figure 47.
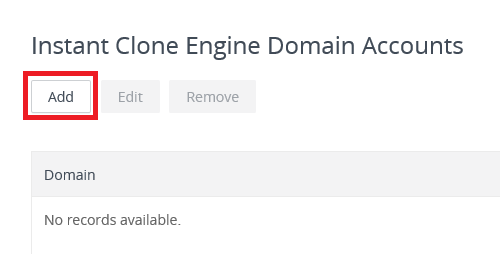
Add an admin account from the domain and click OK, as shown in Figure 48.
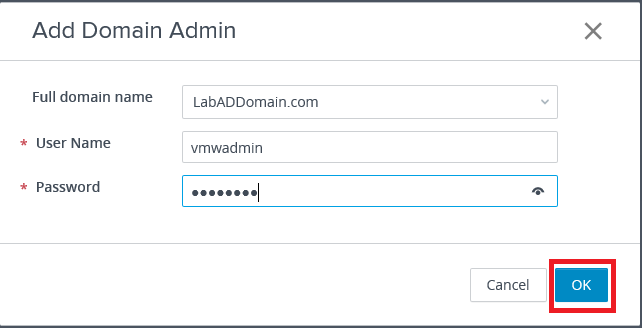
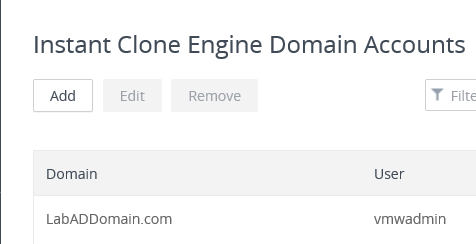
Figure 49 shows the account is added.
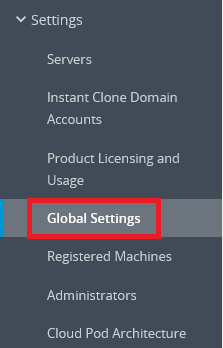
In the left frame, under Settings, click Global Settings, as shown in Figure 50.
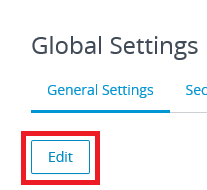
Under Global Settings, General Settings, click Edit, as shown in Figure 51.
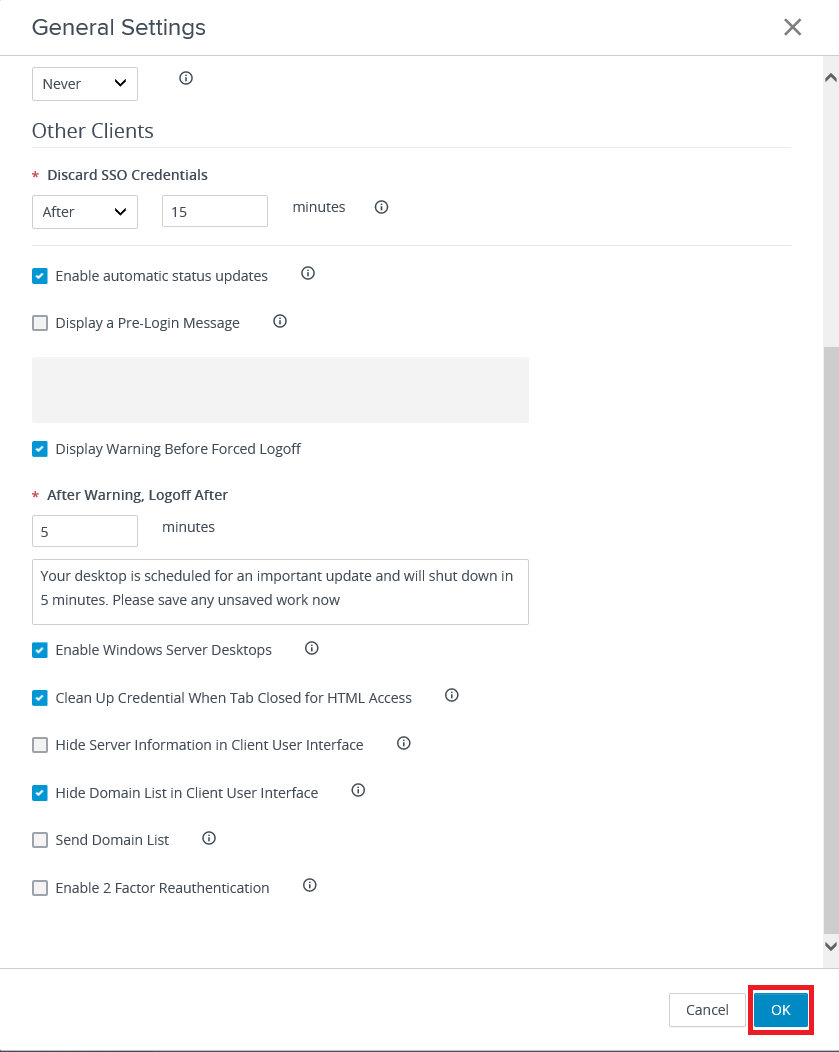
I changed the View Administrator Session Timeout to keep the console from timing out while taking screenshots. I also selected:
- Enable automatic status updates
- Enable Windows Server Desktops
- Clean Up Credential When Tab Closed for HTML Access
Make any changes needed and click OK, as shown in Figure 52.
If you change the View Administrator Session Timeout, you must exit the console and log back in for the change to take effect.
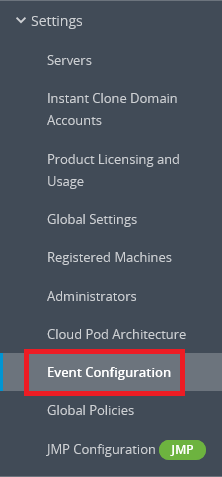
In the left frame, under Settings, click Event Configuration, as shown in Figure 53.
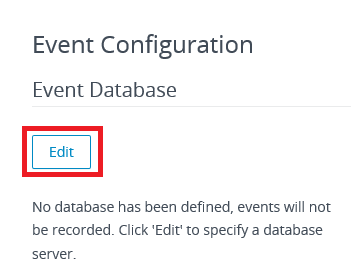
Click Edit, as shown in Figure 54.
Enter the SQL database and user account created earlier, and click OK, as shown in Figure 55.
Note: From back in Figure 4, if you did not deselect Enforce password policy and the password for the account changes, this is where the password is updated. So, it isn’t much effort to allow the account’s password to change and then update the Event database details for the Connection Server.
If you have multiple Connection Servers using the same SQL Server, enter a Table Prefix.
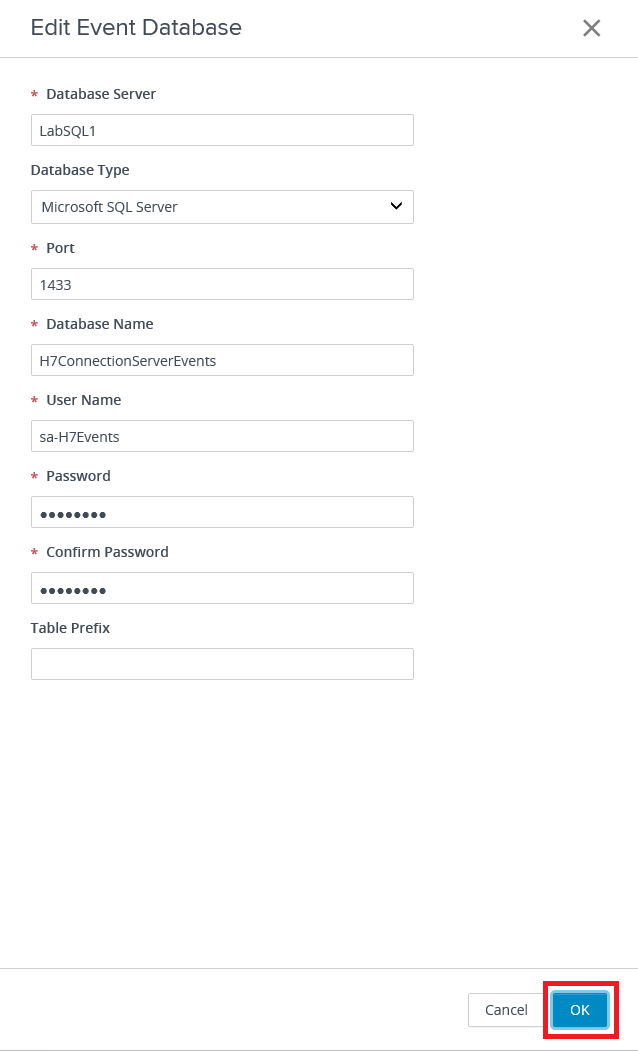
Figure 56 shows the database connection is made.
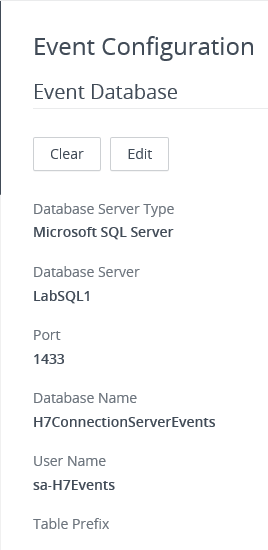
If the database user’s password changes, click Edit to update the password.
Now that we established the database connection, the database’s schema was updated, and there is a missing index in one of the tables. VMware covers the missing index in https://kb.vmware.com/s/article/2094580.
Now, go back to the SQL Server and its Management Studio.
Click the SQL Server and click the refresh button, as shown in Figure 57.

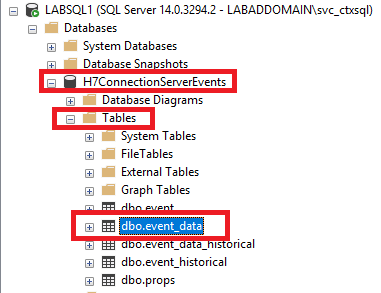
Expand the database created for the Connection Server’s events, expand Tables, and click on dbo.event_data, as shown in Figure 58.
Click New Query, as shown in Figure 59.

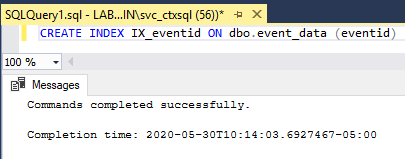
As shown in Figure 60, enter the following text in the query window.
CREATE INDEX IX_eventid ON dbo.event_data (eventid)

Click Execute, as shown in Figure 61.

Figure 62 shows the SQL Query creates the new Index.
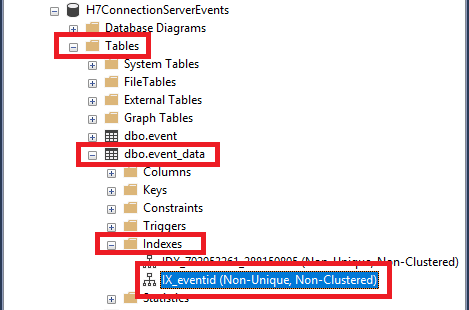
As shown in Figure 63, expand the dbo.event_data Table, expand Indexes, and the new IX_eventid Index shows.
Exit the SQL Server Management Studio. You do not have to save the query to create the index.
Back to the Connection Server.
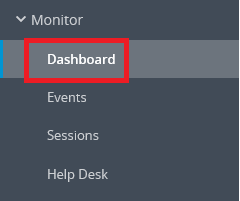
In the left frame, under Monitor, click Dashboard, as shown in Figure 64.
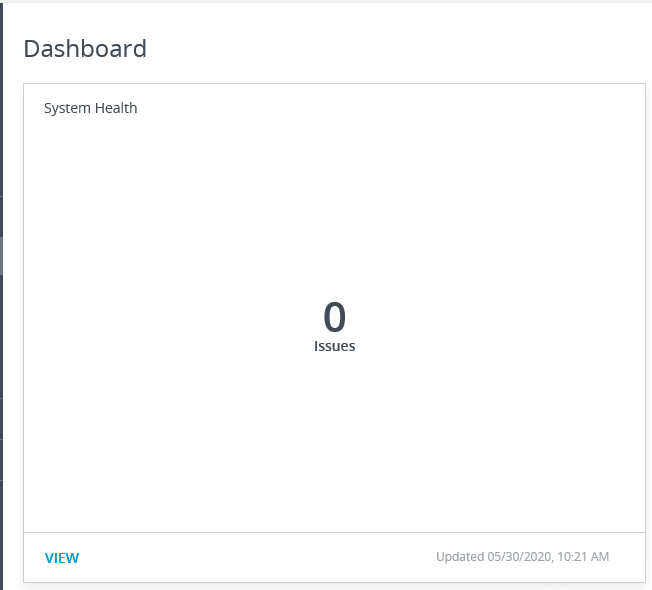
As seen in Figure 65, System Health should show 0 issues.
Upload SSL Certificate to IGEL UMS
If you use IGEL, import the Connection Server’s SSL certificate into UMS.
If you closed the MMC console, open the MMC console with the Certificates snap-in saved earlier.
Expand Certificates -> Personal -> Certificates.
Right-click the server’s certificate issued by the domain’s CA, click All Tasks -> Export…, as shown in Figure 66.

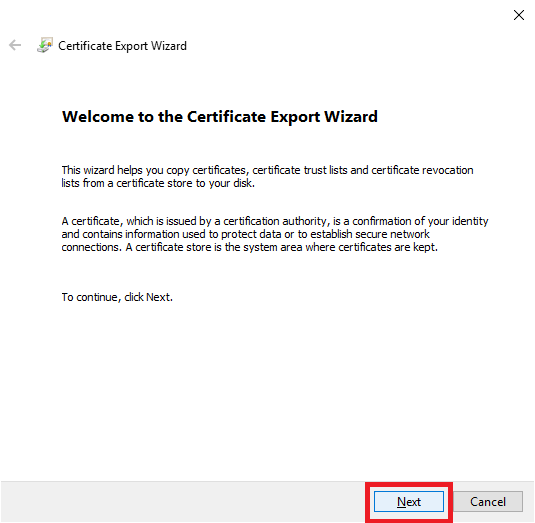
Click Next, as shown in Figure 67.
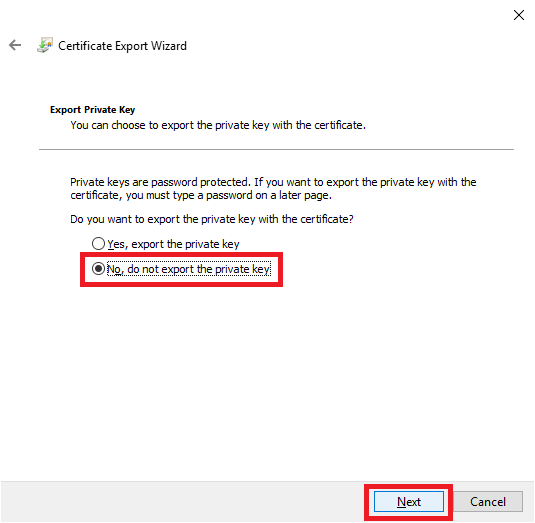
Select No, do not export the private key, and click Next, as shown in Figure 68.
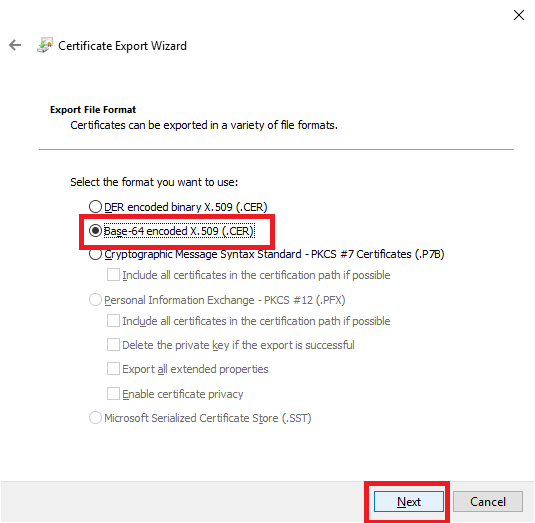
Select Base-64 encoded X.509 (.CER), and click Next, as shown in Figure 69.
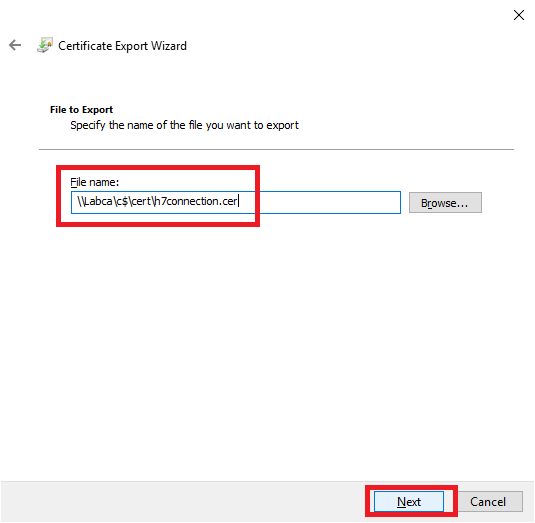
Save the .cer file to a location reachable by the IGEL UMS server, as shown in Figure 70.
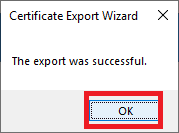
Click OK, as shown in Figure 71.
Go to the UMS server and open the UMS console.
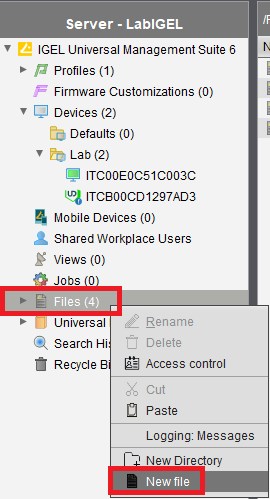
Right-click on Files and click New file, as shown in Figure 72.
Select Upload local file to UMS server. For Local file, enter the same information entered in Figure 70, under File target, change Classification to Common Certificate (all purpose), and click OK, as shown in Figure 73.
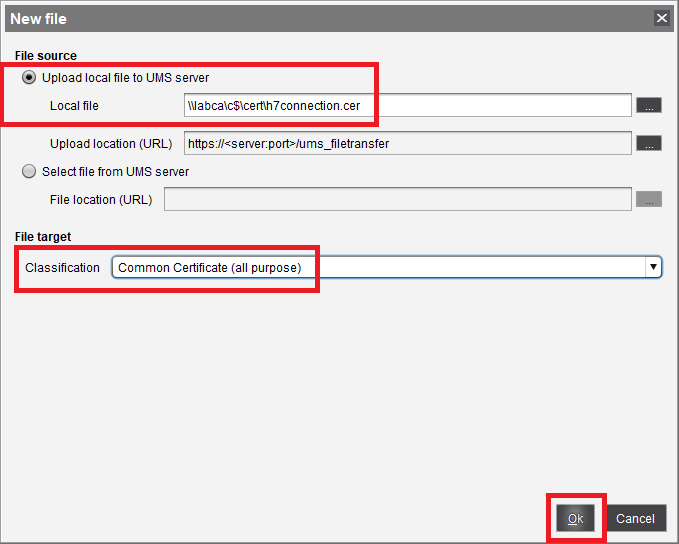
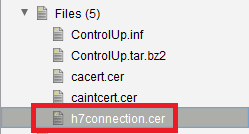
Figure 74 shows the added certificate file.
There are a few ways to add the new certificate file to the existing IGEL devices. I’ll use a way that is easy for me to show visually.
First, let’s see what objects are assigned to one of my IGEL devices.
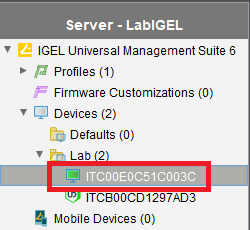
In the UMS console, click on an IGEL device (my lab’s UD7), shown in Figure 75.
In the right frame, look under Assigned objects, as shown in Figure 76.
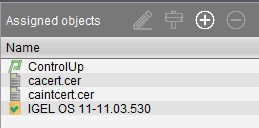
There are four files assigned to the UD7.
- The ControlUp custom partition file.
- The domain’s Root CA file.
- The domain’s Intermediate certificate file.
- The IGEL firmware file.
In the left frame, click on the Connection Server’s certificate file, and in the right frame, click the “+” by Assigned objects, as shown in Figure 77.

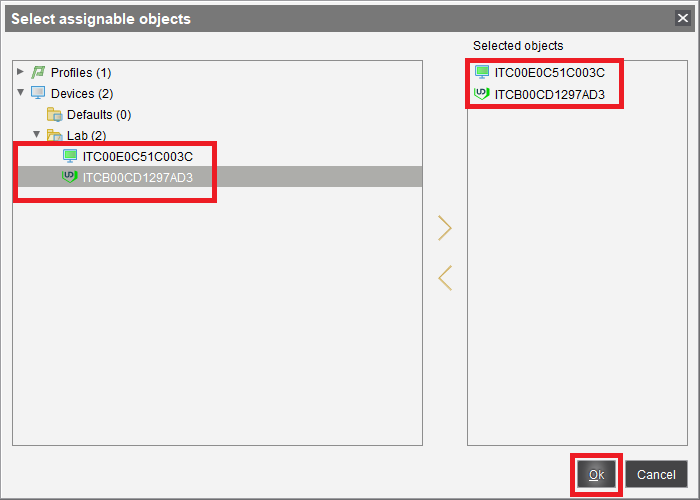
Select the IGEL devices to assign to the certificate file and click OK, as shown in Figure 78.
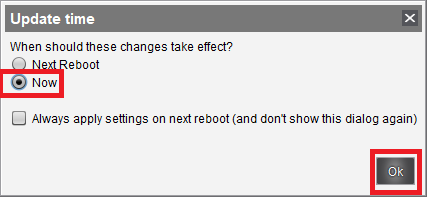
Select when the update should apply and click OK, as shown in Figure 79.
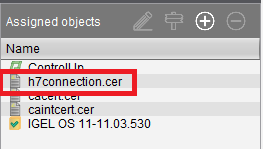
As shown in Figure 80, select an IGEL device to see the Connection Server’s certificate was assigned.
ControlUp and Horizon Integration
If you use ControlUp, log in to the ControlUp console.
From the Home tab, click Add EUC Environment, as shown in Figure 81.

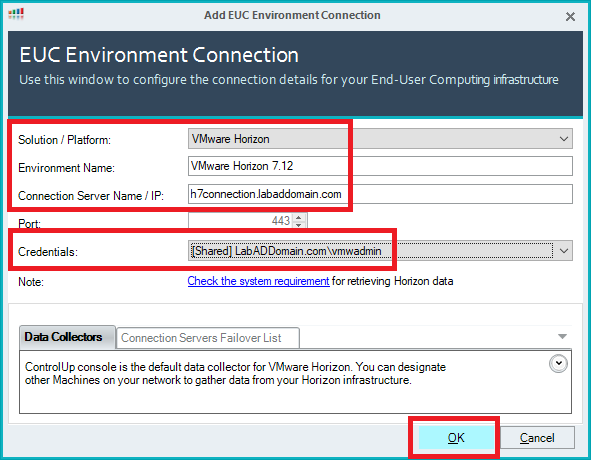
Select VMware Horizon for the Solution/Platform, enter an Environment Name, enter the Connection Server Name/IP, select the Credentials to authenticate to the Connection Server, and click OK, as shown in Figure 82.
If you need to create Credentials, follow these instructions for Local Credentials and these instructions for Shared Credentials (if you use the ControlUp Monitor).
Figure 83 shows the Horizon environment added to the ControlUp console.

After the master images are created and tested, we will add the ControlUp agent for detailed monitoring of the pooled desktops created.
Up next: Windows 10 master image creation and agent installation.
