[Updated 4-Sep-2021]
VMware Dynamic Environment Manager (DEM) is a multiple-purpose product. DEM can manage profiles and policies across virtual, physical, and cloud-based Windows desktops. DEM can also handle mappings such as drives, networks, and printers. DEM can also dynamically apply end-user policies and personalization based on a wide variety of conditions.
In this article and the two following articles, we only scratch the surface of the capabilities of DEM. We only look at saving application settings.
In this article, we do the environment preparation work for DEM. In the following two articles, we install DEM, configure the DEM Management console, configure the DEM Helpdesk Support Tool, and finally test everything with our users and the Instant Clone desktops and published applications.
Configuration Share
Create a file share for the DEM configuration share. I named mine DEMConfig.
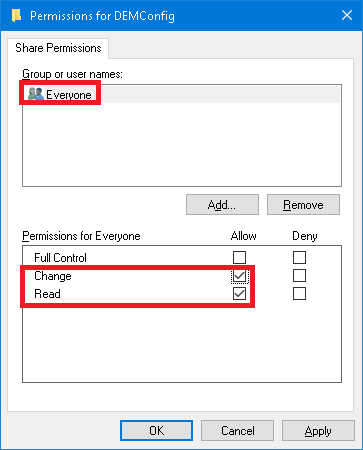
For the Share permissions, Everyone must have Change, as shown in Figure 1.
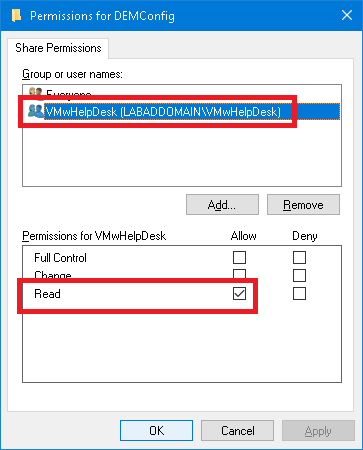
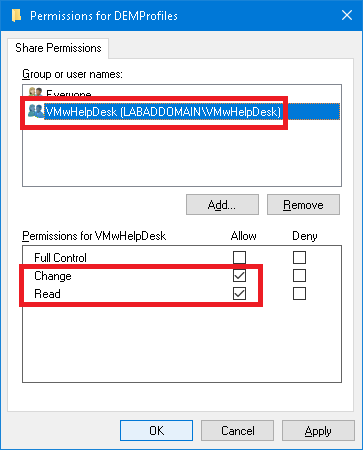
The VMwHelpDesk security group needs Read access on the Share, as shown in Figure 2. and NTFS permissions.
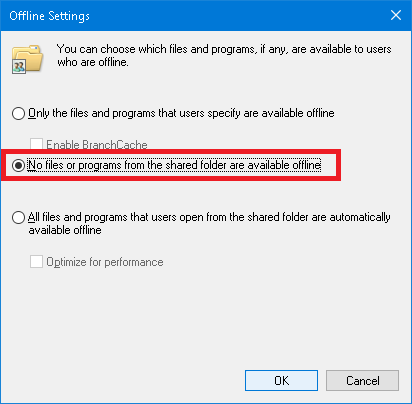
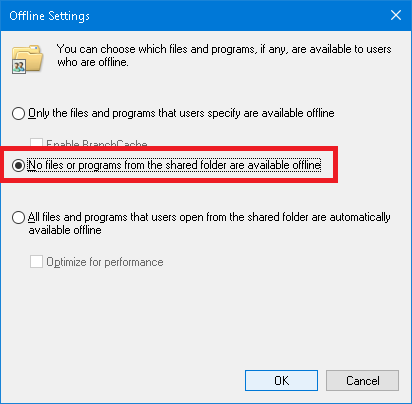
I also disable Caching, as shown in Figure 3.
Now on to NTFS Permissions.
As shown in Figure 4, the DEMAdmins security group must have Full Control permissions applied to This folder, subfolders, and files.
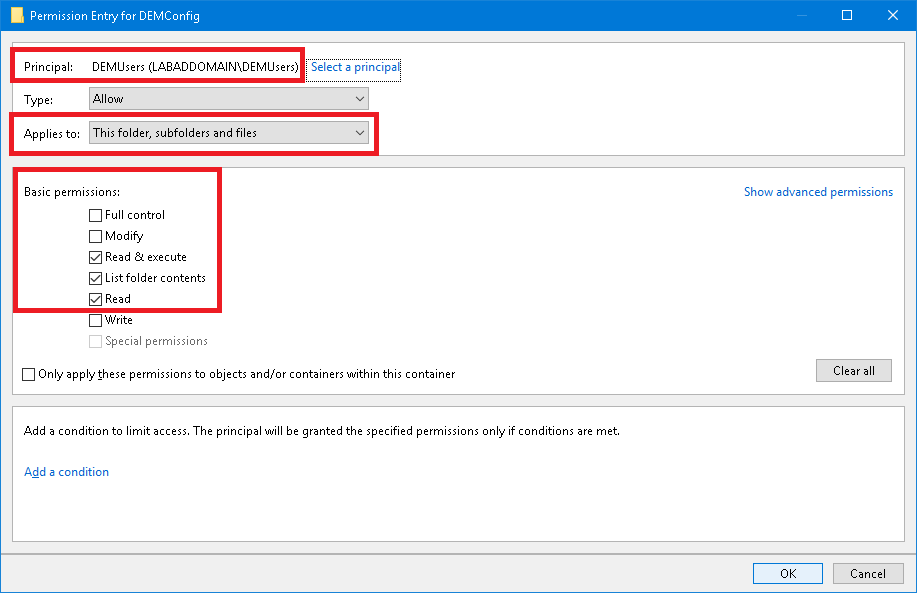
As shown in Figure 5, the DEMUsers security group must have Read & execute permissions applied to This folder, subfolders, and files.
As shown in Figure 6, the Domain Computers security group must also have Read & execute permissions applied to This folder, subfolders, and files.
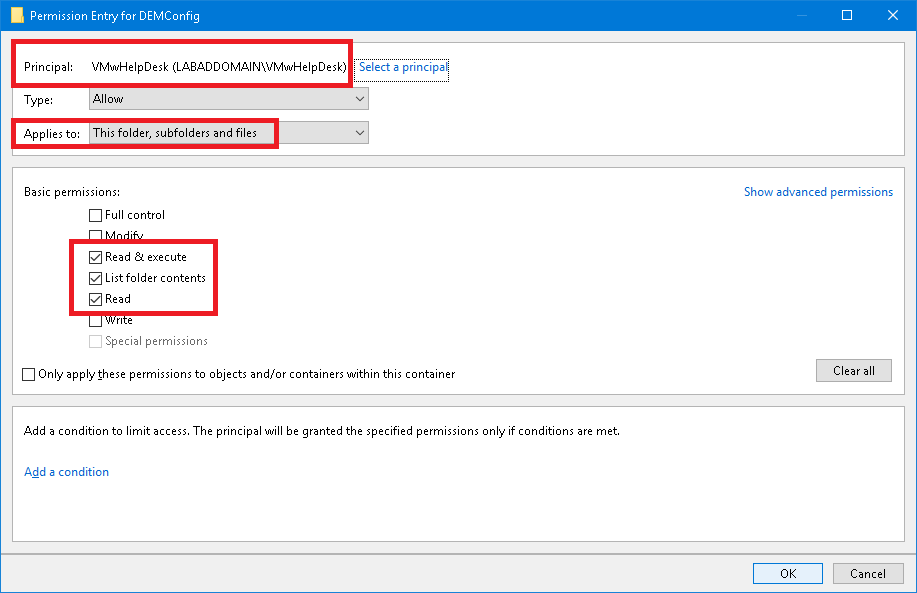
As shown in Figure 7, the VMwHelpDesk security group needs Read & execute permissions applied to This folder, subfolders, and files.


Profile Share
Create a file share for DEM profiles share. I named mine DEMProfiles.
For the Share permissions, Everyone must have Change, as shown in Figure 8.

VMwHelpDesk needs Change permissions, as shown in Figure 9.
I also disable Caching, as shown in Figure 10.
Now on to NTFS Permissions.
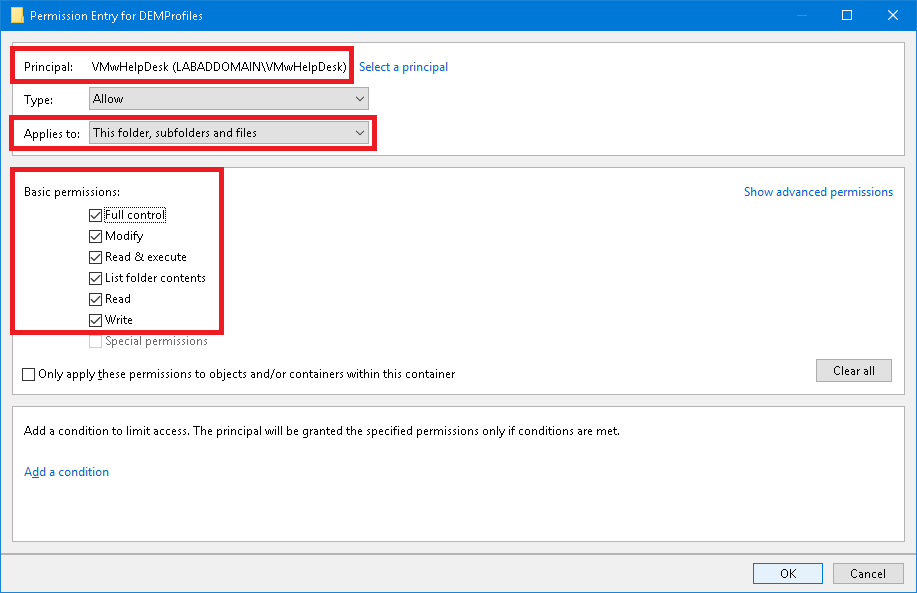
As shown in Figures 11 and 12, DEMAdmins and VMwHelpDesk must have Full Control permissions applied to This folder, subfolders, and files.
As shown in Figure 13, DEMUsers must have Create folders / append data applied to This folder only.
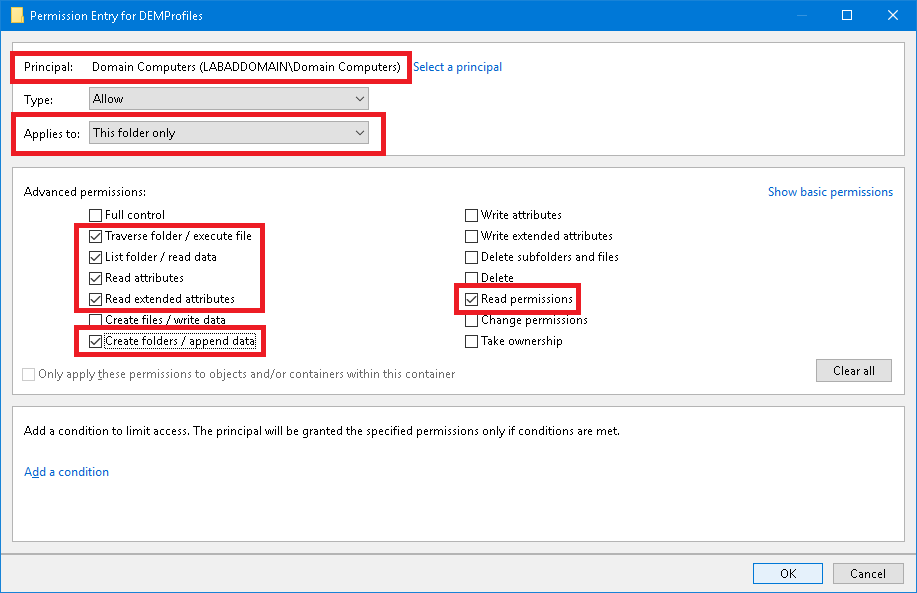
As shown in Figure 14, Domain Computers must have Create folders / append data applied to This folder only.
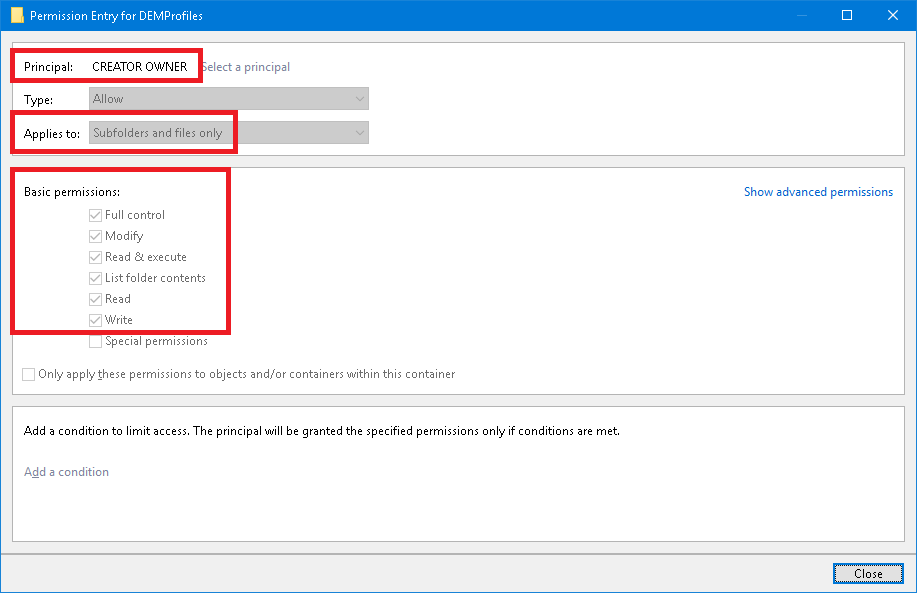
As shown in Figure 15, Creator Owner must have Full Control applied to Subfolders and files only.


Access to Regedit.exe or Reg.exe must not be disabled through Group Policy.
Ensure User Configuration/Policies/Administrative Templates/System/Prevent access to registry editing tools is either Not Configured or Disabled, as shown in Figure 16.
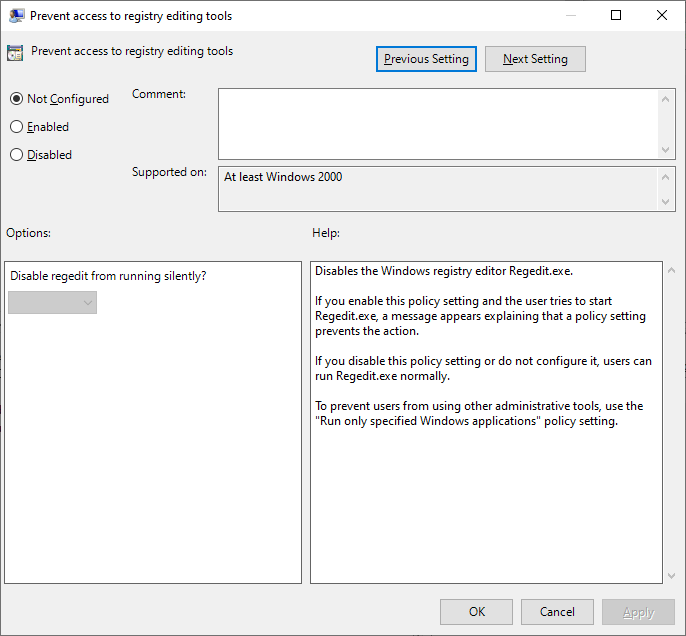
The FlexEngine uses Regedit.exe to add user-specific settings to the registry. Depending on the User Account Control (UAC) settings on Windows 7 or later, FlexEngine might use Reg.exe.
Note: What is FlexEngine? It is an Agent component installed on the virtual or physical machines you want to manage.
Group Policy Setup
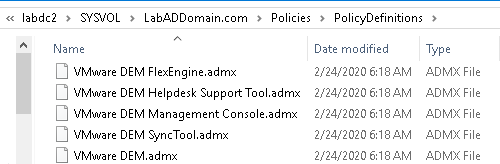
In the extracted file for DEM is folder Administrative Templates (ADMX), as shown in Figure 17.
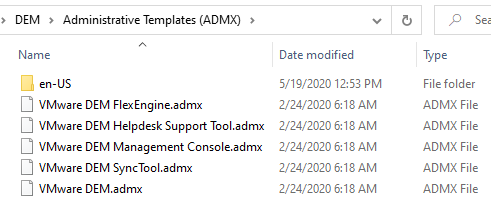
Copy the DEM ADMX/ADML files, shown in Figure 17 to the correct location. The location of this folder might vary, but often the location is C:\Windows\PolicyDefinitions. If you use the central store for administrative templates, you should instead copy the files to the Sysvol share on the primary domain controller, in the following location: \<PDCName>\SYSVOL\<DomainName>\Policies\PolicyDefinitions
I use the Group Policy Central Store in my lab, as shown in Figure 18.
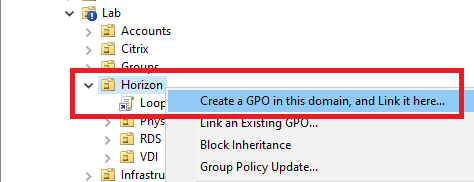
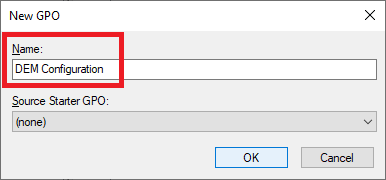
In the Group Policy Management Console (GPMC), create a GPO at the location where your Horizon machine accounts are located, as shown in Figures 19 and 20.
VMware requires a logoff script and that the policy setting Always wait for the network at computer startup and logon is enabled.
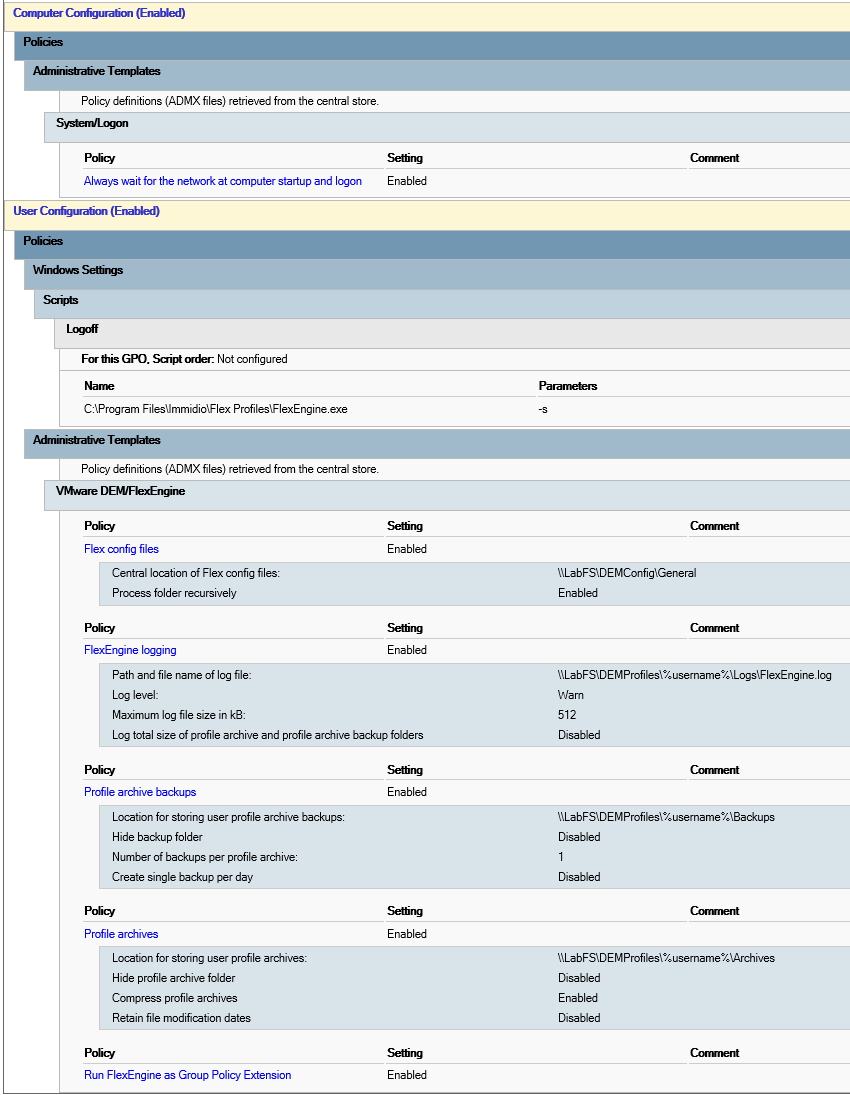
In the new GPO, configure the following settings, as shown in Figure 21:
Computer Configuration:
- Policies/Administrative Templates/System/Logon/Always wait for the network at computer startup and logon: Enabled
User Configuration:
- Policies/Administrative Templates/VMware DEM/FlexEngine
- Flex config files: Enabled, replace <YOUR CONFIGURATION SHARE> with the DEM Config share. i.e., \\LabFS\DEMConfig
- FlexEngine logging: Enabled, replace <YOUR PROFILE ARCHIVES SHARE> with the DEM Profile share. i.e., \\LabFS\DEMProfiles
- Profile archive backups: Enabled, replace <YOUR PROFILE ARCHIVES SHARE> with the DEM Profile share. i.e., \\LabFS\DEMProfiles
- Profile archives: Enabled, replace <YOUR PROFILE ARCHIVES SHARE> with the DEM Profile share. i.e., \\LabFS\DEMProfiles
- Run FlexEngine as Group Policy Extension: Enabled
- Windows Settings/Scripts/Logoff: Add, Script Name: C:\Program Files\Immidio\Flex Profiles\FlexEngine.exe, Script Parameters: -s
Because we are applying User settings to a Computer, link the Loopback GPO to the location where your Horizon machine accounts are located, as shown in Figure 22.
Up next: Dynamic Environment Manager Installation and Configuration