-
Learning the Basics of VMware Horizon 7.12 – Part 12 – Using Update Manager with Instant Clones and Creating Additional Machines
[Updated 4-Sep-2021]
Shortly after learning VMware Horizon, I used Update Manager to apply VMware updates to my cluster. I was shocked when my hosts would never enter Maintenance Mode. I asked a question on Twitter about this issue, and a friend directed me to look at https://kb.vmware.com/s/article/2144808.
That KB article explains the process to follow on how to use Update Manager with Instant Clones. Unfortunately, my Update Manager shows no updates of any kind to ESXi 6.7U3 since 27-Apr-2020. Even though there are no updates to apply, I’ll still walk through the process for you because it isn’t that hard.
Using Update Manager
From the vSphere HTML Client, from the toolbar, click Menu, then click VMs and Templates, as shown in Figure 1.
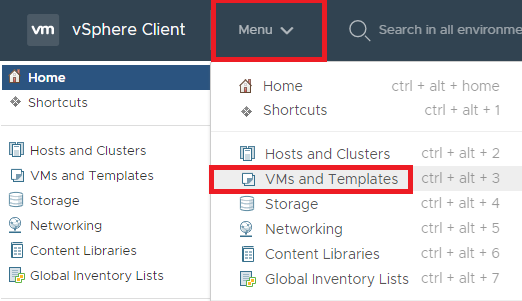
Figure 1 To see all the Instant Clone Parent VMs, expand all the Instant Clone folders, as shown in Figure 2.
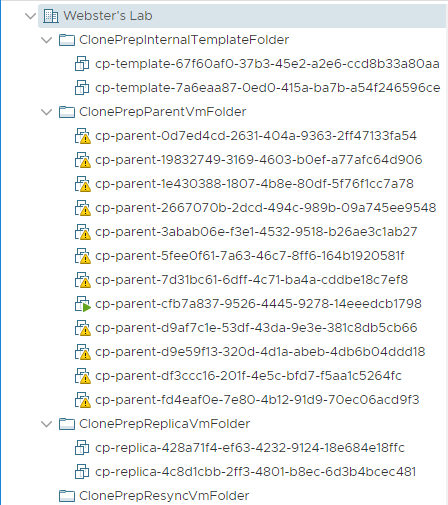
Figure 2 Switch to Hosts and Clusters view. From the toolbar, click Menu, then click Hosts and Clusters, as shown in Figure 3. You can also click the Hosts and Clusters icon, as shown in Figure 4.
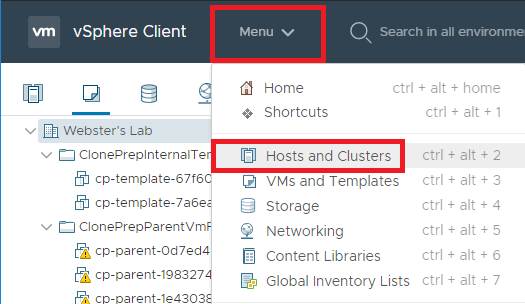
Figure 3 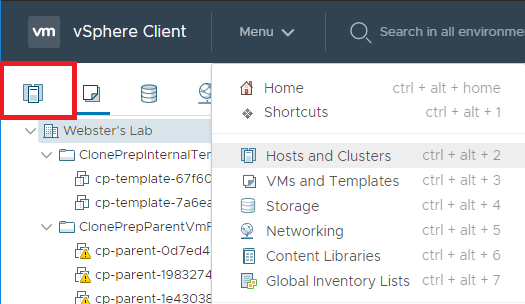
Figure 4 Select the host that you want to put into Maintenance Mode. Look up Annotations in the host’s Summary tab, Custom Attributes, and see that InstantClone.Maintenance is set to 0, as shown in Figure 5.
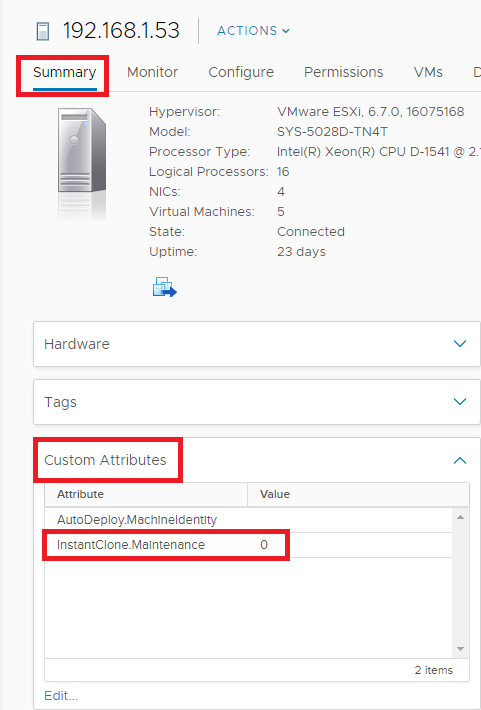
Figure 5 Click Edit, as shown in Figure 6.
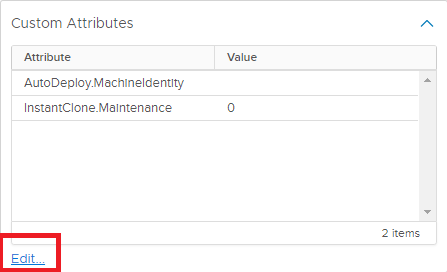
Figure 6 Change InstantClone.Maintenance to 1, and click OK, as shown in Figure 7.
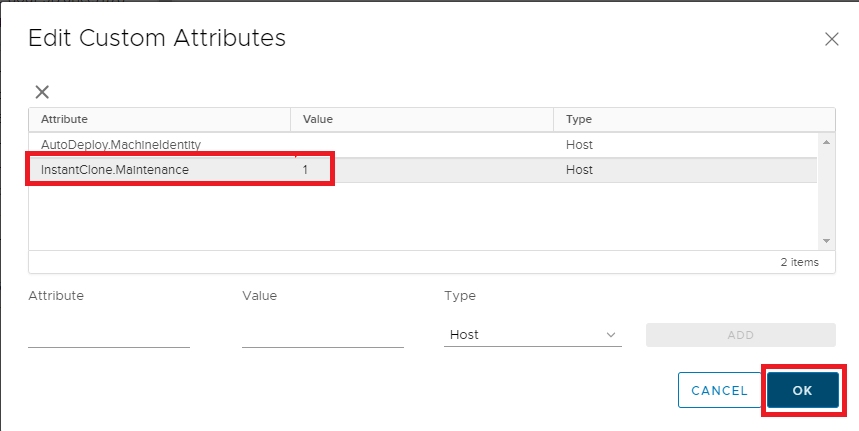
Figure 7 Repeat for every Host in the cluster.
After a brief amount of time, less than 10 seconds in my lab, all the Parent VMs are deleted, as shown in Figures 8 and 9.
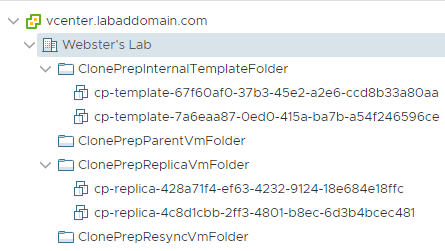
Figure 8 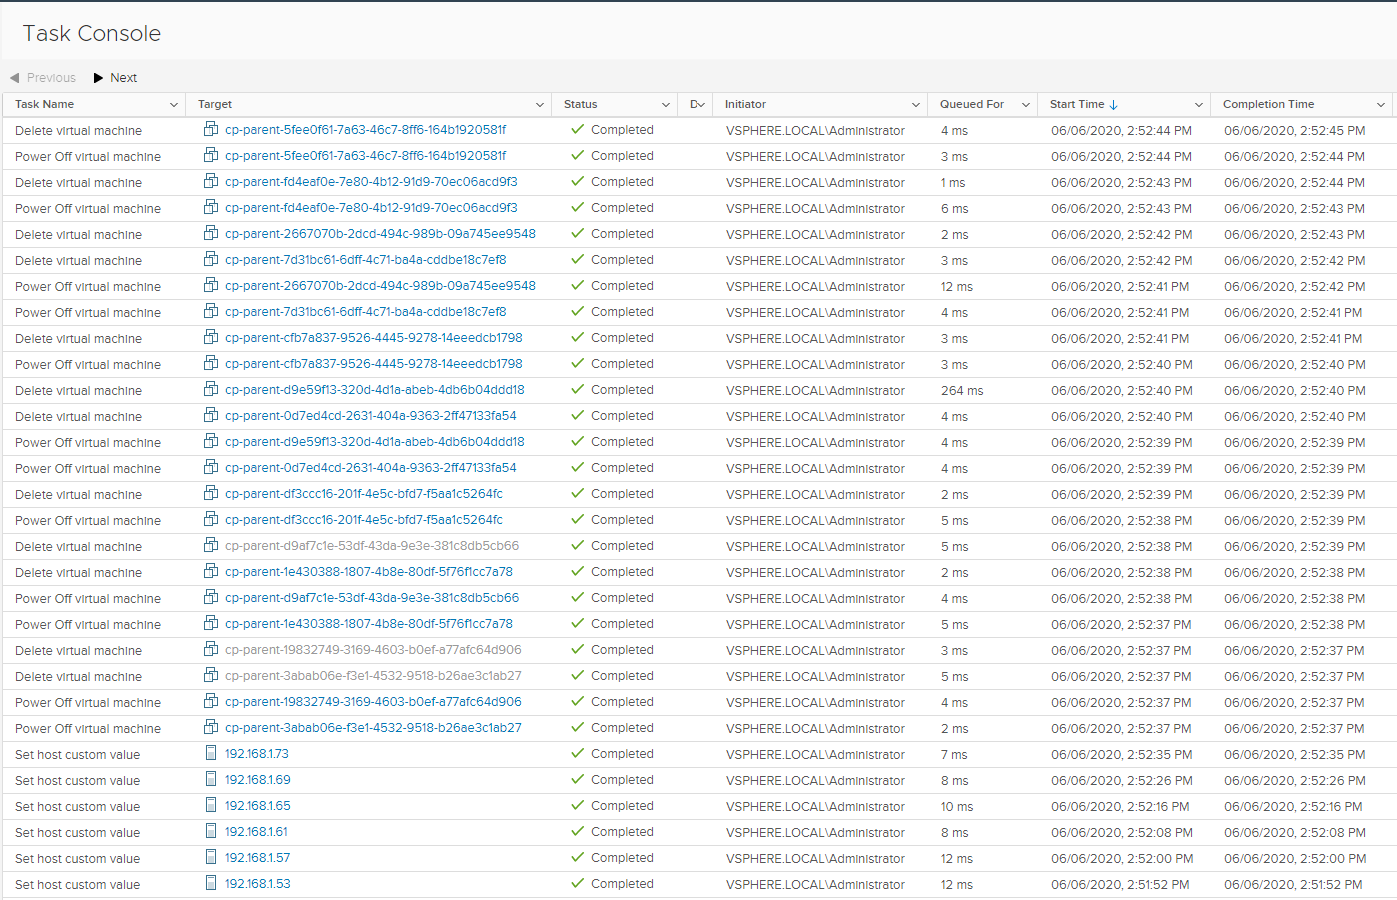
Figure 9 The InstantClone.Maintenance value is changed to 2, as shown in Figure 10.
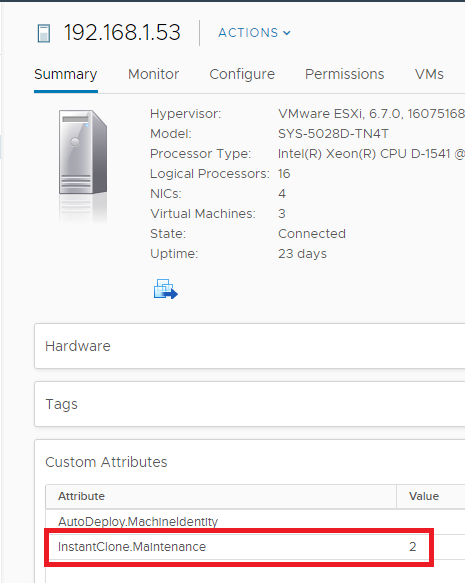
Figure 10 You can now put the Host into Maintenance Mode, as shown in Figure 11, or let Update Manager handle putting each Host in and out of Maintenance Mode (my preference, but I have no updates).
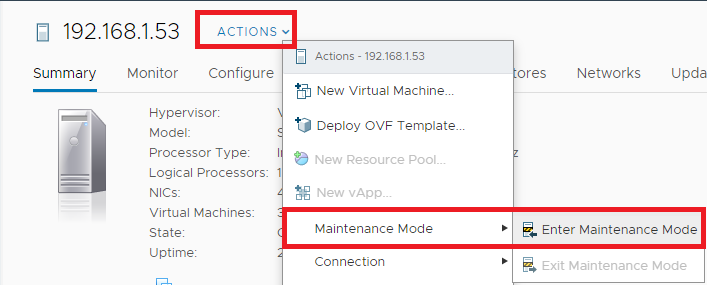
Figure 11 Click OK, as shown in Figure 12.
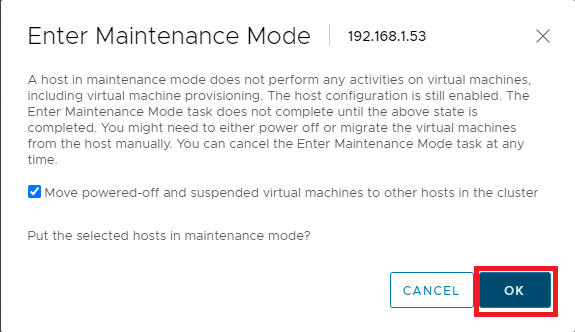
Figure 12 The Host is placed in Maintenance Mode, as shown in Figure 13.
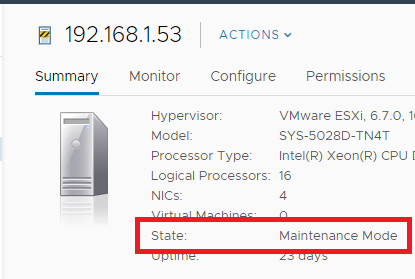
Figure 13 When Update Manager is complete, all Hosts should be out of Maintenance Mode. As Figure 14 shows, the value for InstantClone.Maintenance is still set to 2.
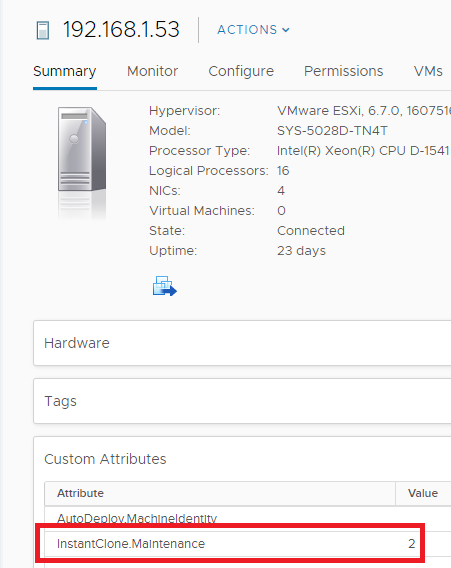
Figure 14 For each host, edit the InstantClone.Maintenance value and set it to 0, as shown in Figure 15.
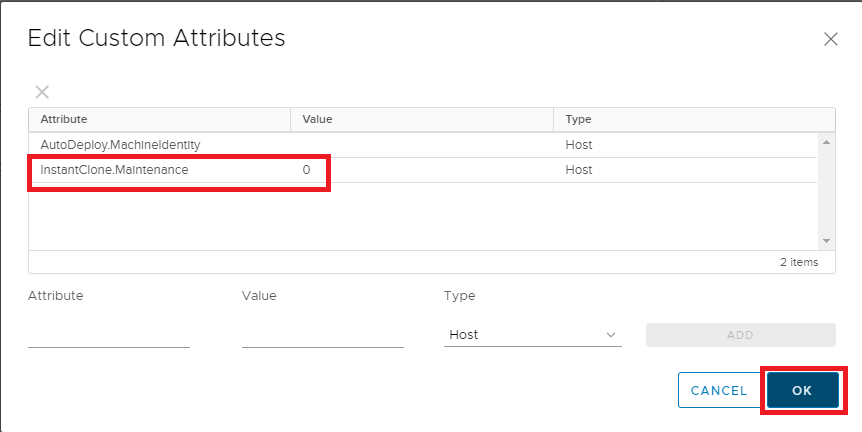
Figure 15 As new provisioning happens, parent VMs and then instant clones are created again.
Figure 16 shows that even though the hosts are out of Maintenance Mode and the InstantClone.Maintenance value is no longer 1 or 2; the original Parent VMs did not recreate.
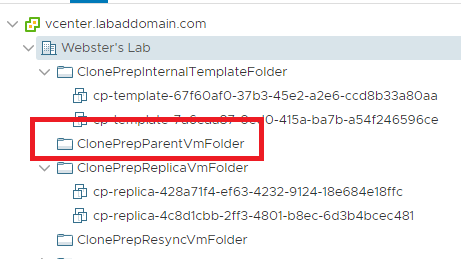
Figure 16 As you can tell, updating a host or all the hosts in a cluster with or without Update Manager is not that hard.
Creating Additional Machines
Since vCenter (or some VMware internal process) deleted the Parent VMs, now is a good time to create additional machines.
Back in Chapter 10, when we tested accessing published resources, we only had one Windows 10 virtual desktop and one Server 2019 RDS server. Let’s go through creating two additional Windows 10 machines and one additional Server 2019 RDS machine.
Back on the Connection Server, log in to the Connection Server console.
In the left frame, under Inventory, click Desktops, as shown in Figure 17.
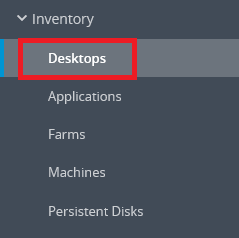
Figure 17 Select the VDI Pool and click Edit, as shown in Figure 18.
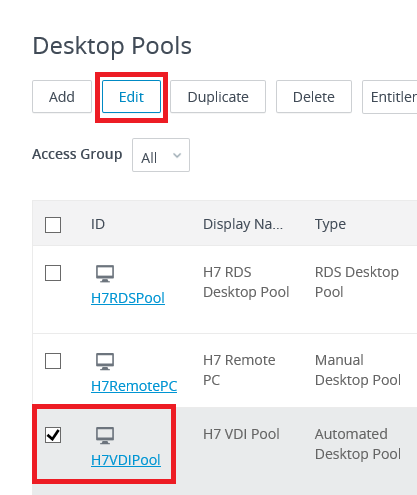
Figure 18 Click Provisioning Settings, as shown in Figure 19.
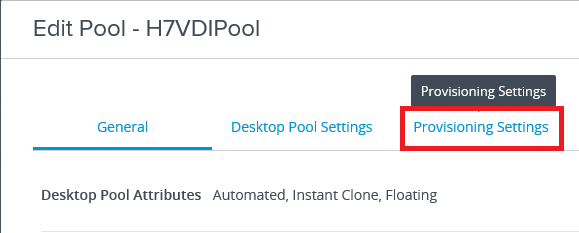
Figure 19 Change the Max Number of Machines to 3 and click OK, as shown in Figure 20.
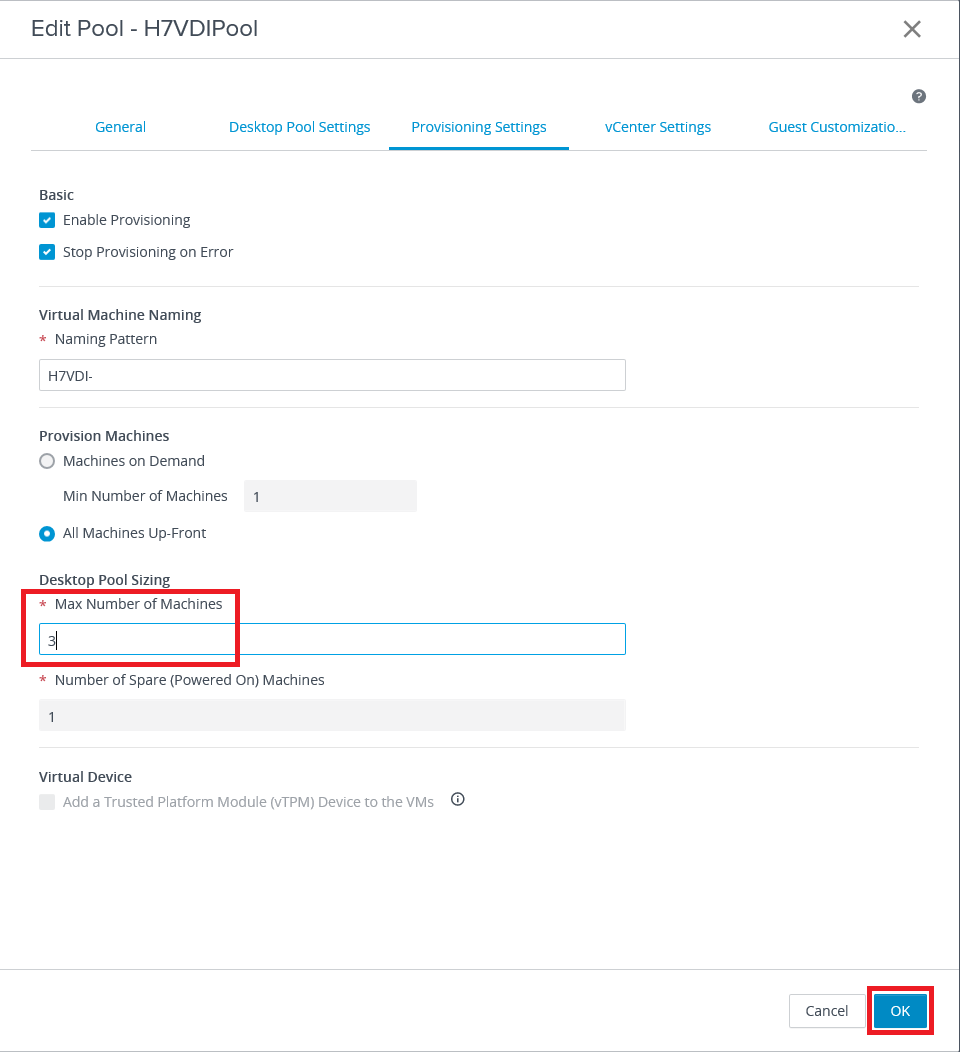
Figure 20 After a few seconds, Figure 21 shows the Parent VMs created.
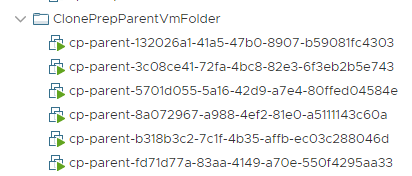
Figure 21 After a brief interval, you will see the two additional Windows 10 VDI machines in vCenter, as shown in Figure 22.
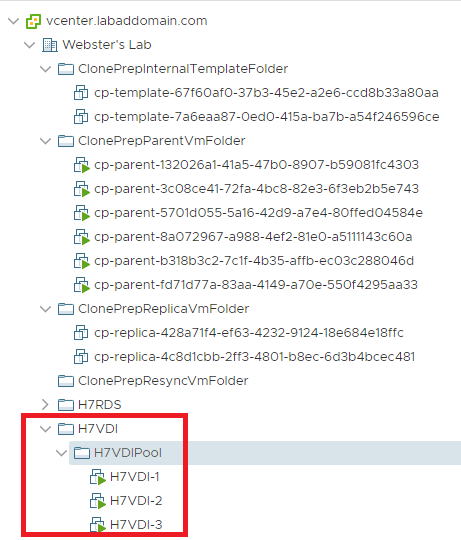
Figure 22 Click on the VDI Pool, as shown in Figure 23.
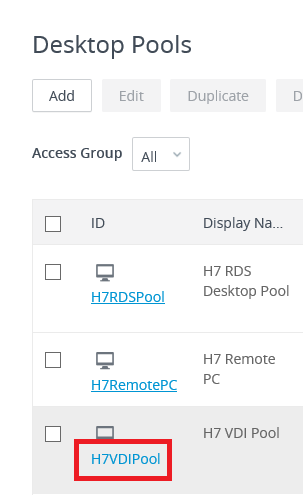
Figure 23 Click on Machines, then Machines (Instant Clone Details), as shown in Figure 24, and then Figures 25 and 26 show Machine details.
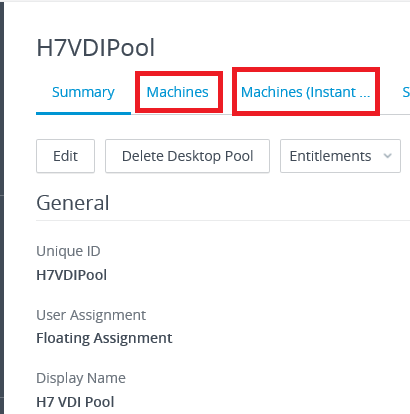
Figure 24 
Figure 25 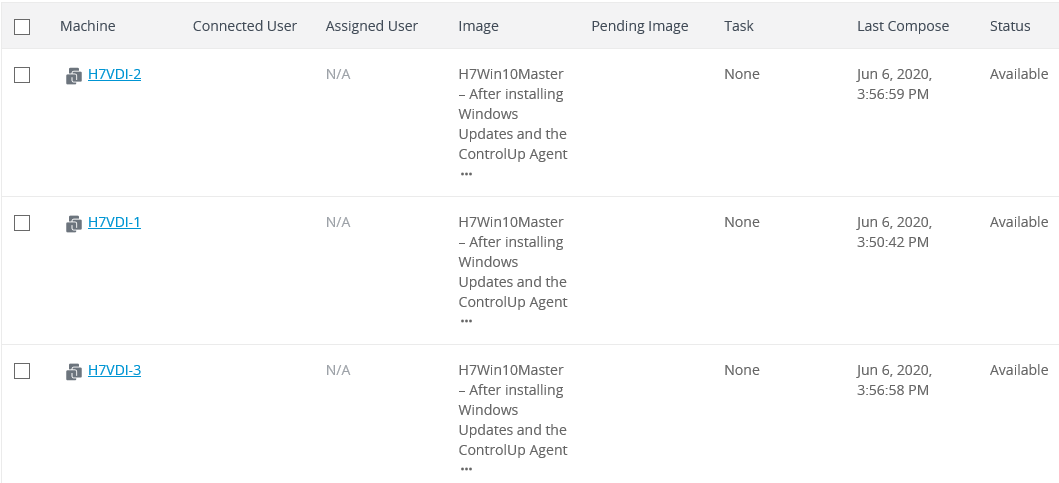
Figure 26 Now to add the additional RDS server.
In the left frame, under Inventory, click Farms, as shown in Figure 27.
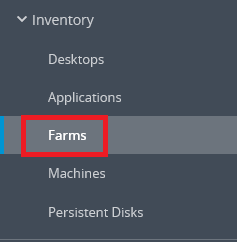
Figure 27 Select the RDS Farm and click Edit, as shown in Figure 28.
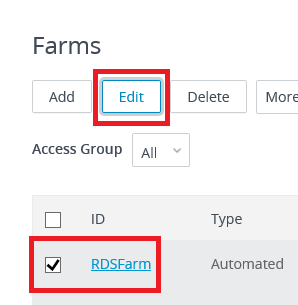
Figure 28 Click Provisioning Settings, as shown in Figure 29.

Figure 29 Change the Max Number of Machines to 2 and click OK, as shown in Figure 30.
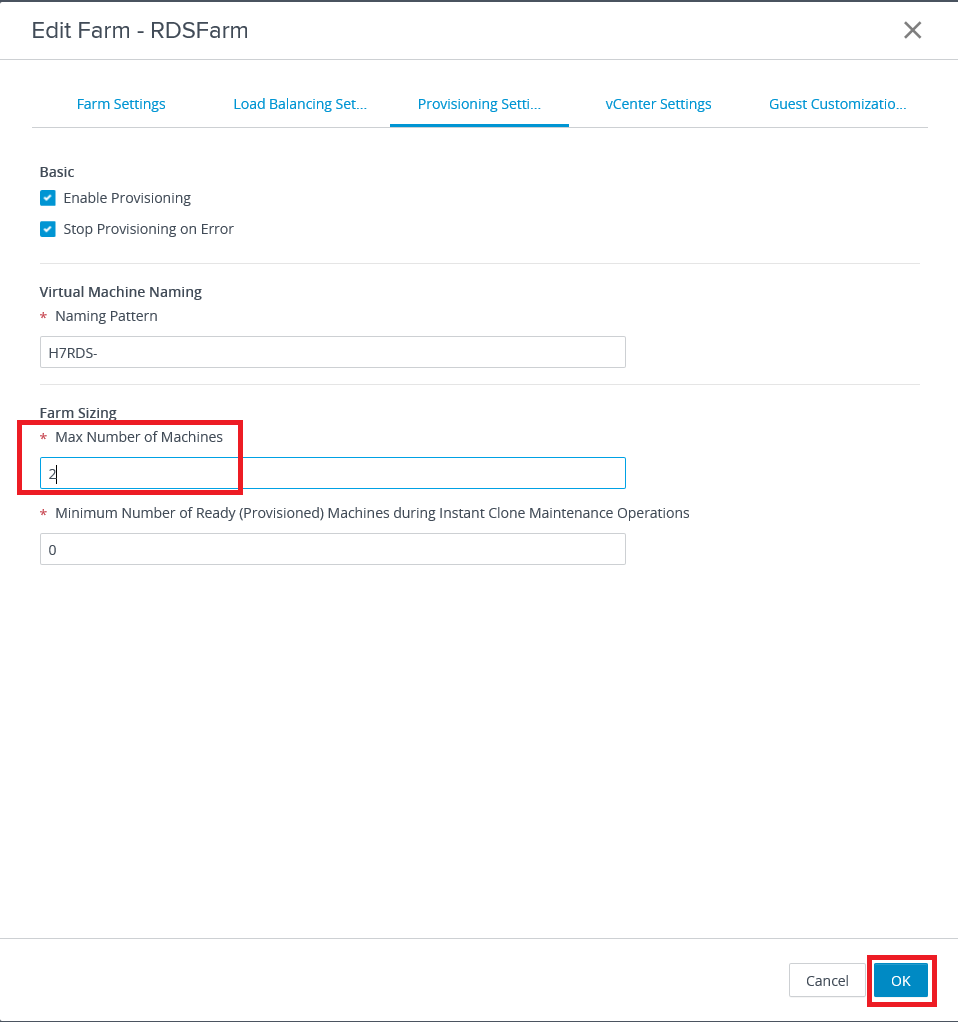
Figure 30 After a few seconds, you will see the additional Parent VMs and the additional RDS Server show in vCenter, as shown in Figure 31.
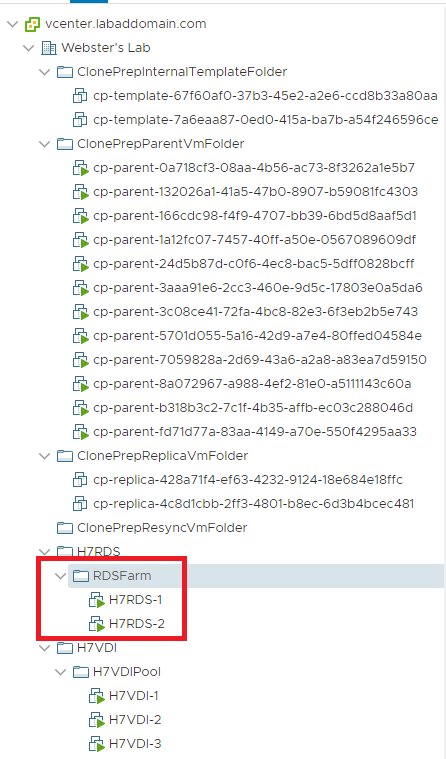
Figure 31 Click on the RDS Farm, as shown in Figure 32.
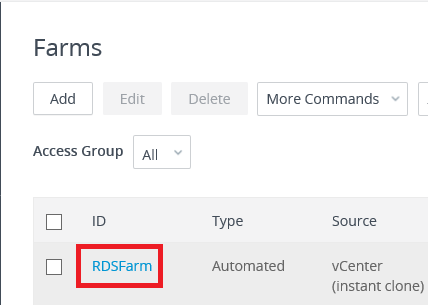
Figure 32 Click on RDS Hosts, as shown in Figure 33.

Figure 33 Figure 34 shows details on the RDS Hosts.
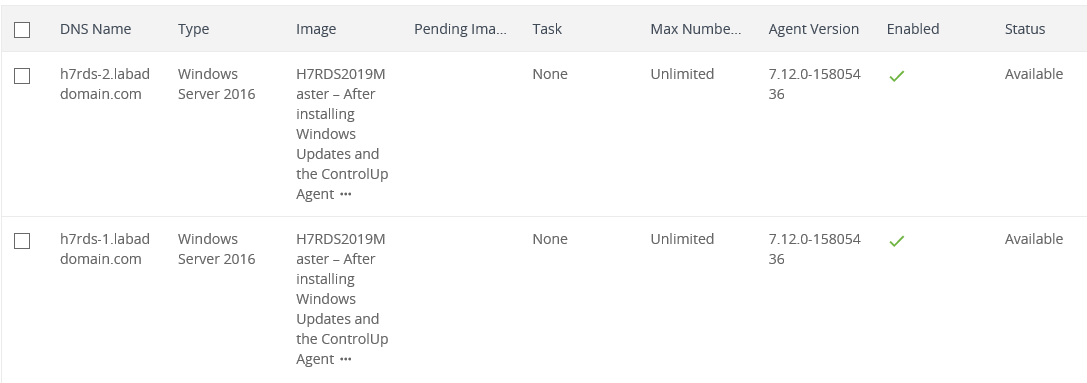
Figure 34 There are now additional machines if you wish to go back through Chapter 10 Accessing Resources and verify that each test user can access a Windows 10 virtual desktop.
ControlUp
With additional Instant Clone machines available, the desktop pool machines add to the ControlUp console.
In the ControlUp console, click the Home tab and click Add Machines, as shown in Figure 35.
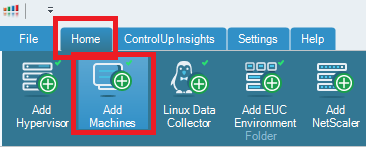
Figure 35 Click Search, select the updated desktop pool machines, and click Add, as shown in Figure 36.
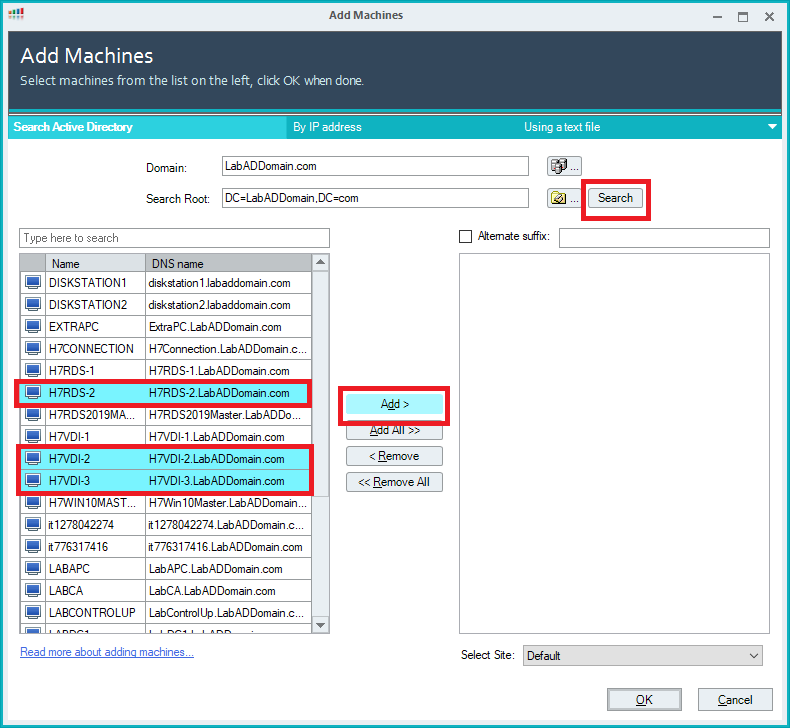
Figure 36 Click OK, as shown in Figure 37.
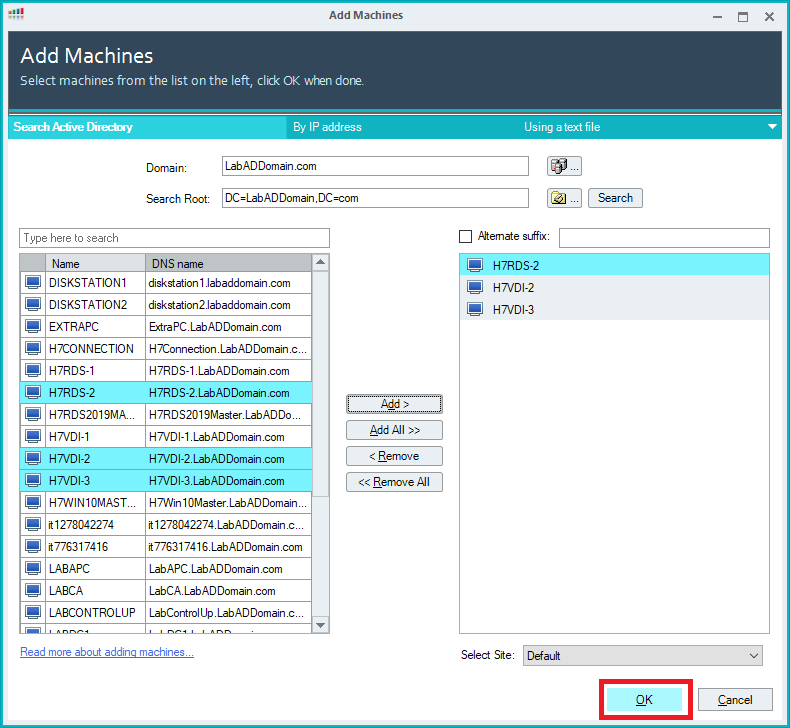
Figure 37 The machines are added to the console, as shown in Figure 38.
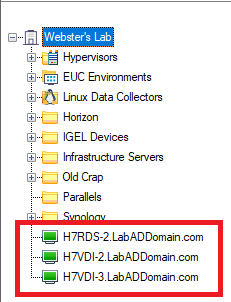
Figure 38 If you want, move the machines to your Horizon folder.
Note: The machines are automatically placed in the selected folder if you select the Horizon folder before clicking Add Machines.
Figure 39 shows the updated machines with a Ready status, which means ControlUp is now getting detailed monitoring data. We will use the desktop pool machines in Part 14.
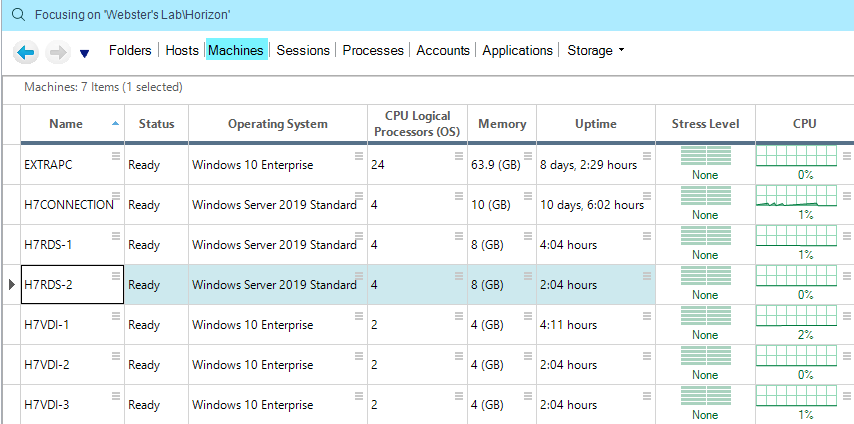
Figure 39 Up next: Dynamic Environment Manager


June 16, 2020
Blog, VMware