-
Learning the Basics of VMware Horizon 7.12 – Part 10 – Accessing Published Resources
[Updated 4-Sep-2021]
We now have three desktop pools and four published applications. There is nothing else in the Connection Server we need to configure to access the published resources. Let’s look at how easy it is to access these published resources using the HTML5 client and IGEL devices. Then look at what ControlUp shows us for utilization.
HTML5
When we installed the Connection Server, HTML5 access was a default selection. When we created the Desktop Pools and Applications, HTML5 access was also enabled. HTML5 access enables a user to access the published resources without installing a VMware Horizon Client.
On a domain-joined computer, use your preferred browser to browse to https://ConnectionServerFQDN and click on VMware Horizon HTML Access.
For me, that is https://h7connection.labaddomain.com, as shown in Figure 1.
Notice there is no SSL certificate error.
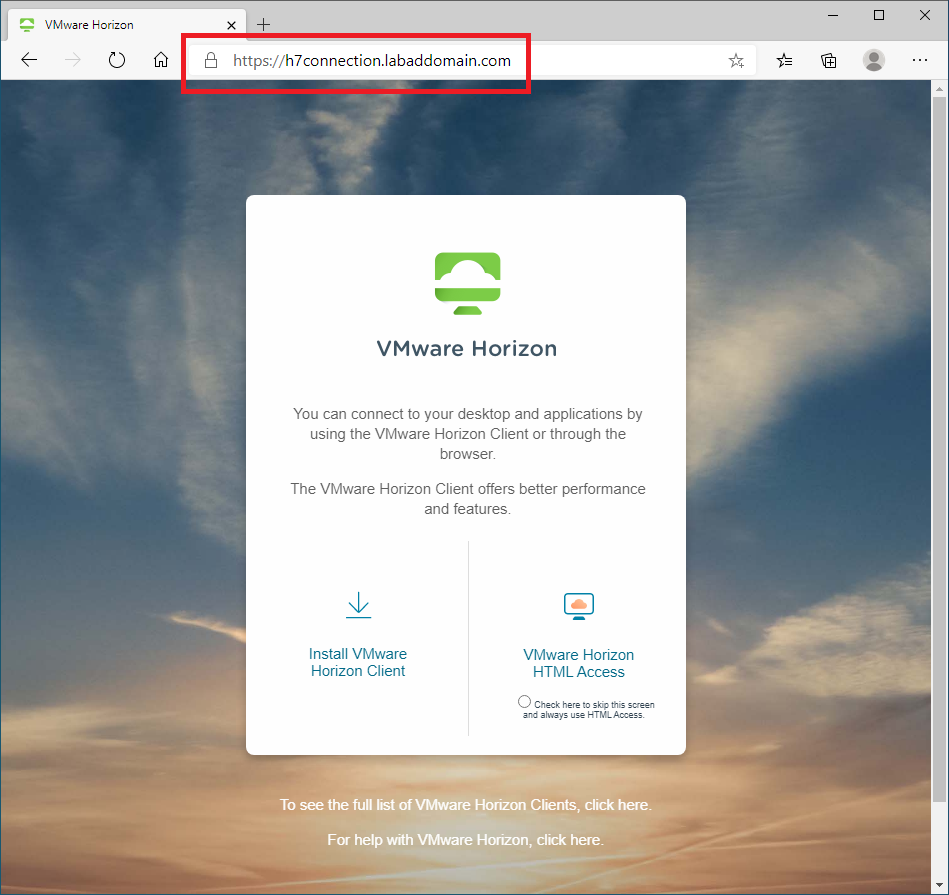
Figure 1 If you do not want to install the VMware Horizon Client, click VMware Horizon HTML Access, as shown in Figure 2. If you always want to use HTML5 access, select Check here to skip this screen and always use HTML Access.
Note: I found in my lab testing that VMware’s HTML5 access is fast and responsive.
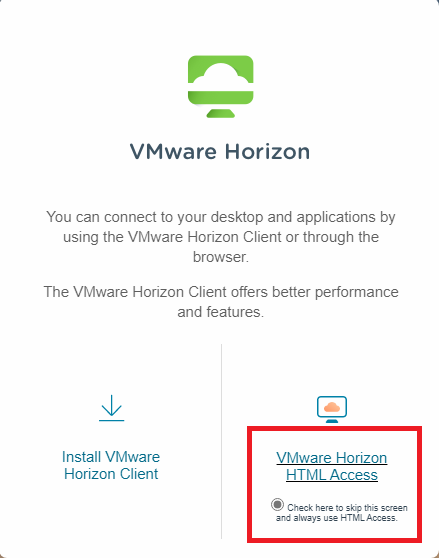
Figure 2 Enter user credentials and click Login, as shown in Figure 3.
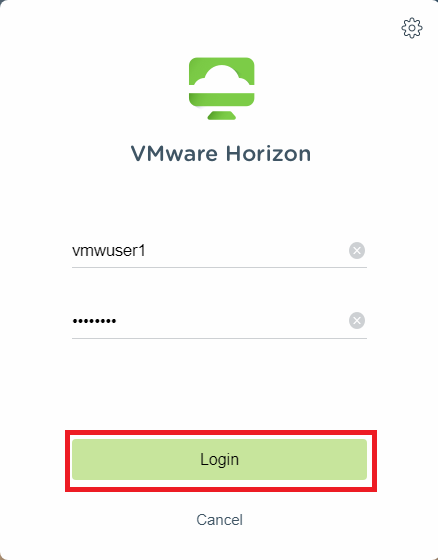
Figure 3 The published resources the user account can access, shown in Figure 4, appear in the browser.
I don’t know why sometimes I get a generic icon, and sometimes I get the application’s icon.
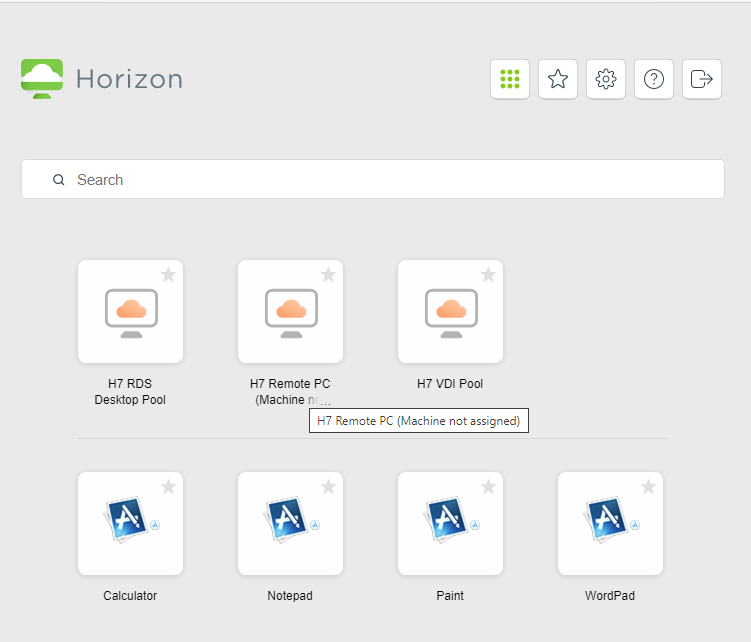
Figure 4 Launch any published resources to verify access works. Figure 5 shows I launched every published resource.
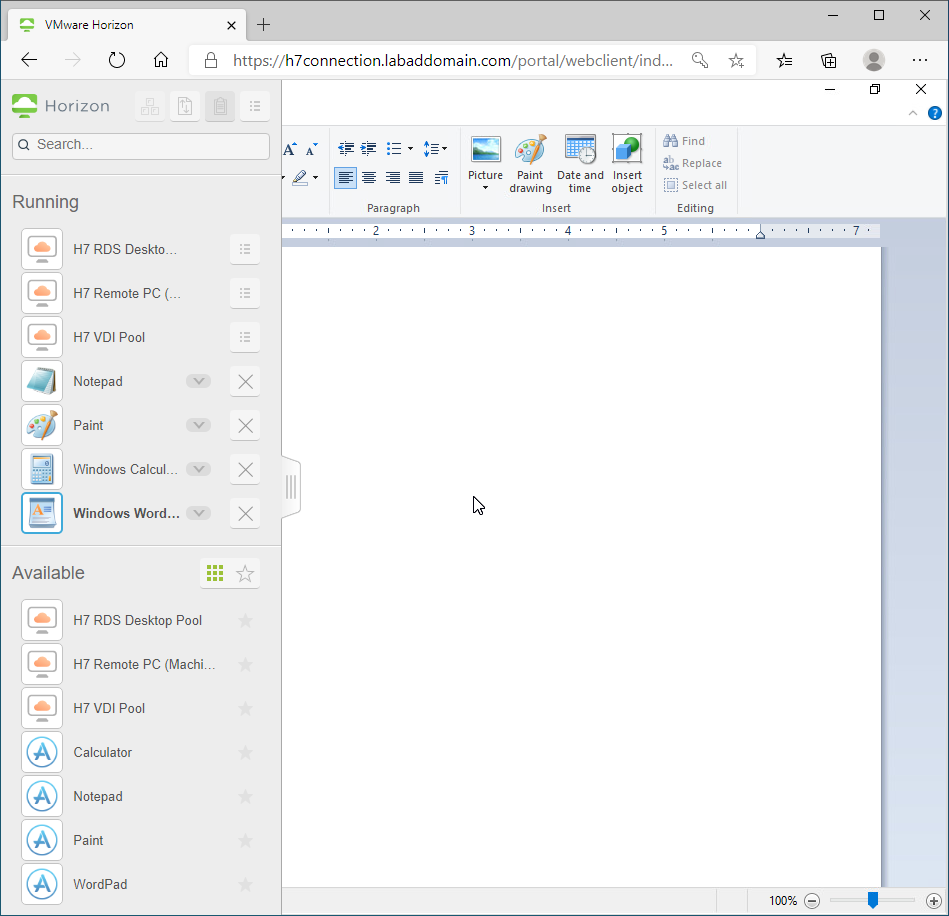
Figure 5 After launching the first published resource, Figure 6 shows you have access to Copy and Paste. That is because there are no settings or policies configured.
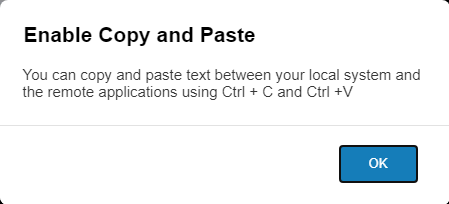
Figure 6 Leave the published resources running.
IGEL
Log in to the UMS console.
A UMS Profile is needed to connect to the Connection Server.
In the UMS Console, right-click where your profiles are located and click New Profile, as shown in Figure 7.
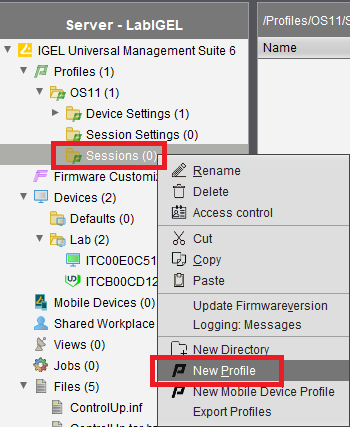
Figure 7 Give the profile a name and click OK, as shown in Figure 8.
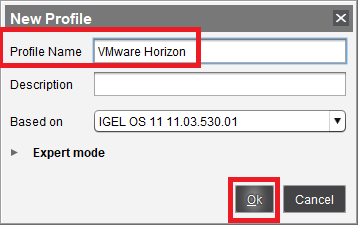
Figure 8 Expand Sessions, Horizon Client, click Horizon Client Sessions, and click the “+” in the upper right frame, as shown in Figure 9.
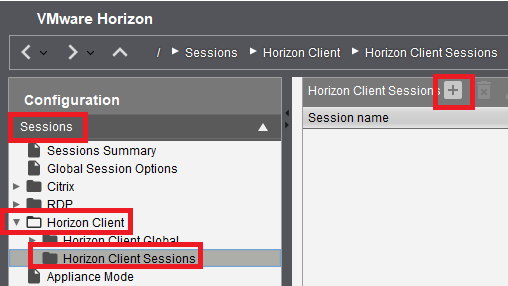
Figure 9 Expand Horizon Client Session and click on Connection settings, as shown in Figure 10.
For this color-blind person, even using the Smart Contrast console theme, I still find the words Connection settings hard to read against that (I assume) grey bar background.
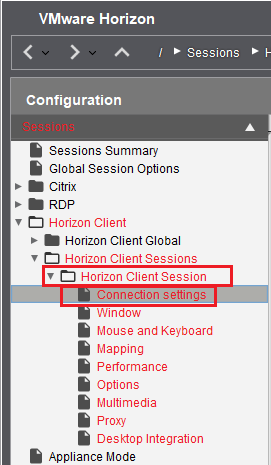
Figure 10 In the right frame, enter the FQDN of the Connection Server for the Server URL, as shown in Figure 11. Enter any other settings desired.
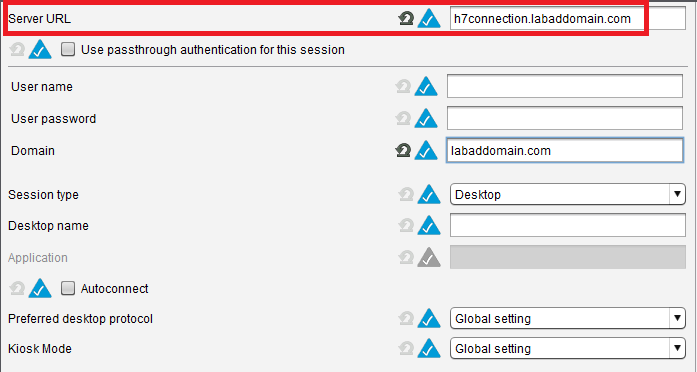
Figure 11 If you have multiple monitors and wish to start the Horizon session on a specific monitor, in the left frame, click Window, and in the right frame, change Start Monitor to the desired monitor number, as shown in Figure 12.
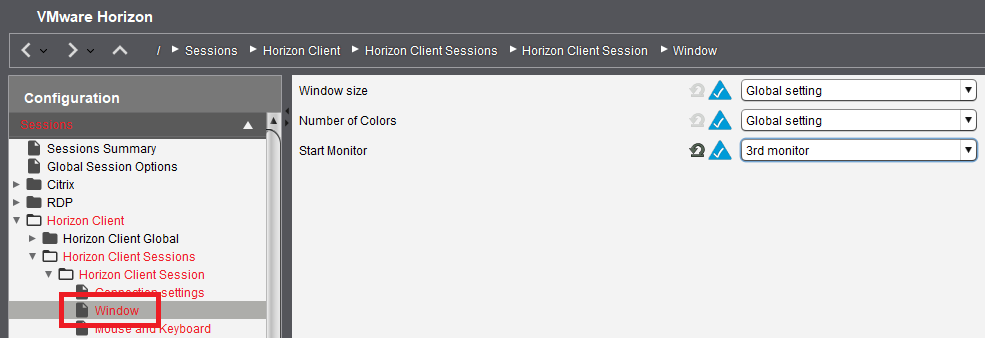
Figure 12 Many more settings are available, but these are the minimum required to launch published resources from the Connection Server.
Once all desired settings are configured, click Save, as shown in Figure 13.

Figure 13 Now we need to assign devices to the new profile.
In the right frame, to the right of Assigned objects, click the “+“, as shown in Figure 14.

Figure 14 Assign the desired IGEL device, and click OK, as shown in Figure 15.
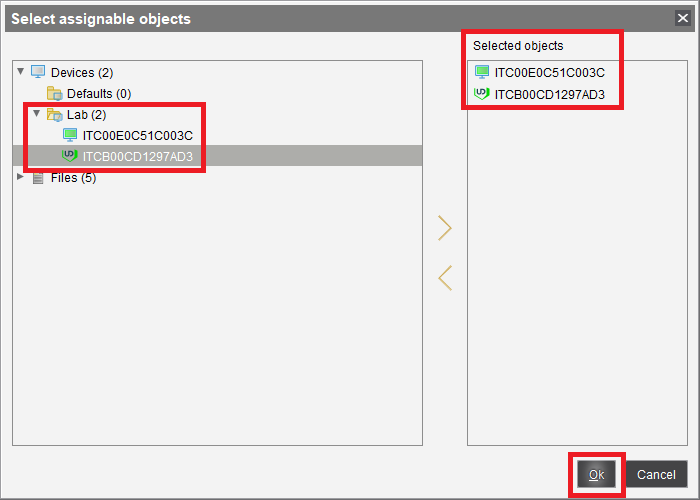
Figure 15 Decide when to apply the new profile and click OK.
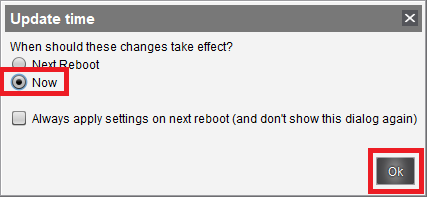
Figure 16 The profile is applied to the assigned IGEL device(s).
Using Shadowing to show the Horizon Client Session is now on the device(s).
Right-click an IGEL device and click Shadow, as shown in Figure 17.
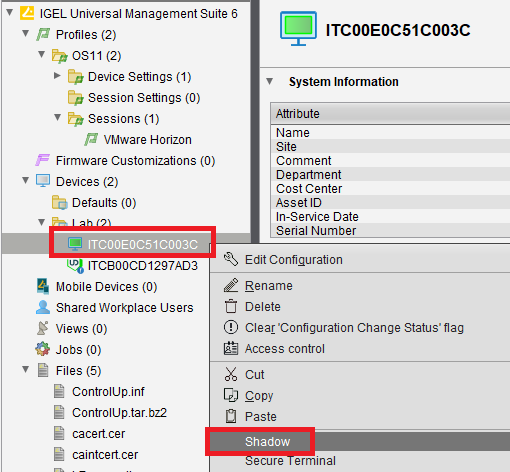
Figure 17 Enter the Shadow account password entered in Part 4, and click Connect, as shown in Figure 18.

Figure 18 Figure 19 shows my UD7.
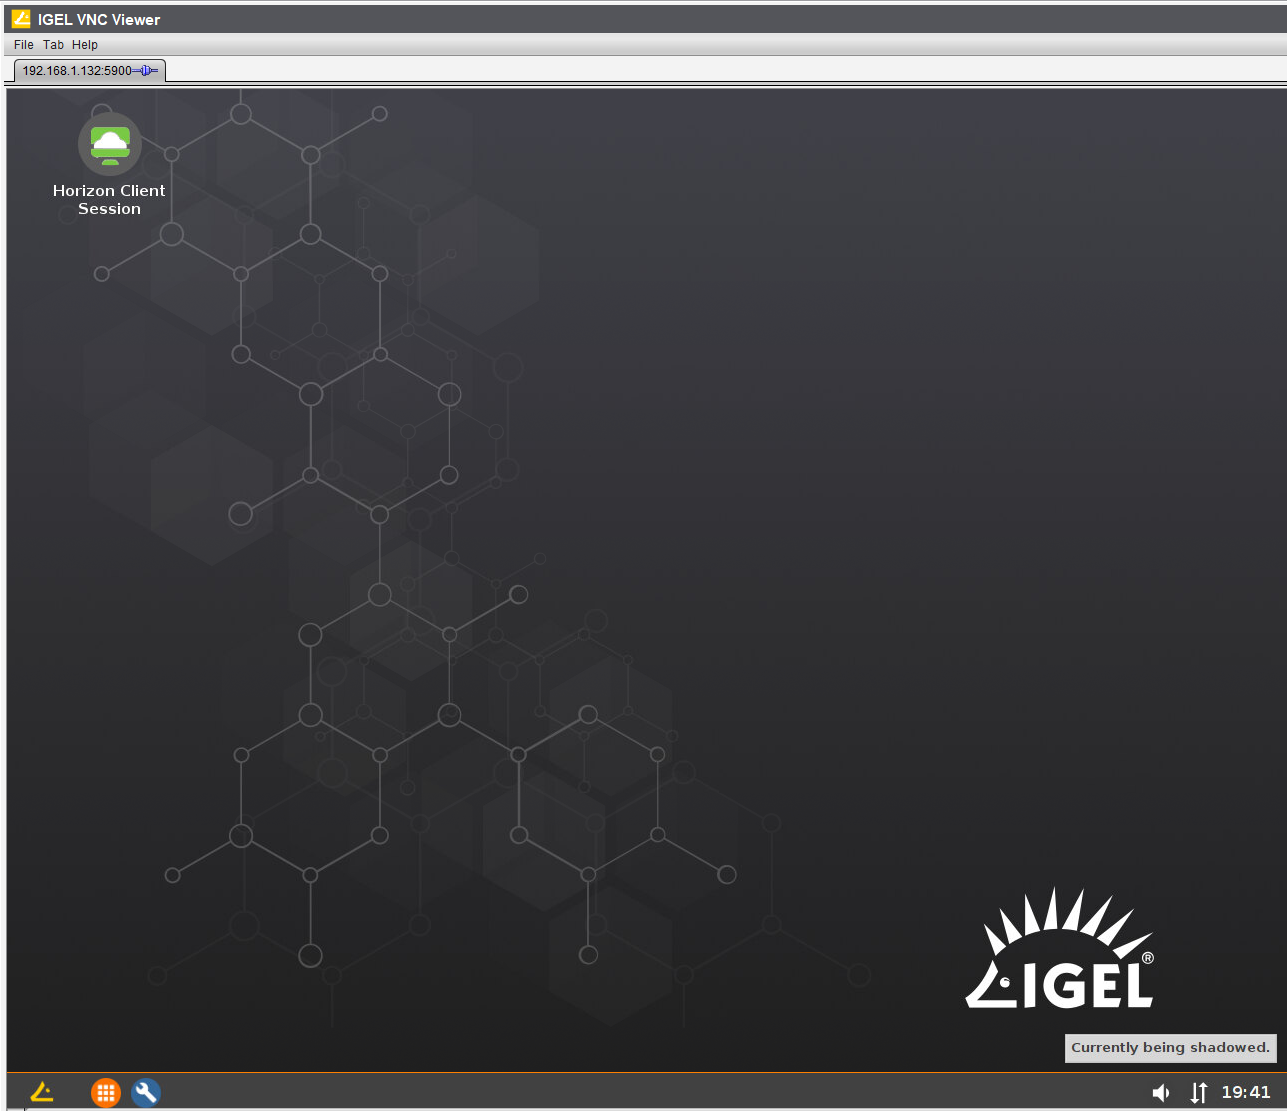
Figure 19 Figure 20 shows my UD Pocket.
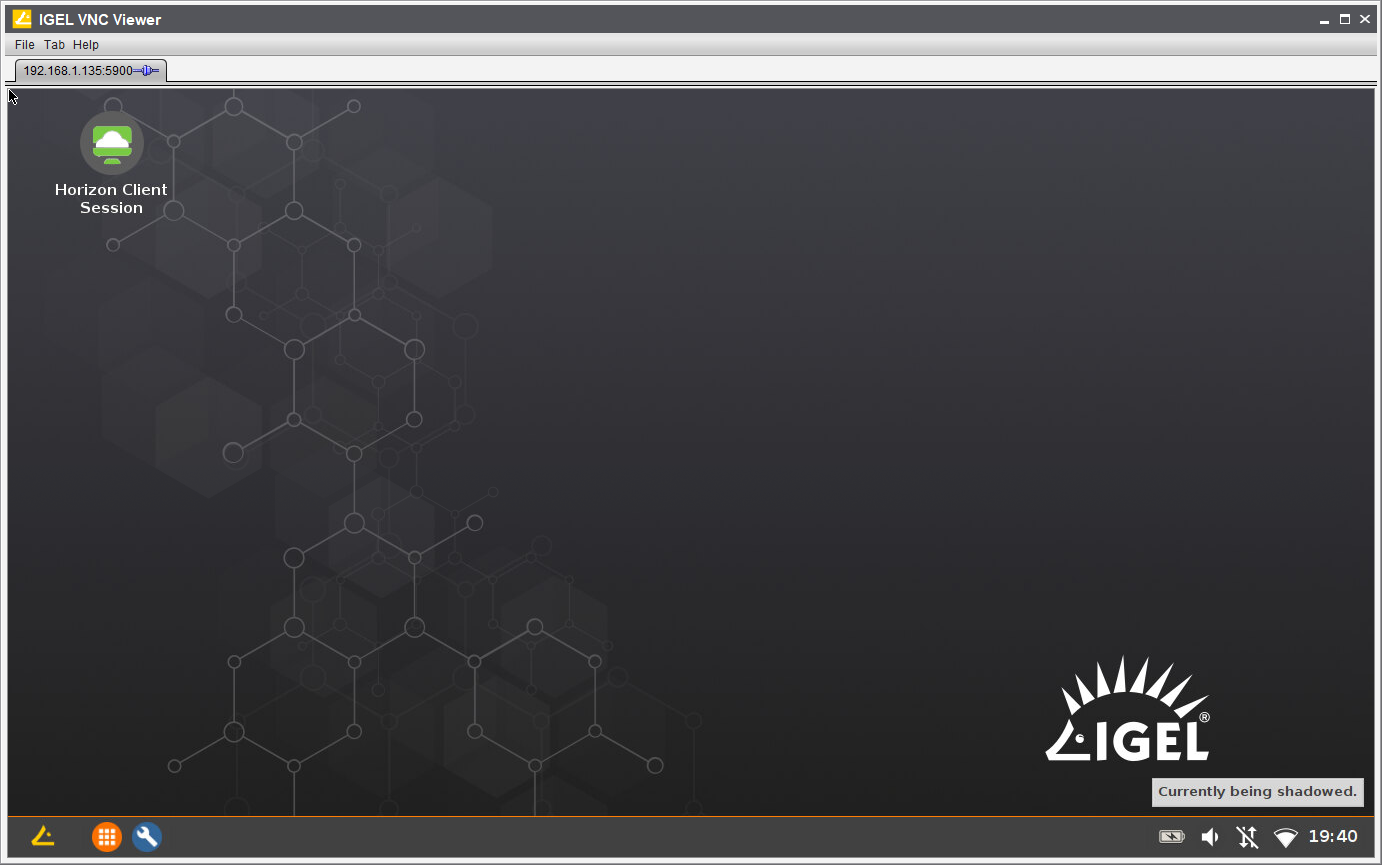
Figure 20 Figures 21 through 23 show the UD7.
Double-click the Horizon Client Session icon.
Double-click the Connection Server’s icon, as shown in Figure 21.
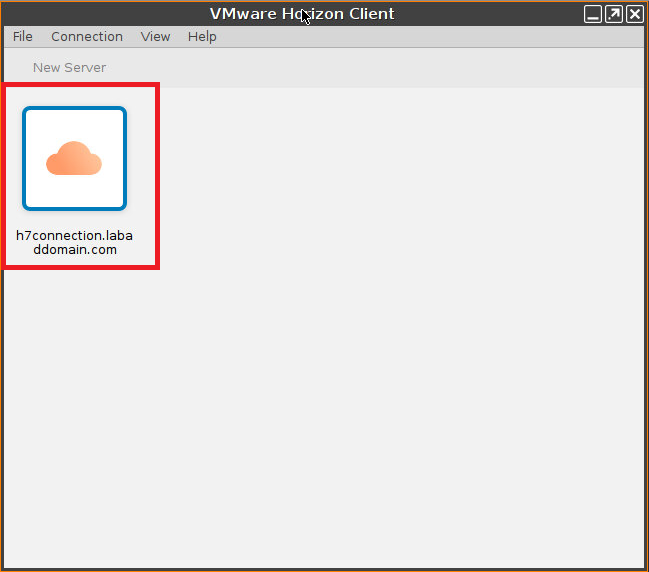
Figure 21 Notice there is no SSL error. If there were any issues with the Connection Server’s SSL certificate, you would see https.
Login to the Horizon Client Session, as shown in Figure 22.
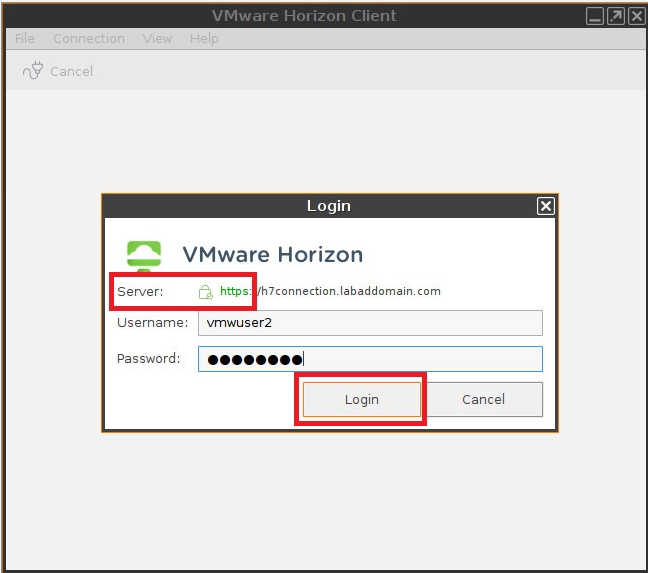
Figure 22 Figure 23 shows the published resources the logged-in user account has access to.
To me, Figure 23 also shows the published resource icon “glitch”. Paint has its icon, WordPad has Paint’s icon, and Calculator and Notepad have generic icons.
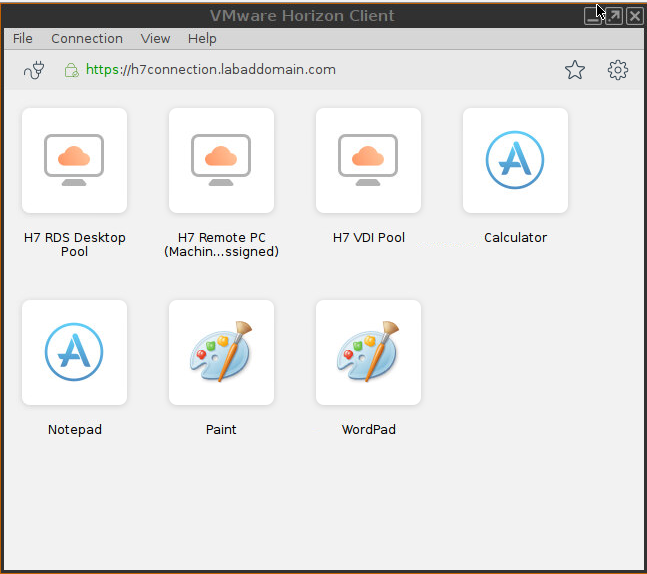
Figure 23 Figure 24 shows there is already user vmwuser1 logged into the only Win10 desktop. We will remedy this later.

Figure 24 Figure 25 shows that vmwuser1 has already logged into the physical desktop and is now the assigned user.
If the user vmwuser1 is already assigned to the physical computer, why does user vmwuser2 see it as an available published resource? Because the H7Users security group has an Entitlement to the Physical Desktop Pool.

Figure 25 Figure 26 shows I launched all the published resources available.
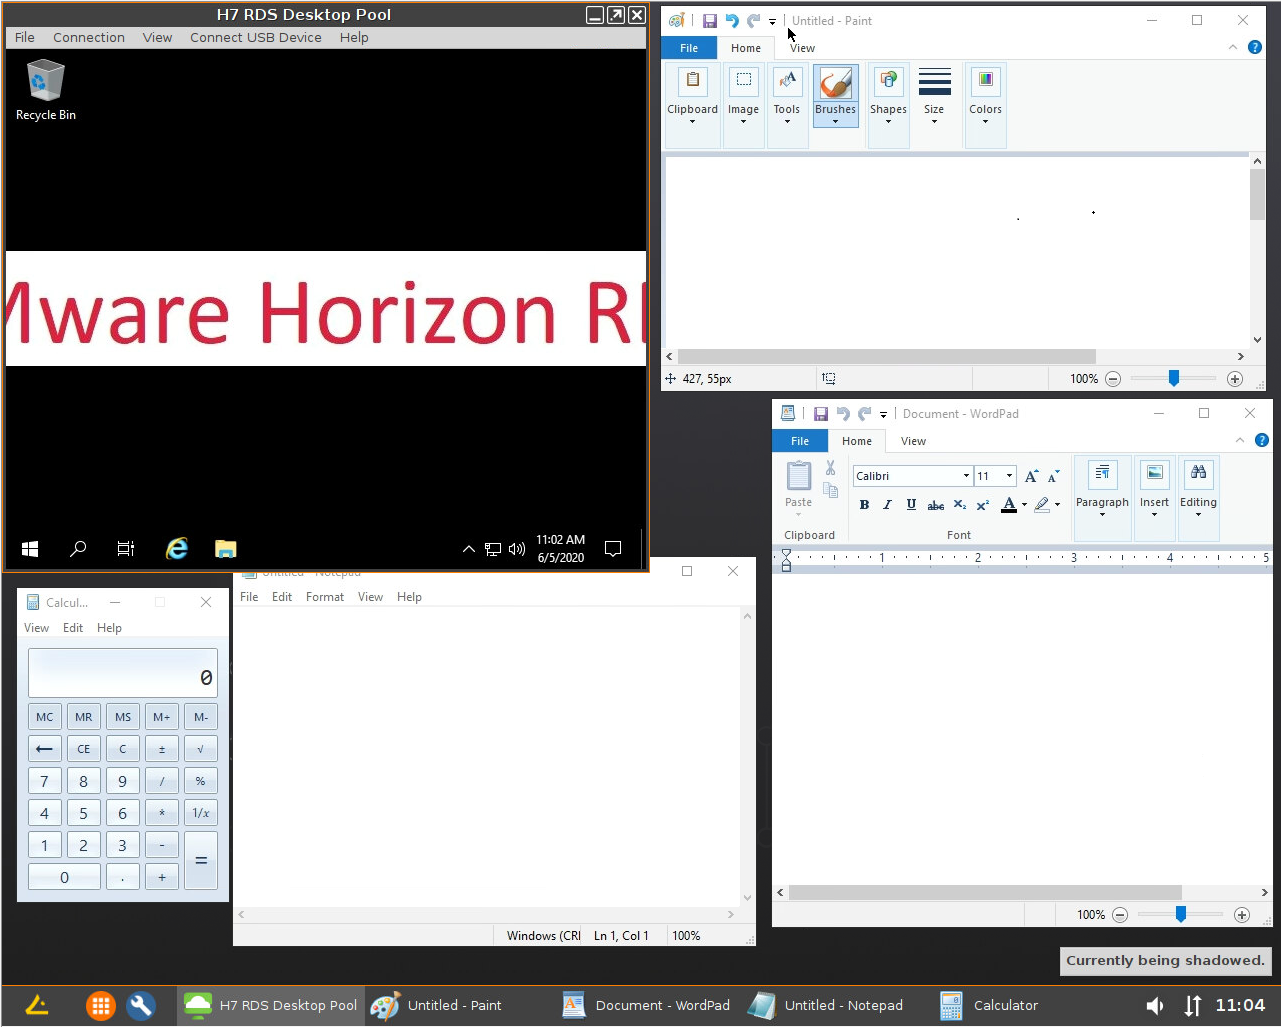
Figure 26 Leave the published resources running.
Figures 27 through 29 show the UD Pocket.
Double-click the Horizon Client Session icon, shown in Figure 20.
Double-click the Connection Server’s icon, as shown in Figure 27.
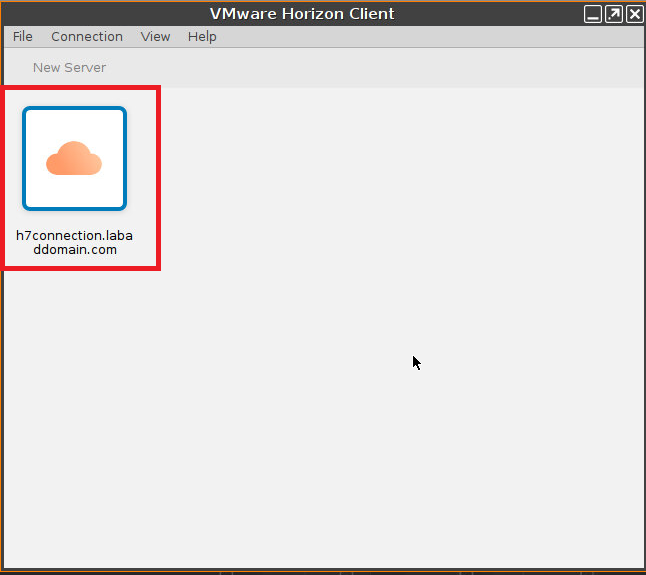
Figure 27 Notice there is no SSL error. If there were any issues with the Connection Server’s SSL certificate, you would see https.
Login to the Horizon Client Session, as shown in Figure 28.
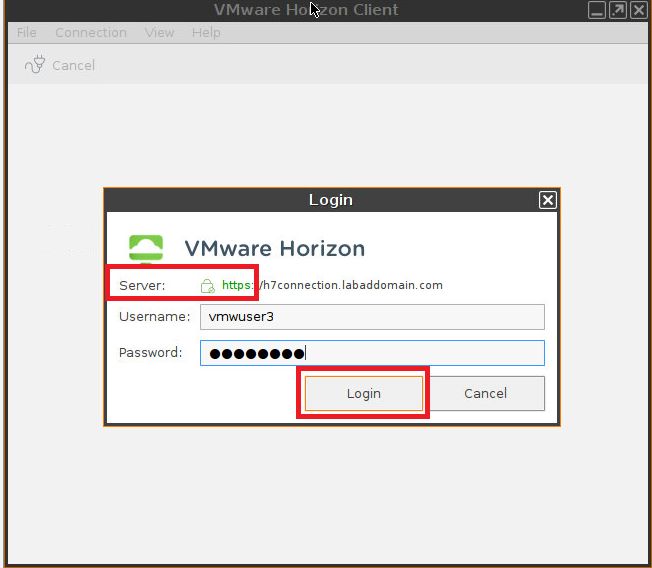
Figure 28 Figure 29 shows the published resources the logged-in user account has access to.
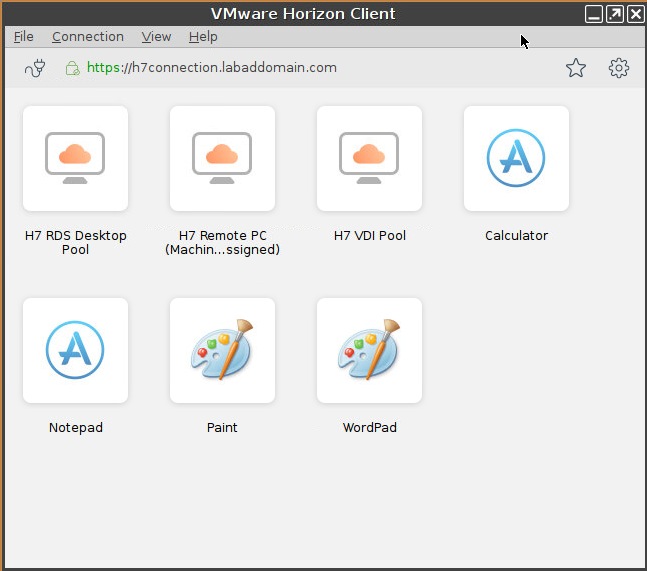
Figure 29 Why is user vmwuser3 seeing the H7 Remote PC as an available published resource? Because the H7Users security group has an Entitlement to the Physical Desktop Pool.
Figure 30 shows I launched all the published resources available.
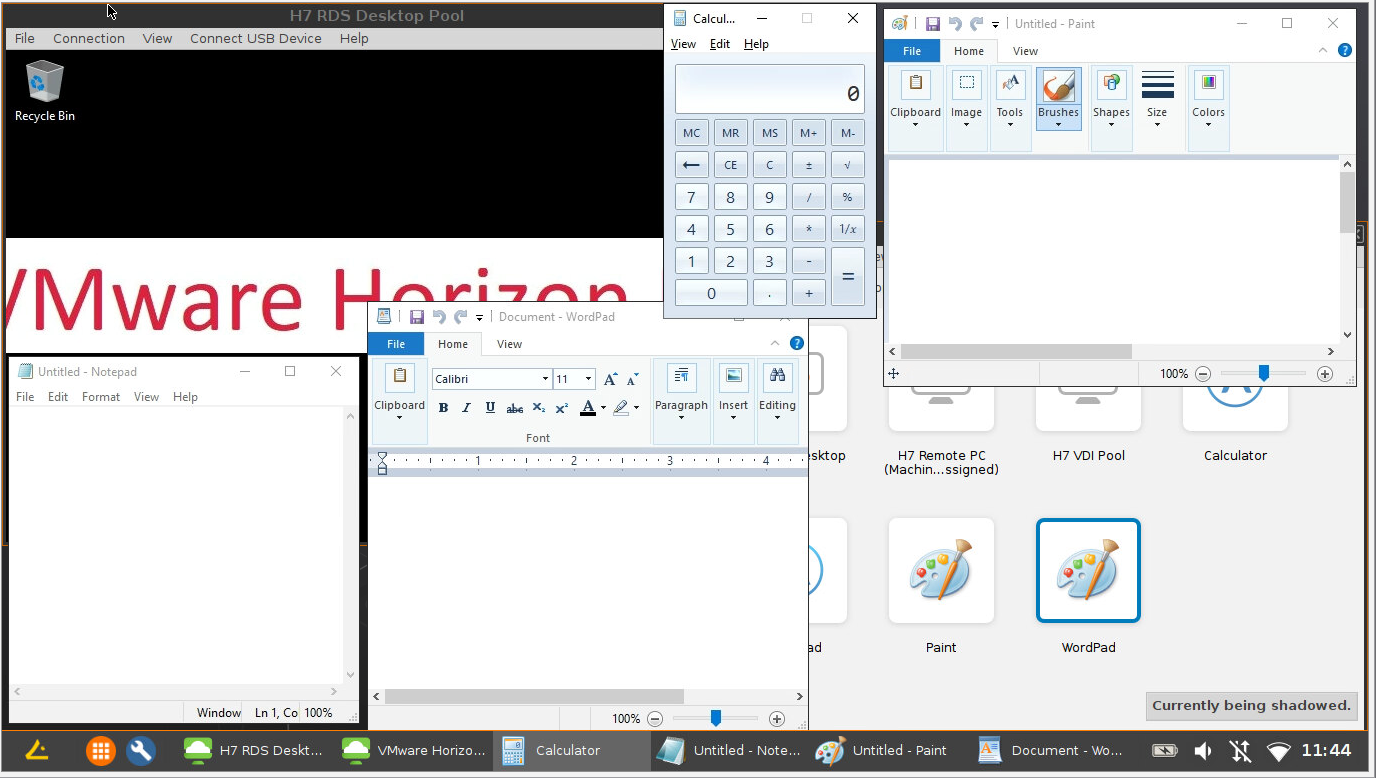
Figure 30 Leave the published resources running.
ControlUp
In the ControlUp console, expand EUC Environments, your Horizon environment, right-click Desktop Pools, click Focus, as shown in Figure 31.
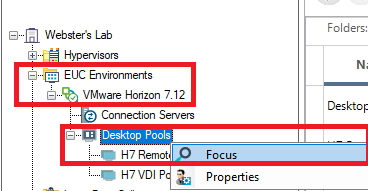
Figure 31 Figure 32 shows the console is now focused on the Desktop Pools.
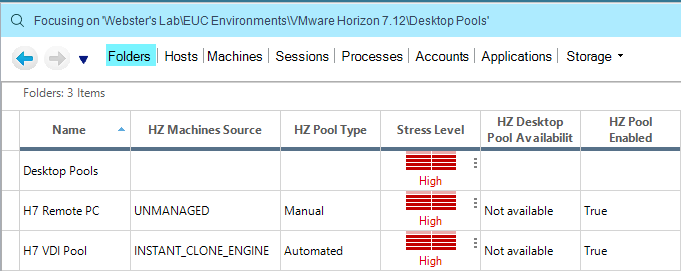
Figure 32 In Part 11, we will add the ControlUp agent to get more details.
Collapse EUC Environments.
Expand Linux Data Collectors, right-click IGEL, and click Focus, as shown in Figure 33.
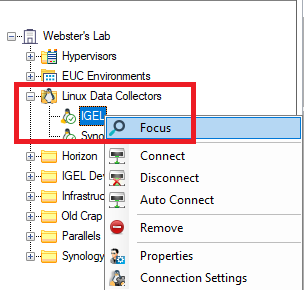
Figure 33 Change the Column Preset to Linux Default, as shown in Figure 34.
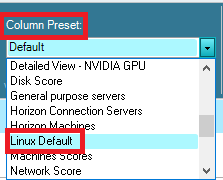
Figure 34 Figure 35 shows a high-level overview of the IGEL devices.
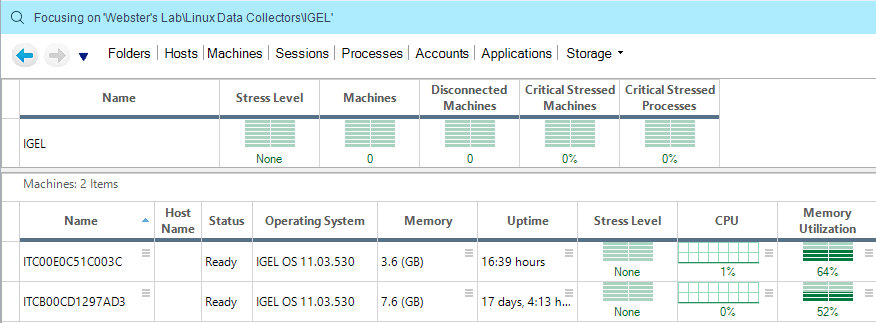
Figure 35 Double-click an IGEL device to see more detailed information, as shown in Figure 36.

Figure 36 You can exit out of all published resources and log off of all Horizon sessions.
Up next: Image Updating


June 12, 2020
Blog, VMware