On a recent project, I needed to set up high availability for the Citrix Virtual Apps and Desktops (CVAD) databases. The customer wanted to use Microsoft SQL Server 2016 Standard and I was tasked with implementing the new Basic Availability Groups. This article details the steps I took to implement Microsoft SQL Server 2016 Standard Basic Availability Groups for CVAD.
Updated 1-Jun-2021: Fixed the images, grammar, and missing text.
Update 13-Sep-2016: The article from Dell that I reference is no longer available. I found a cached copy, saved the relevant information, and put that information in place of the Dell support link.
The SQL database provides the foundation for all configuration information in the CVAD Site. Configuration, Logging, and Monitoring information are stored in the databases. The databases contained within a SQL server infrastructure are crucial to the continuous operation of the CVAD architecture and if it fails, effects ranging from loss of the ability to administer the CVAD site to the inability to connect to CVAD virtual desktops. SQL Server can be made highly available through a number of technologies.
Citrix supports various levels of database high availability for CVAD:
- SQL Server database mirroring
- Using the hypervisor’s high availability features
- SQL Clustering
- AlwaysOn Availability Groups
Those were the preferred order for versions 7.0, 7.1, 7.5, and 7.6. Starting with version 7.7, Citrix changed the order to:
- AlwaysOn Availability Groups
- SQL Server database mirroring
- SQL Clustering
- Using the hypervisor’s high availability features
Beginning with SQL Server 2016, Microsoft offers a new form of AlwaysOn Availability Groups (AAGs) named Basic Availability Groups (BAGs).
Overview of AlwaysOn Availability Groups
What are the differences between AAGs and BAGs?
- BAGs are only supported on SQL Server 2016 Standard Edition
- BAGs cannot be upgraded to AAGs
- A BAG is limited to one database
- You cannot add or remove a replica to an existing BAG
- Replicas can only run SQL Server 2016 Standard Edition (no prior versions)
- No backups on the secondary replica
- No read access on the secondary replica
- Limit of two replicas
There are, as expected, some Microsoft licensing guidelines you should pay attention to. Download the SQL Server 2016 License Guide for detailed licensing information.
The important financial part from page 20 of the license guide:
Failover Basics
For each server licensed with SQL Server 2016 and covered by active SA, customers can run-up to the same number of passive failover instances in a separate, operating system environment to support failover events. A passive SQL Server instance is one that is not serving SQL Server data to clients or running active SQL Server workloads. The passive failover instances can run on a separate server. These may only be used to synchronize with the primary server and otherwise maintain the passive database instance in a warm standby state in order to minimize downtime due to hardware or software failure.
• The secondary server used for failover support does not need to be separately licensed for SQL Server as long as it is truly passive, and the primary SQL Server is covered with active SA.
What this means is that if you have Microsoft SA on your SQL Server 2016 Standard software, the second SQL Server used for the BAG’s replica does not need a separate license if it meets the criteria. I am no Microsoft (or Citrix) license expert so please check with Microsoft licensing if you have any questions.
Citrix tested CVAD 7.9 with SQL Server 2016 Standard Edition Basic Availability Groups and fully supports using the two together.
This article describes, in detail, the process I used to implement BAGs for use with a new CVAD Site.
High-Level Overview
- Create a Windows Failover Cluster
- Give the new cluster object the right to create computer objects in the container or OU the cluster object resides in
- Give the new cluster object the right to create child objects in the DNS forward lookup zone
- Install two independent Microsoft SQL Server 2016 Standard Edition servers using Latin_100_General_CI_AS_KS Collation
- On the first SQL server, install the SQL Management Studio
- Add the second SQL server to the SQL Management Studio
- Create a share for the BAG database seeding
- Enable AlwaysOn Availability Groups on the SQL Server service on both SQL servers
- Create the three databases needed for CVAD
- Do a full backup of the three databases
- Create three BAGs and Listeners
- Verify on the second SQL server that the BAGs have replicated
- Now you are ready for the CVAD Site creation
Create a Windows Failover Cluster
If you plan to create your Windows Failover Cluster using multiple subnets or spanning different physical locations, there are some important considerations. Please read this Microsoft article before you start building such a cluster.
https://blogs.msdn.microsoft.com/sambetts/2014/05/16/building-true-multi-subnet-windows-server-failover-clusters/
From the advice given by several SQL MVPs, I created an OU named SQL2016Cluster that contains the two SQL servers.
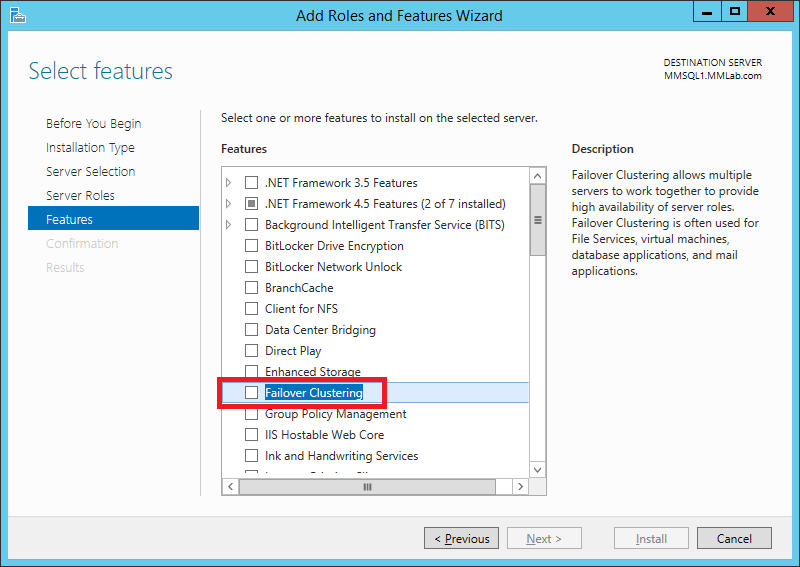
On both SQL servers, install the Failover Clustering Feature, as shown in Figure 1.
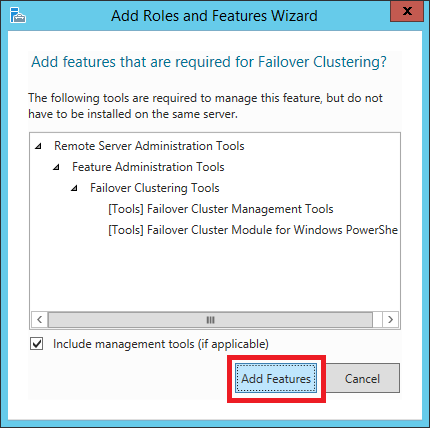
Add the Failover Clustering management tools, as shown in Figure 2.
Before creating the failover cluster, install all Windows Updates and restart the server.
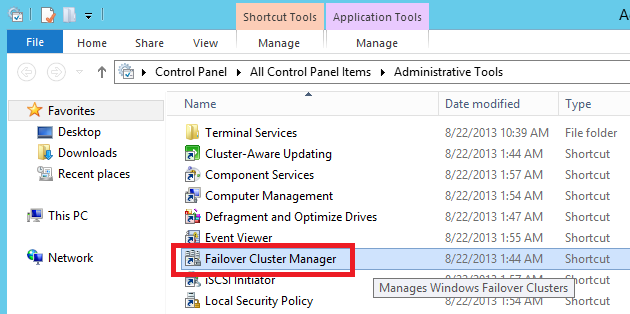
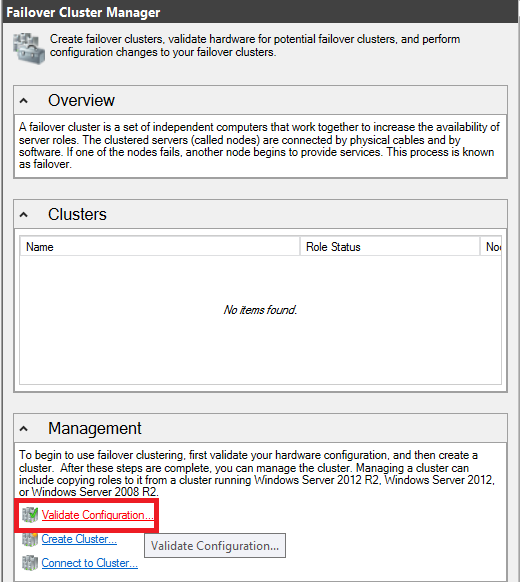
After the server restarts, log in on the first SQL server, go to Administrative Tools and select Failover Cluster Manager, as shown in Figure 3.
In the middle pane, under Management, select Validate Configuration…, as shown in Figure 4
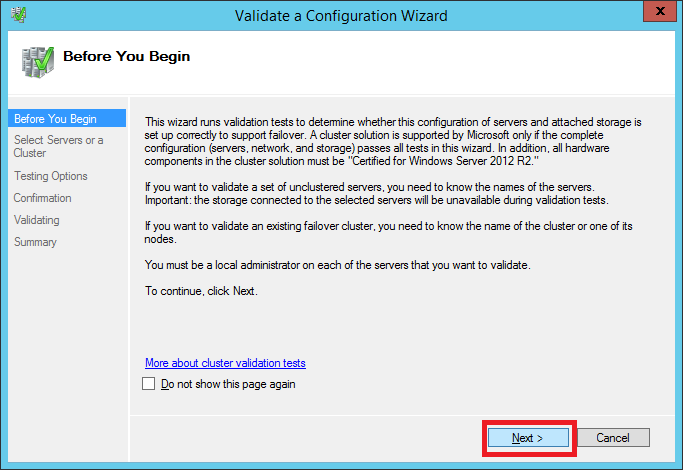
Click Next, as shown in Figure 5.
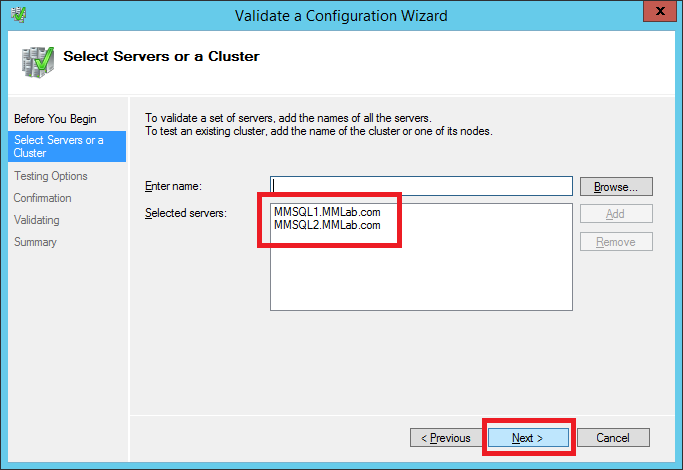
Enter the FQDN of the two SQL servers by typing in the names or by clicking Browse and searching for the servers and click Next, as shown in Figure 6.
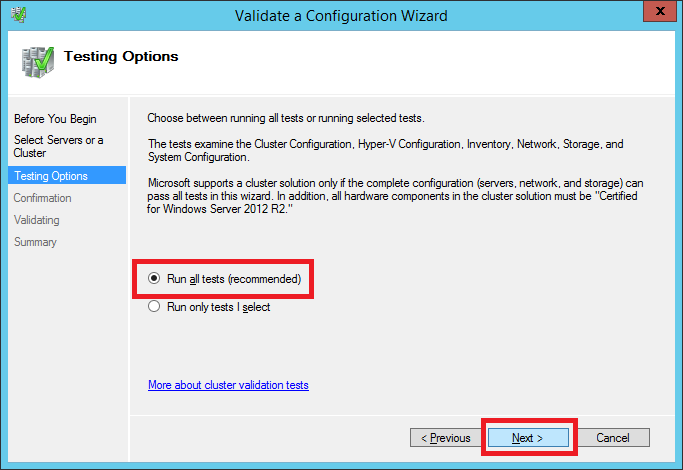
Select Run all tests and click Next, as shown in Figure 7.
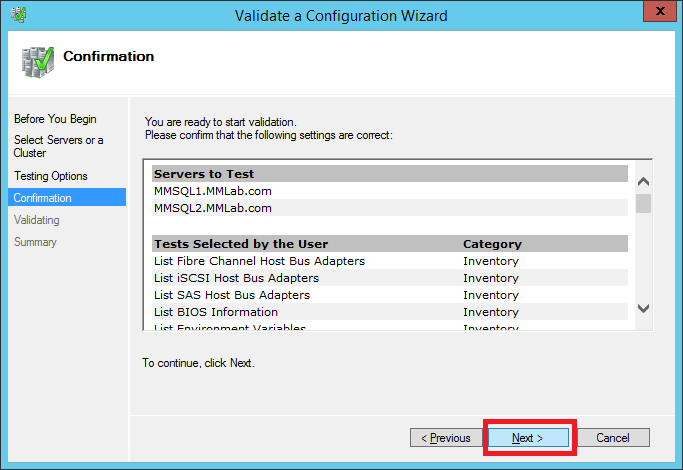
Click Next, as shown in Figure 8.
Validation testing begins, as shown in Figure 9.

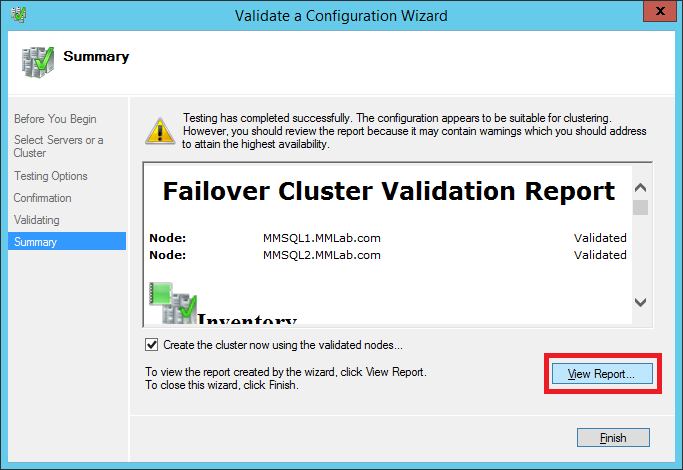
Click View Report… and leave Create the cluster now using the validated nodes… selected, as shown in Figure 10.
Analyze the report for warnings and errors. In a lab or small environment, some warnings can be safely ignored. In a production environment, you will need multiple paths to the network. It is also important that both SQL servers have the same Windows Updates.
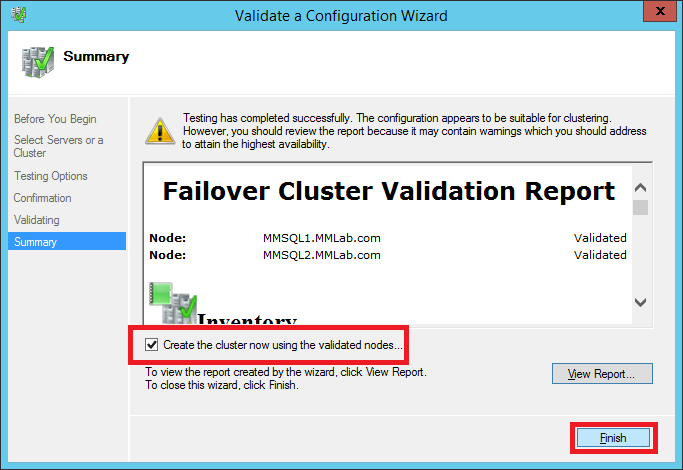
Click Finish to create the cluster, as shown in Figure 11.
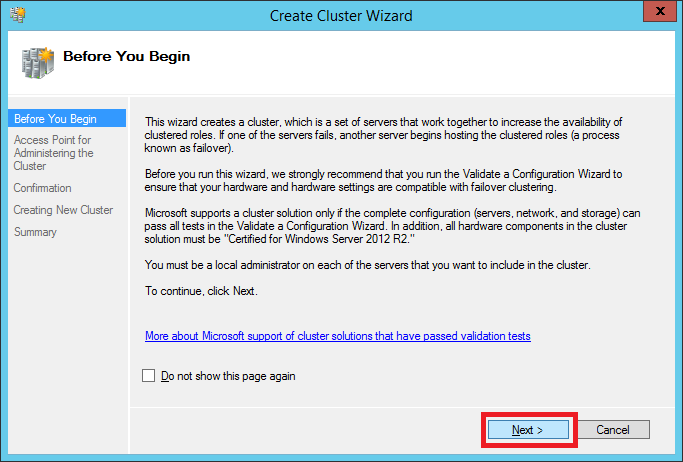
Click Next, as shown in Figure 12.
Enter a Cluster Name, an IP Address, and click Next, as shown in Figure 13.
The Cluster Name is the name of a computer account created in Active Directory and a DNS “A” record is created with the IP address entered. The Cluster Name is used to refer to the cluster instead of using the name of the two SQL servers.

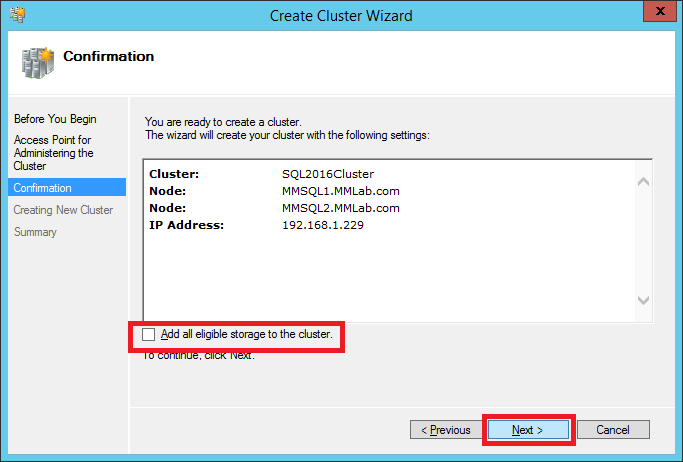
Unselect Add all eligible storage to the cluster and click Next, as shown in Figure 14.
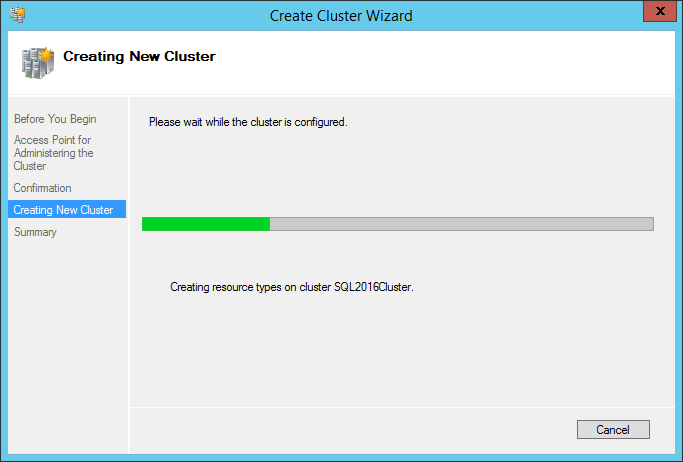
The cluster creation process starts, as shown in Figure 15.
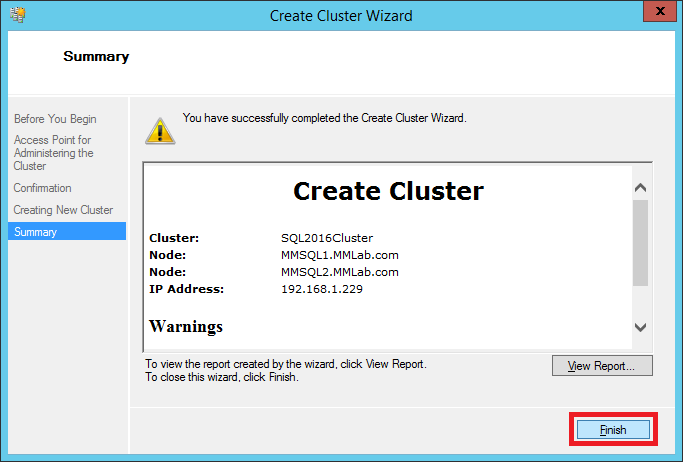
When the cluster creation is complete, click Finish, as shown in Figure 16.
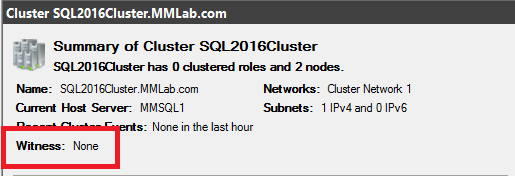
The Failover Cluster Manager console shows the new cluster, as shown in Figure 17.
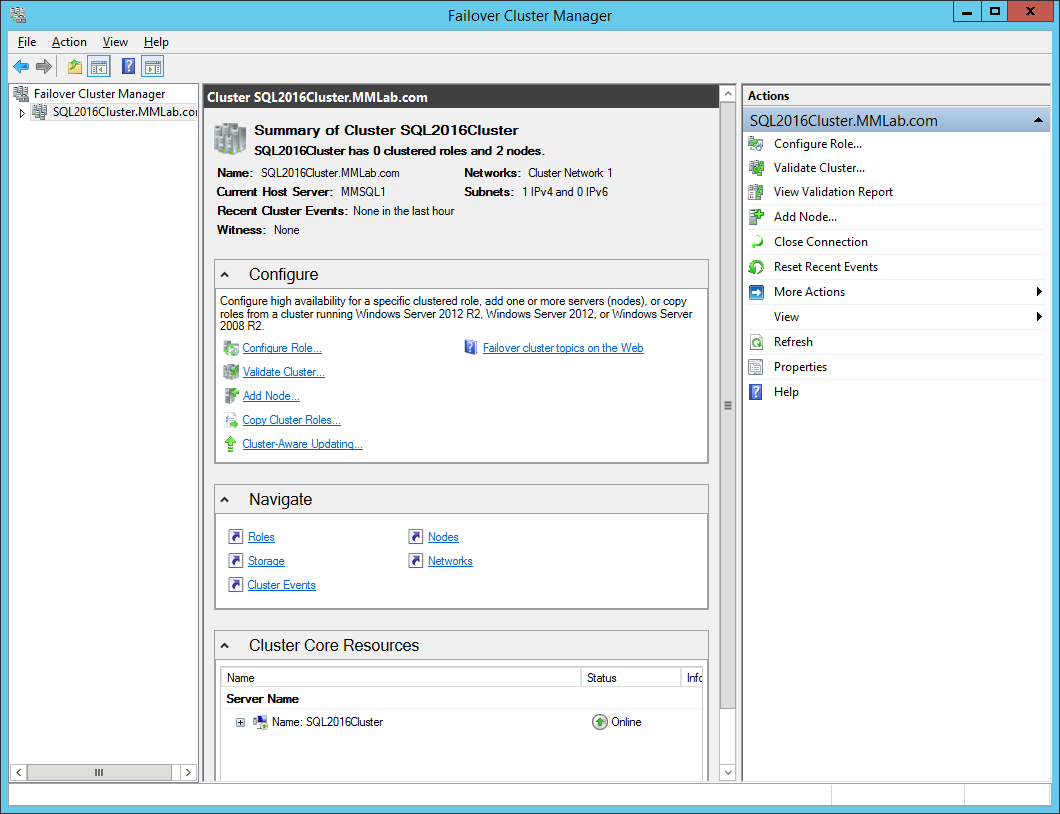
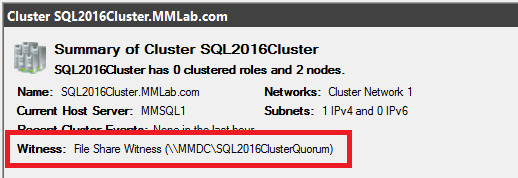
As shown in Figure 18, the console shows there is no Witness configured for the cluster.
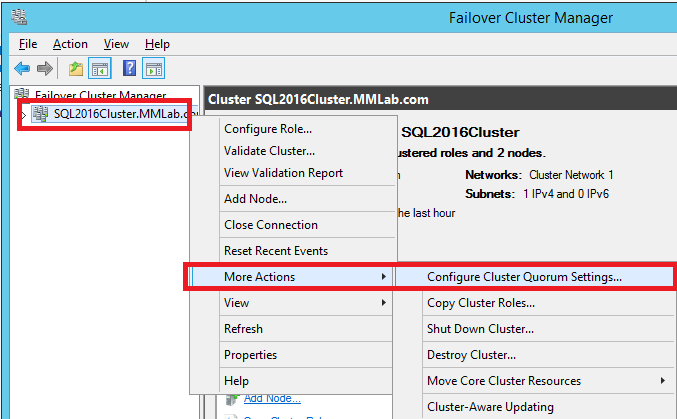
Right-click the Cluster name, select More Actions, and click Configure Cluster Quorum Settings…, as shown in Figure 19
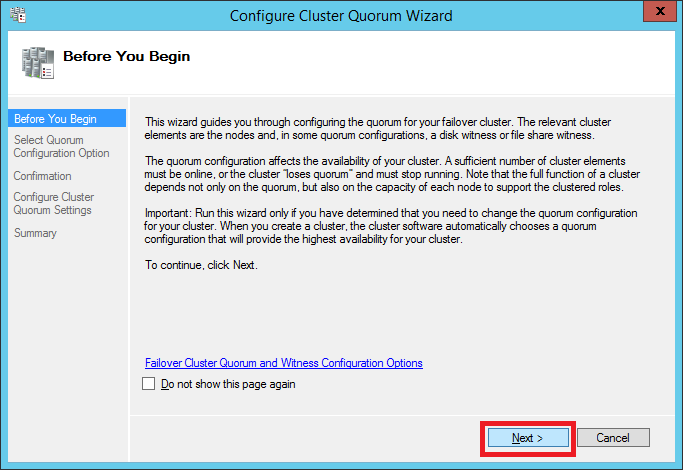
Click Next, as shown in Figure 20.
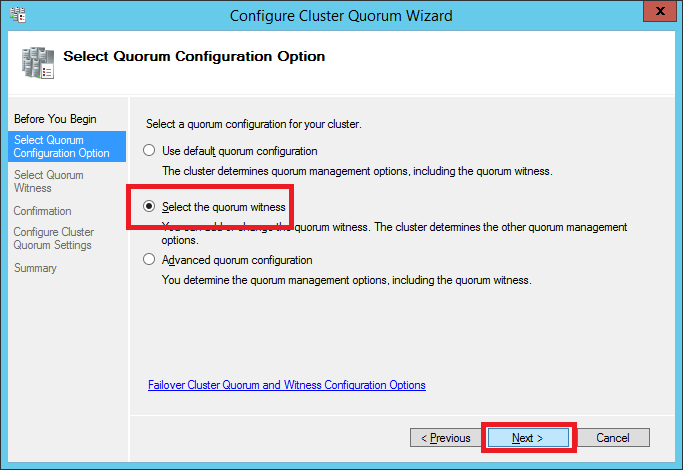
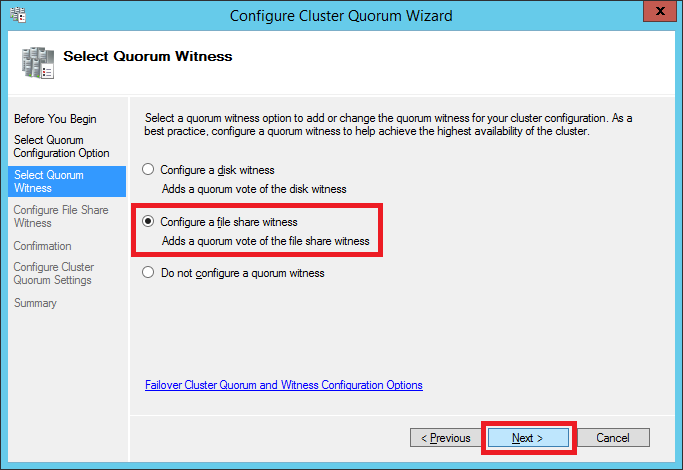
Select Select the quorum witness and click Next, as shown in Figure 21.
A Basic Availability Group requires two independent Microsoft SQL Server 2016 Standard servers built on top of a Windows Failover Cluster. There is no need for shared storage for the cluster or the two SQL servers. A Windows Failover Cluster requires a Witness to determine if the two nodes of the cluster are online and communicating. For this cluster, a simple file share is used. In a production environment, this file share should be on a highly available server and highly available storage. For this lab, I am using my single domain controller.
Note: If this is a multiple subnet cluster or a cluster spanning different physical locations, make sure the quorum witness is on a third subnet or location.
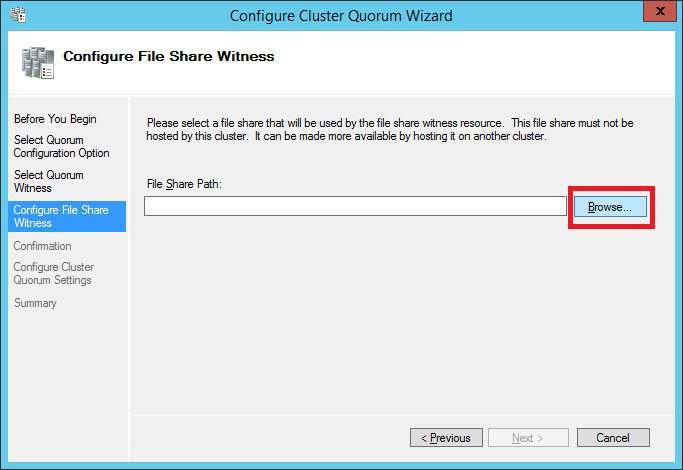
Select Configure a file share witness and click Next, as shown in Figure 22.
Click Browse, as shown in Figure 23.
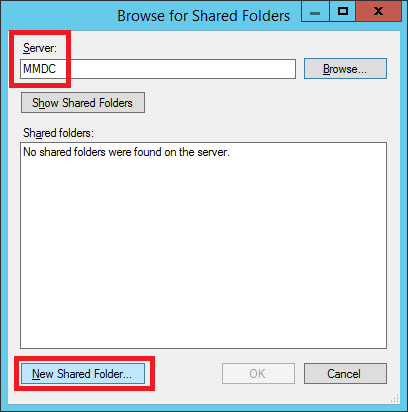
Enter the name of the server and click New Shared Folder…, as shown in Figure 24
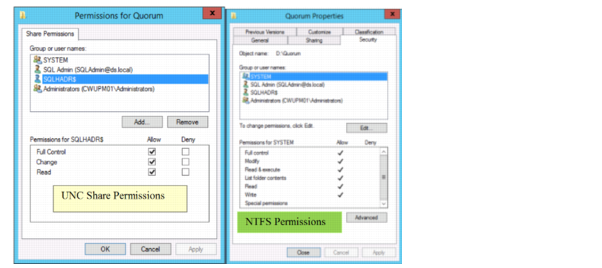
Dell had a very good article on configuring the file share and NTFS permissions but it has since been removed. Here is the relevant information from the original Dell article:
Quorum File Share Witness
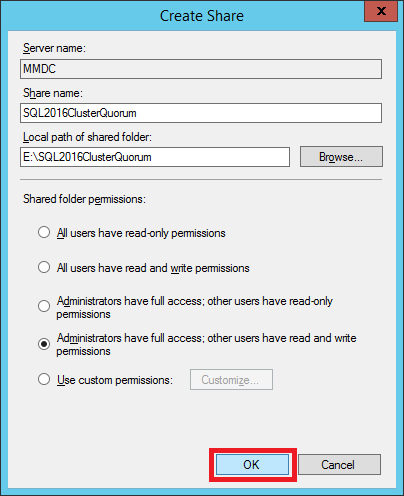
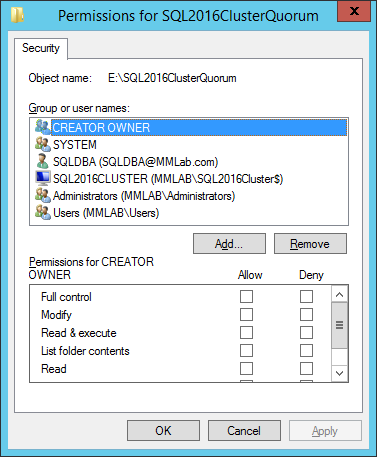
Both NTFS permissions and File Share permissions need to be assigned to the Cluster Host Name Object Account. For permissions, the Cluster Host Name Object is an Active Directory Computer account. Assign both NTFS and File Share identical permissions.
Click on the share permissions and clear out the previous inherited entries and add the following permissions:
Cluster Name Object (CNO) Account – Full Control
SYSTEM – Full Control
SQL Database Engine Service Account – Full Control
Local Server Administrators Group – Full Control
Configure the share as required and click OK, as shown in Figure 25.
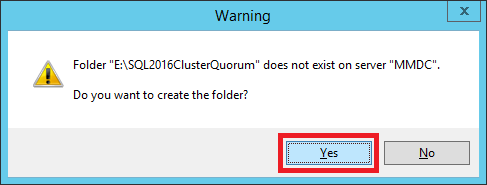
Click Yes, as shown in Figure 26.
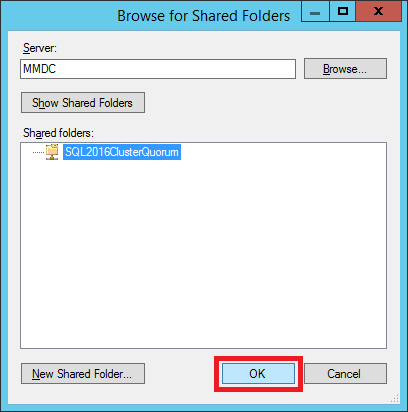
Click OK, as shown in Figure 27.
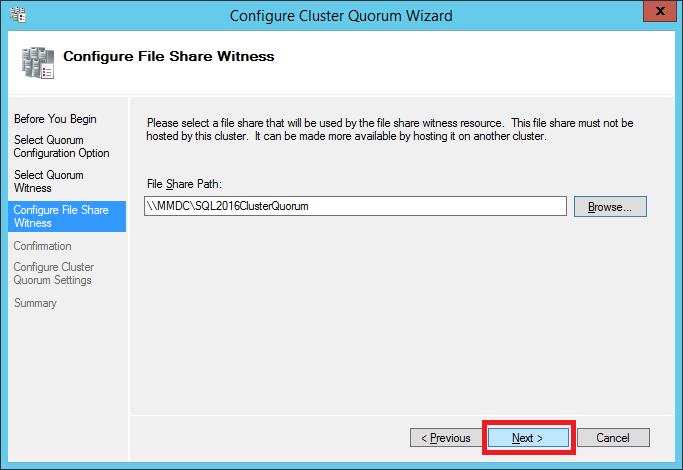
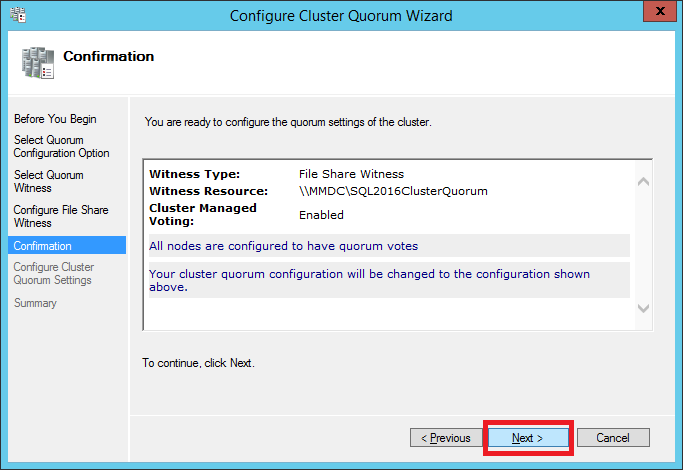
Click Next, as shown in Figure 28.
Click Next, as shown in Figure 29.
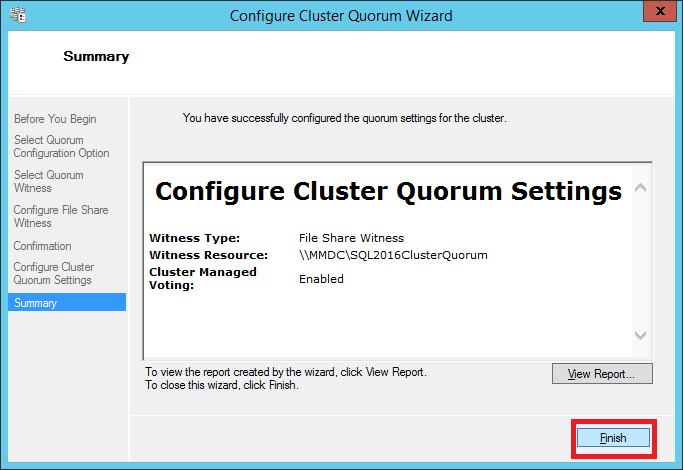
Click Finish, as shown in Figure 30.
Next, I went to the server with the share to verify Share and NTFS permissions according to the Dell document, as shown in Figures 31 and 32.
Share permissions:
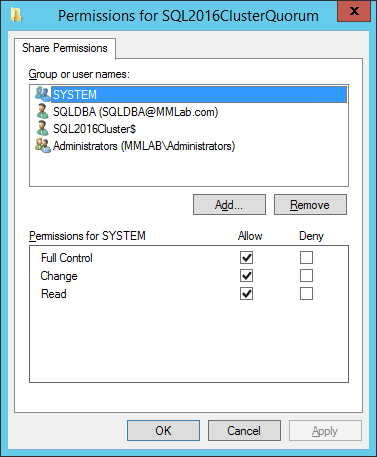
NTFS permissions:
As seen in Figure 33, the Failover Cluster Manager now shows the Witness configured.
Configure Cluster Object
Before continuing, the cluster computer object requires the rights to create computer objects and DNS child objects.
Because I moved my two SQL server computer accounts to a specific OU, the cluster computer account is in the same OU, as shown in Figure 34.
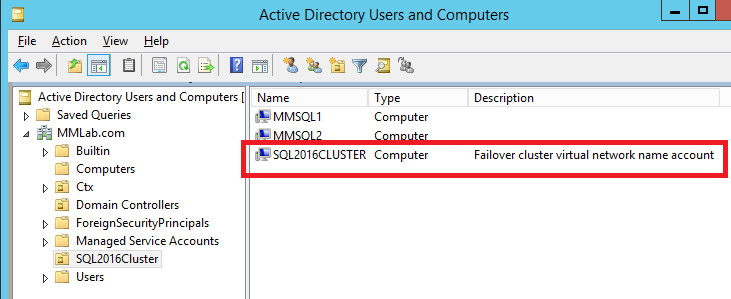
The cluster computer account needs rights to create computer accounts in the Container or OU it resides in. The process of creating the Basic Availability Groups creates computer accounts for the Listeners.
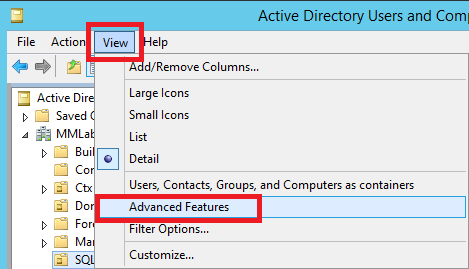
In Active Directory Users and Computers, click View and then Advanced Features, as shown in Figure 35.
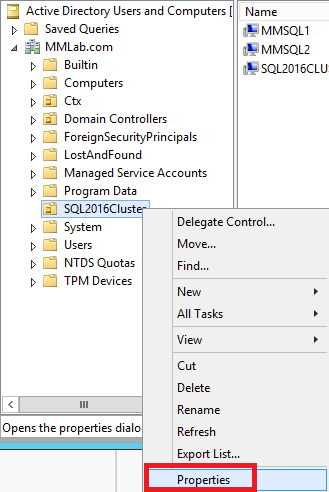
Right-click the Container or OU and click Properties, as shown in Figure 36.
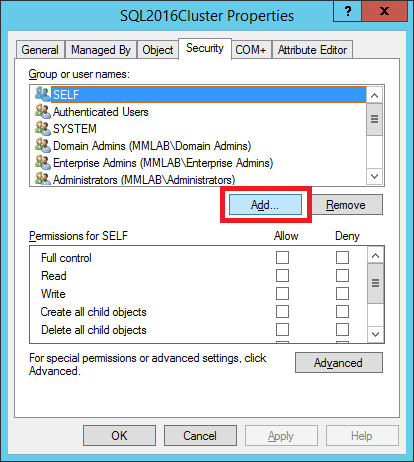
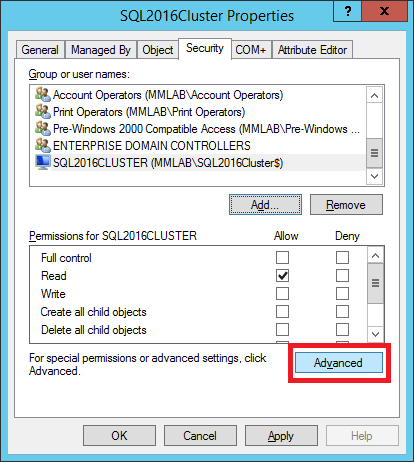
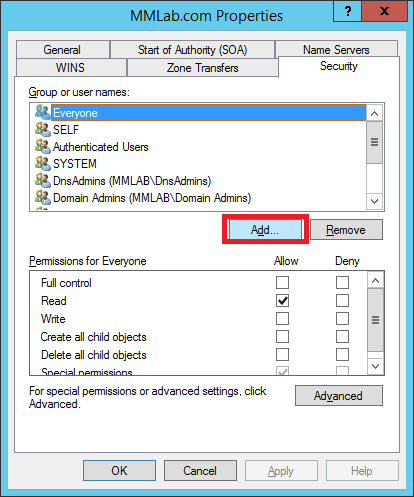
Click the Security tab, as shown in Figure 37.

Click Add…, as shown in Figure 38.
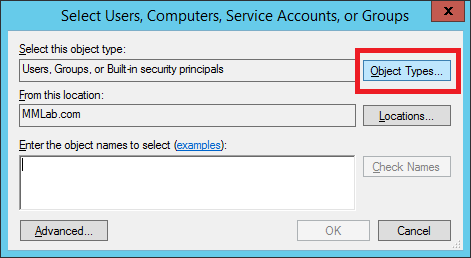
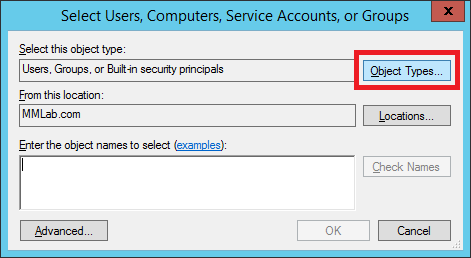
Click Object Types…, as shown in Figure 39.
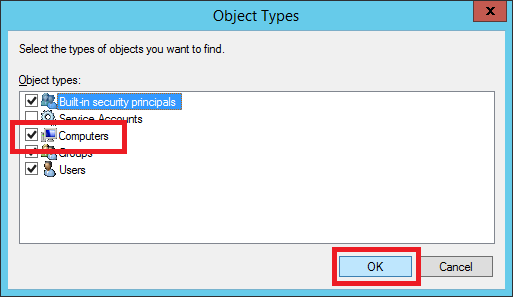
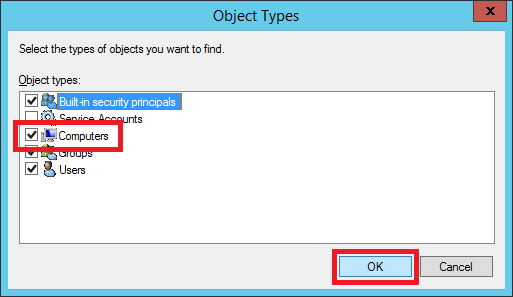
Select Computers and click OK, as shown in Figure 40.
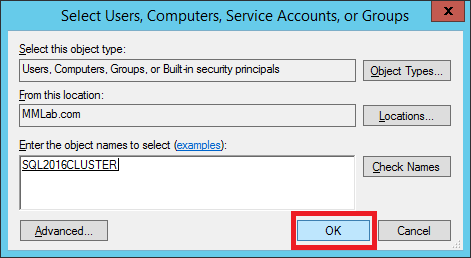
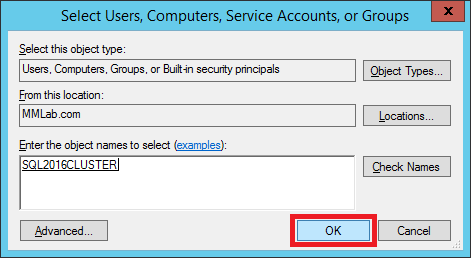
Enter the name of the cluster computer account, click Check Name and click OK, as shown in Figure 41.
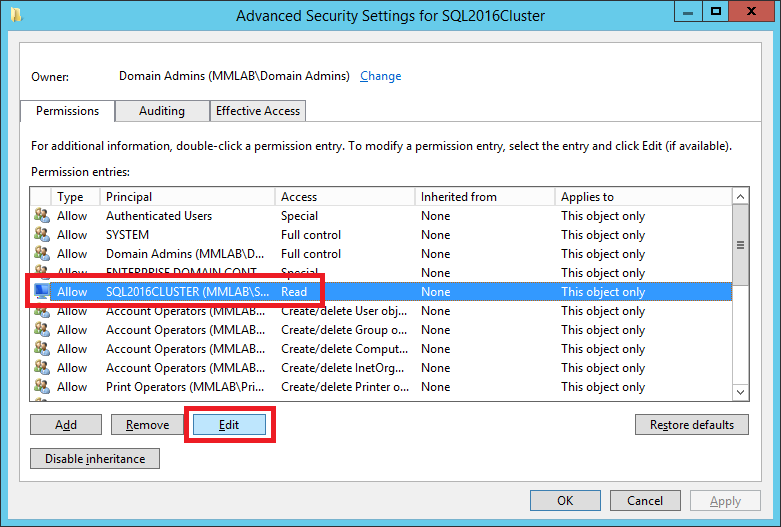
Click Advanced, as shown in Figure 42.
Select the cluster computer account and click Edit, as shown in Figure 43.
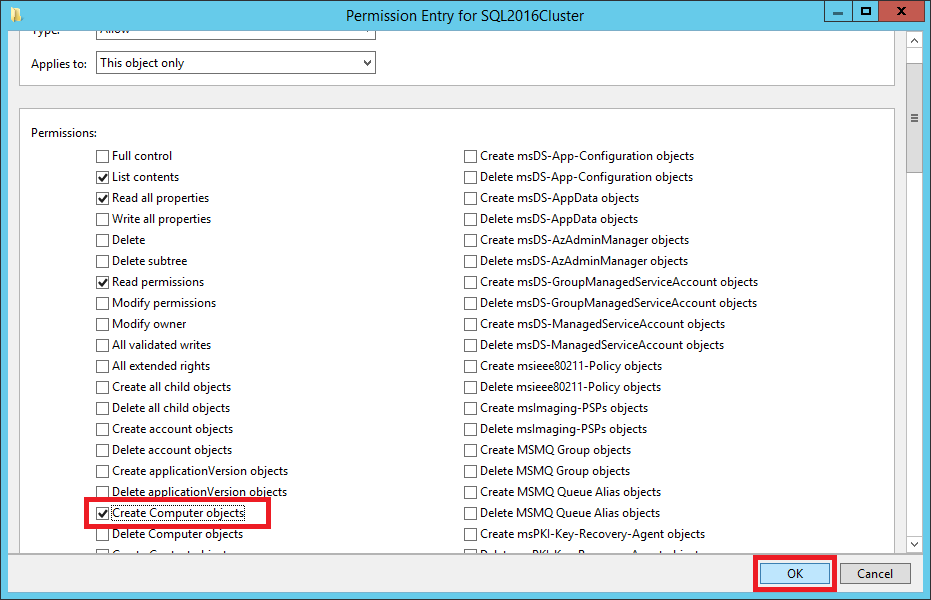
Scroll down, select Create Computer objects and click OK, as shown in Figure 44.
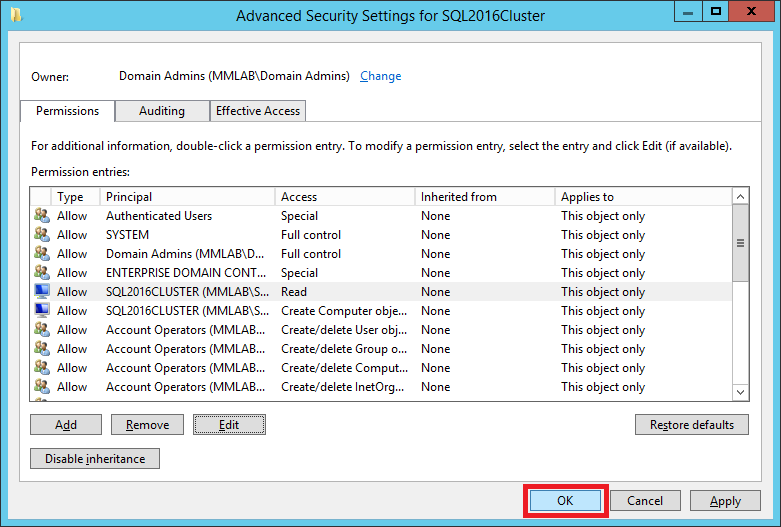
Click OK, as shown in Figure 45.
Click OK, as shown in Figure 46.
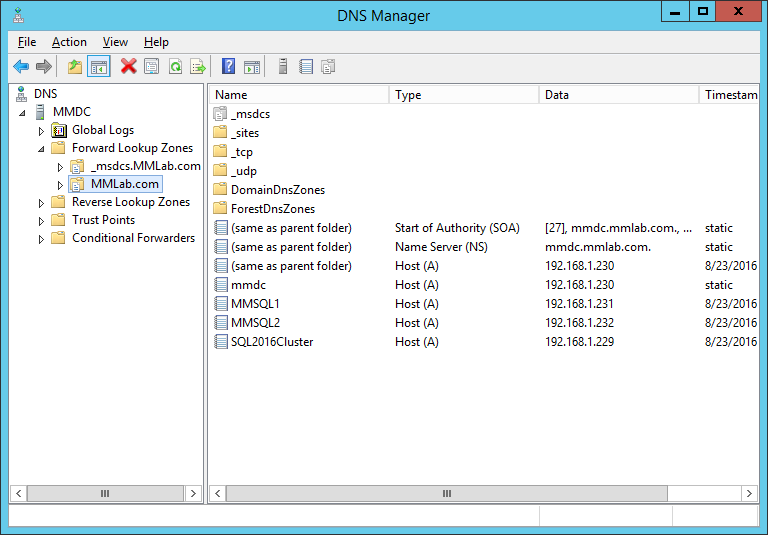
Exit Active Directory Users and Computers, open the DNS Manager, and expand to the domain’s Forward Lookup Zone, as shown in Figure 47. The SQL cluster computer account needs rights to create DNS records. The process of creating the Basic Availability Groups creates DNS “A” records for the Listeners.
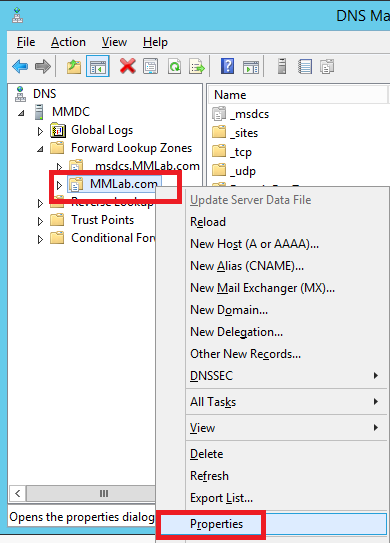
Right-click the domain’s zone and click Properties, as shown in Figure 48.
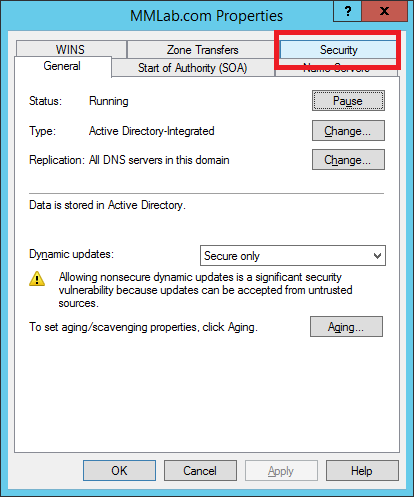
Click the Security tab, as shown in Figure 49.
Click Add…, as shown in Figure 50.
Click Object Types…, as shown in Figure 51
Select Computers and click OK, as shown in Figure 52.
Enter the name of the SQL cluster computer account, click Check Names, and click OK, as shown in Figure 53.
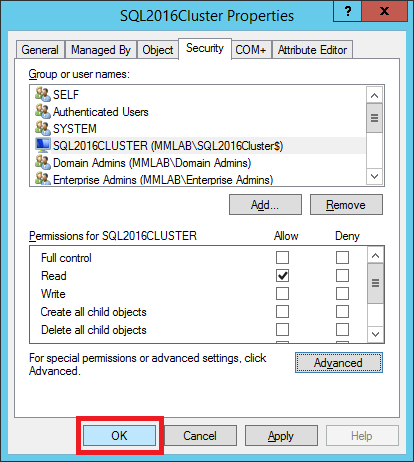
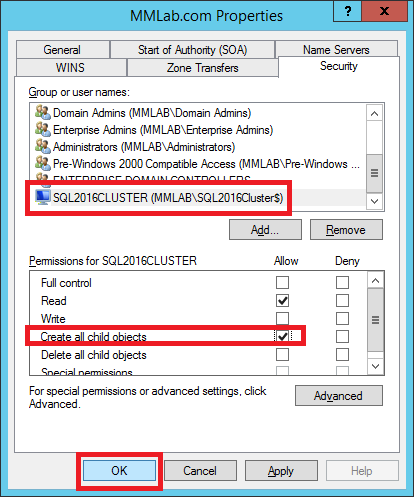
Select the SQL cluster computer account, select Allow for Create all child objects and click OK, as shown in Figure 54.
Exit the DNS Manager.
Install Microsoft SQL Server 2016 Standard
I created two SQL-related user accounts in AD. A service account, svc_sql, that is used for the SQL services and sqldba, that is a full SQL sysadmin and local admin. I created a GPO Preference to place the sqldba account in the local administrators group.
On both SQL server VMs, mount the ISO for SQL Server 2016 Standard.
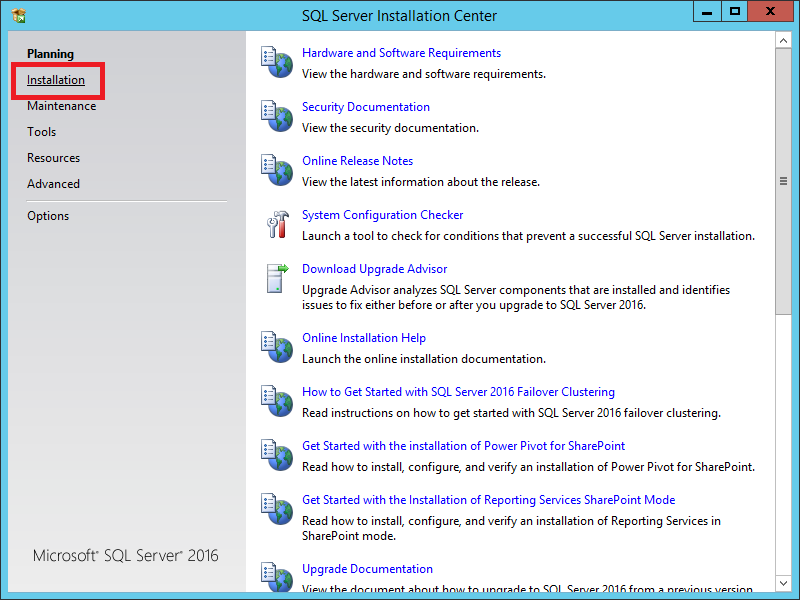
When the SQL Server Installation Center appears, click Installation, as shown in Figure 55.
Click New SQL Server stand-alone installation or add features to an existing installation, as shown in Figure 56.

Click Next, as shown in Figure 57.
Note: This step could be different for you as I am using MSDN media for my lab. I believe the commercial version of the SQL Server installation may have you select the licensing method.

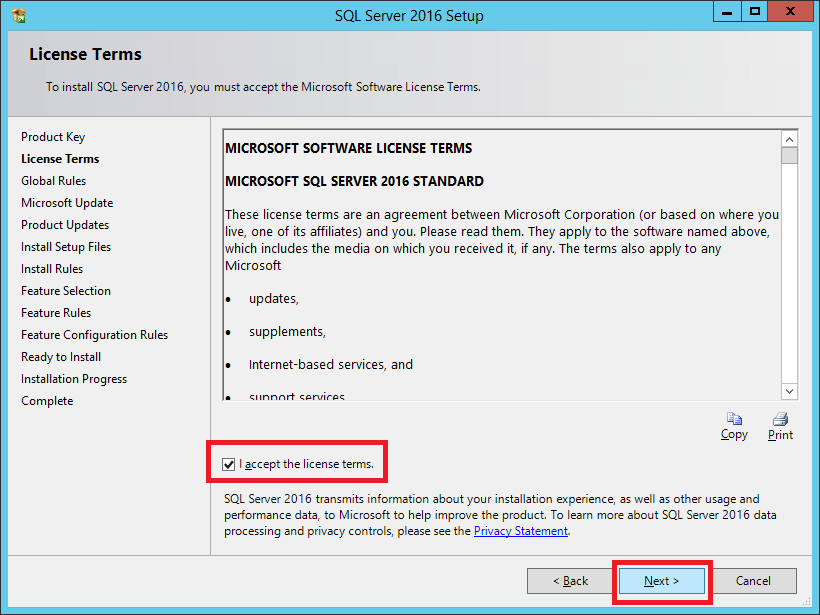
Select I accept the license terms and click Next, as shown in Figure 58.
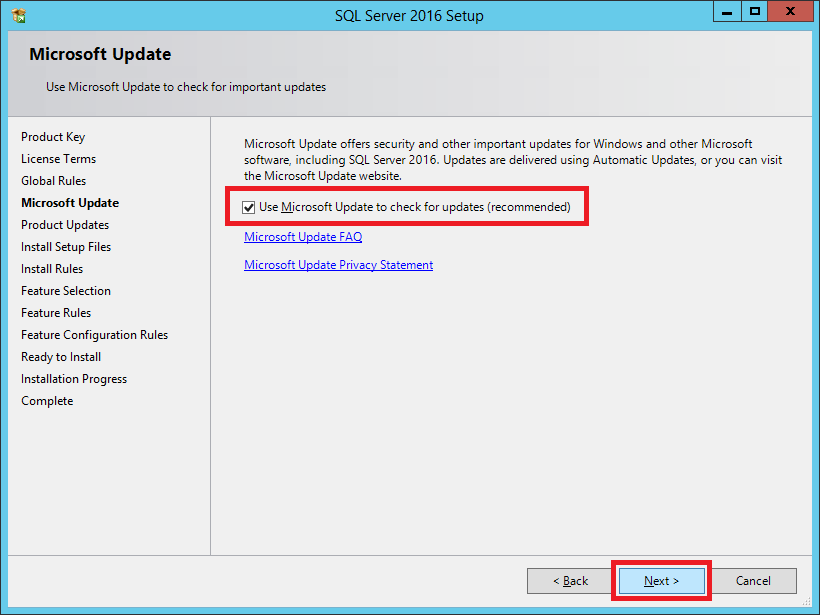
Select Use Microsoft Update to check for updates and click Next, as shown in Figure 59.
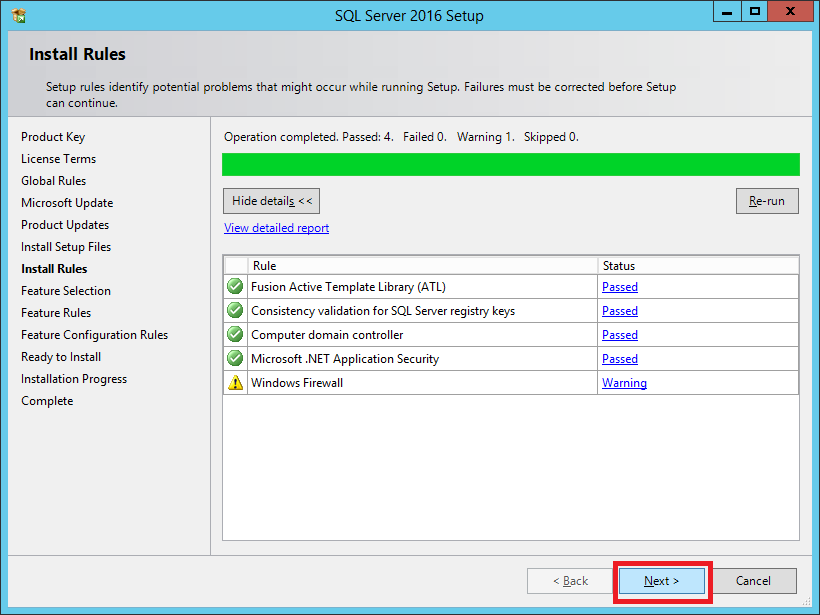
Resolve any Warning and Failures and click Next, as shown in Figure 60.
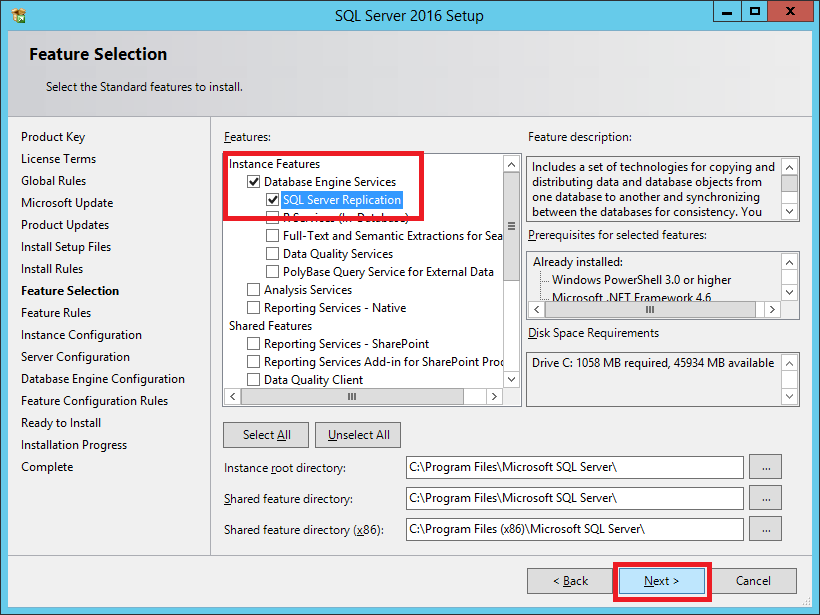
Select Database Engine Service and SQL Server Replication and click Next, as shown in Figure 61.
Do not (and you cannot) put any of the root directories on the cluster shared drive.
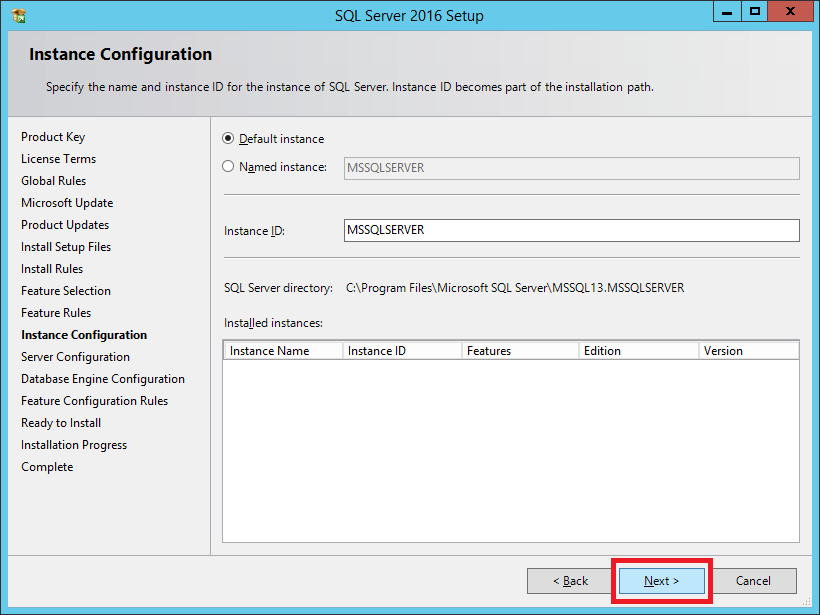
Click Next, as shown in Figure 62.
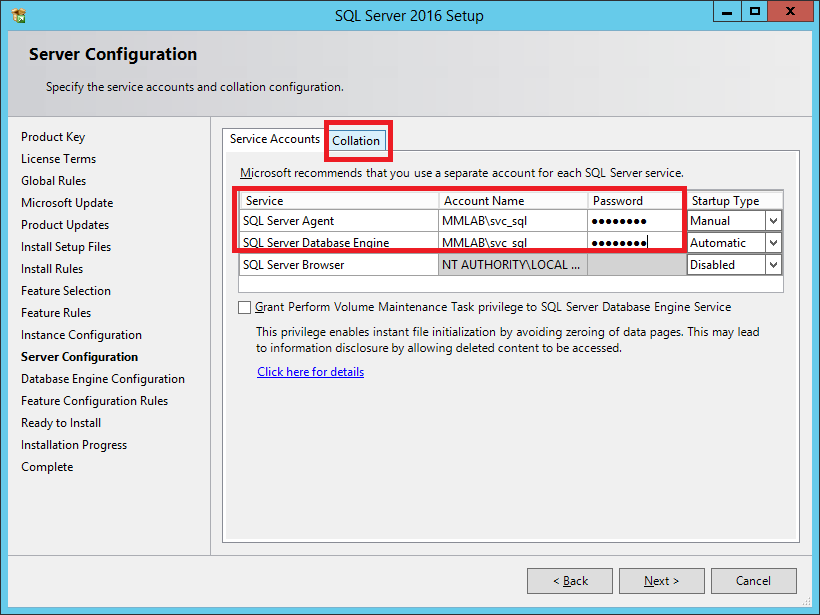
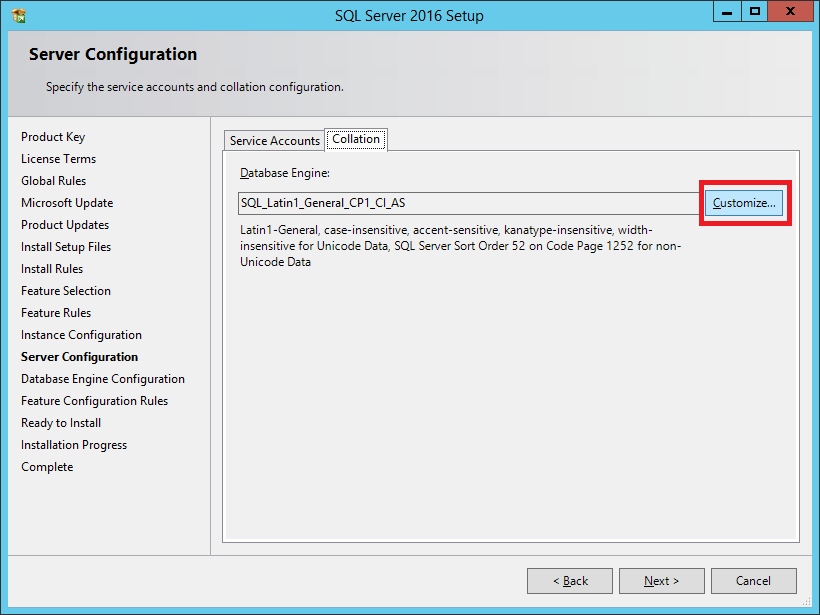
Enter the SQL service account name and password and click the Collation tab, as shown in Figure 63.
Click Customize…, as shown in Figure 64.
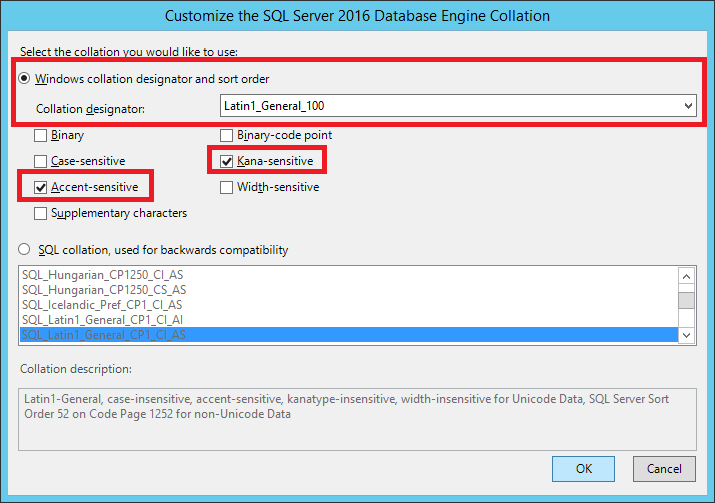
Select Windows collation designator and sort order, Latin1_General_100 for Collation designator, Accent-sensitive, Kana-sensitive, and click OK, as shown in Figure 65.
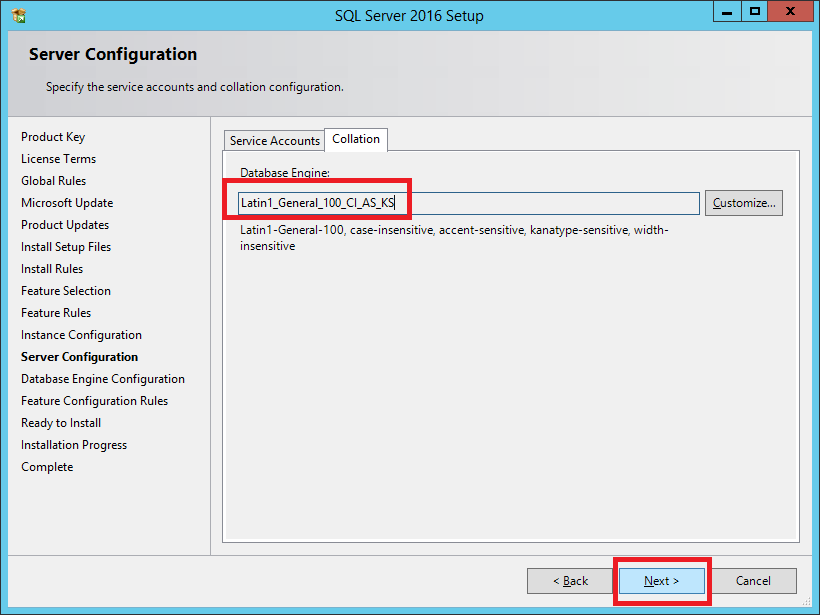
The Citrix recommended SQL collation of Latin1_General_100_CI_AS_KS is created by the previous options. Click Next, as shown in Figure 66.
https://docs.citrix.com/en-us/xenapp-and-xendesktop/7-9/technical-overview/databases.html
“Use a collation that ends with “_CI_AS_KS”. Citrix recommends using a collation that ends with “_100_CI_AS_KS”.”
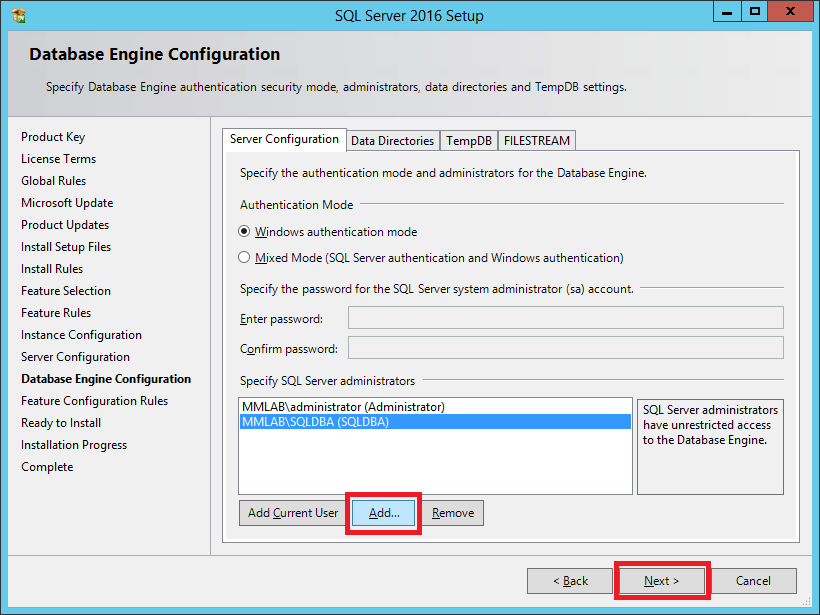
Select Windows authentication mode and click Add Current User, as shown in Figure 67.
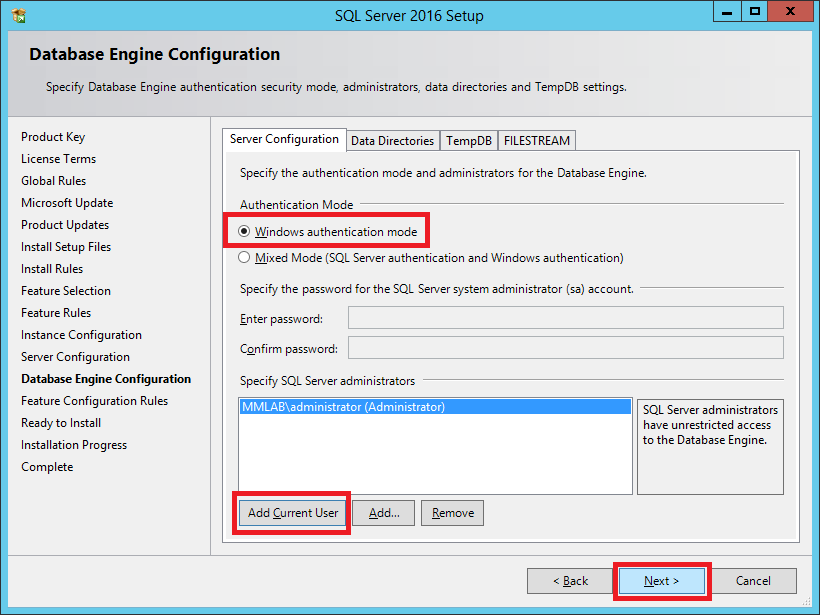
Click Add…, add the sqldba account and click Next, as shown in Figure 68.
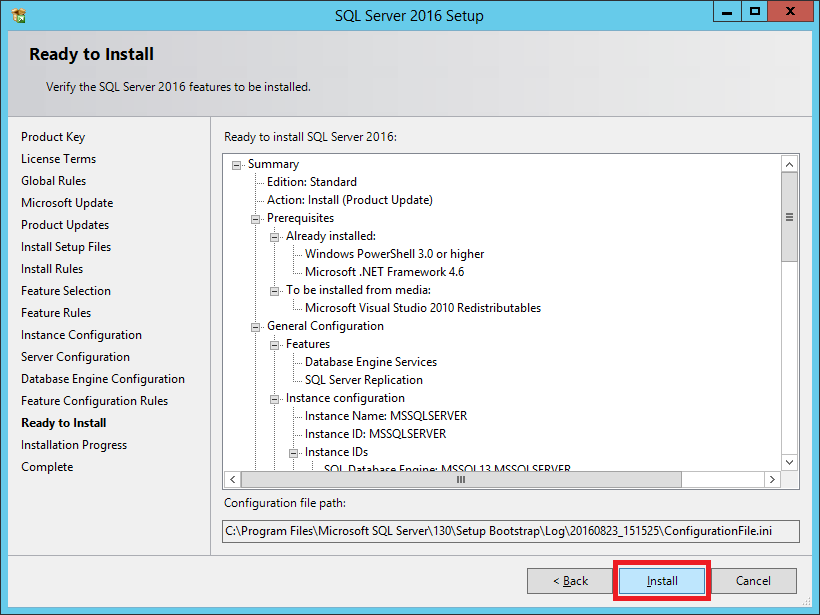
Click Install, as shown in Figure 69.
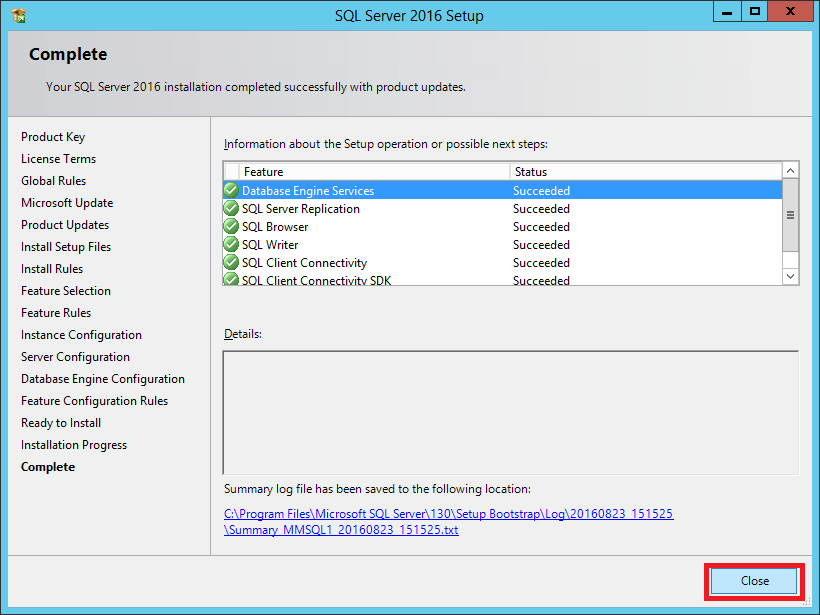
As shown in Figure 70, the installation of SQL Server 2016 Standard begins.

After SQL Server installation completes, click Close, as shown in Figure 71.
On the second SQL Server, exit the SQL Server Installation Center and eject the ISO.
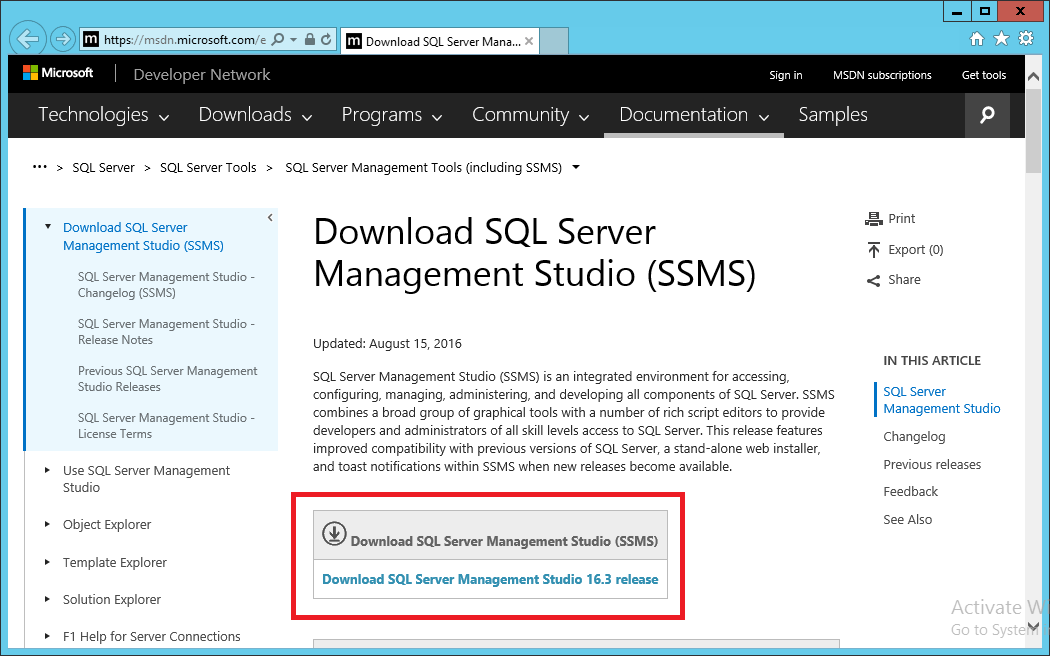
On the first SQL Server, select Install SQL Server Management Tools, as shown in Figure 72.
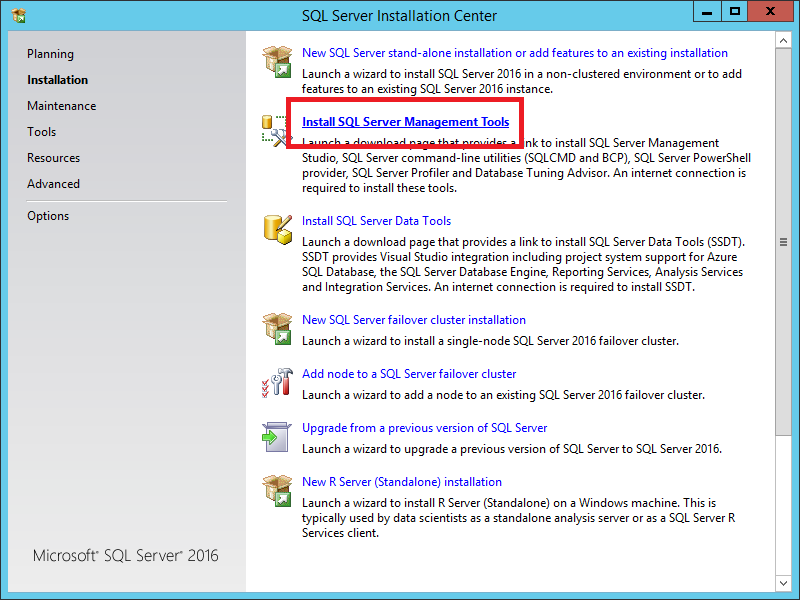
Download and install the SQL Server Management Studio, as shown in Figure 73.
Exit your Internet browser and the SQL Server Installation Center on the first SQL Server. Eject the SQL Server ISO.
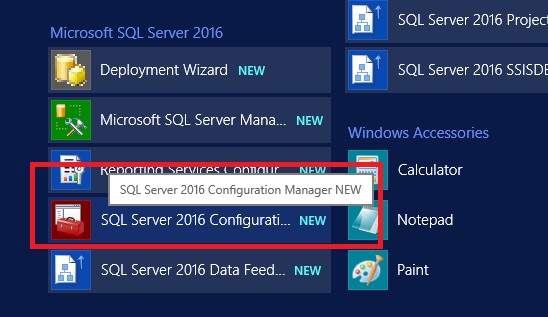
On both SQL servers, start SQL Server 2016 Configuration Manager, as shown in Figure 74.
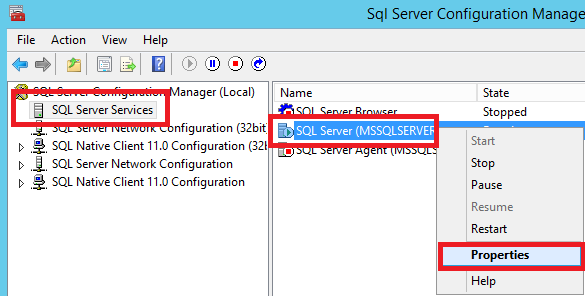
Click SQL Server Services, then right-click SQL Server (instance name) and click Properties, as shown in Figure 75.
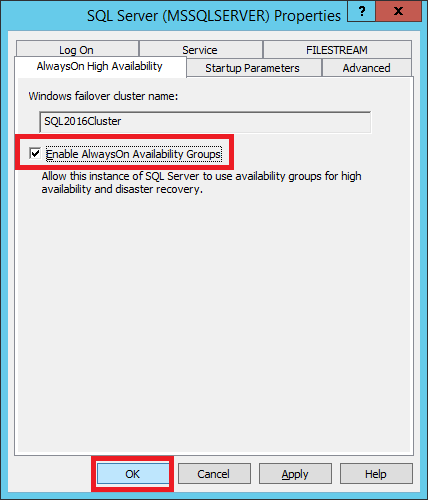
Click the AlwaysOn High Availability tab, as shown in Figure 76.
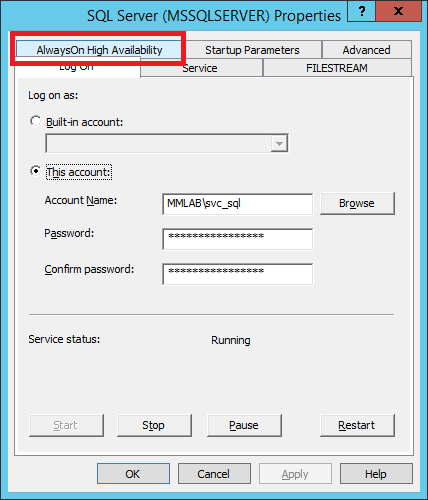
Select Enable AlwaysOn Availability Group and click OK, as shown in Figure 77.
Right-click SQL Server (instance name) and click Restart, as shown in Figure 78.
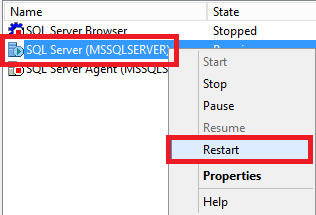
After the service restarts, exit the SQL Server 2016 Configuration Manager.
Install all Windows Updates on both SQL Servers.
Create Databases for CVAD
CVAD uses three databases: Site, Logging, and Monitoring. Each is created and configured the same way. The only difference is the name.
Creating the Basic Availability Groups requires a network file share for the initial data synchronization. I created a folder and share name SQL2016Share with default Share and NTFS permissions.
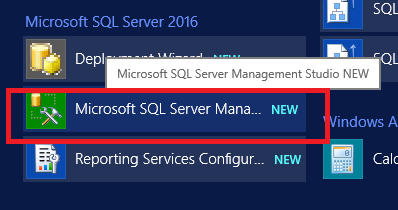
On the first SQL Server, launch SQL Server Management Studio, as shown in Figure 79.
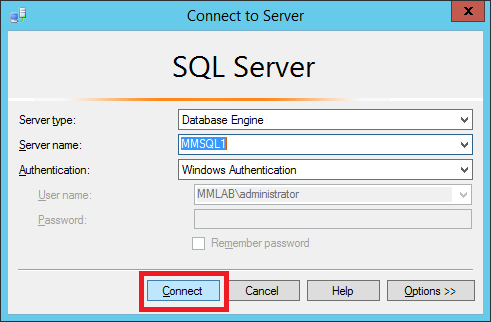
Click Connect, as shown in Figure 80.
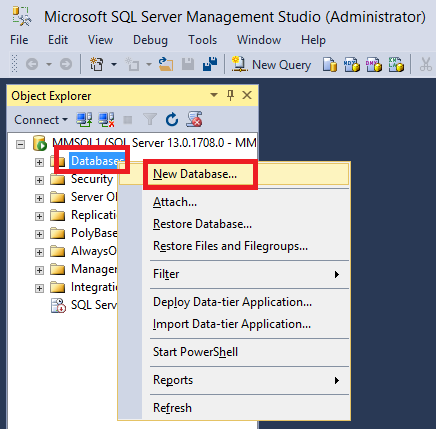
Right-click Databases and click New Database…, as shown in Figure 81.
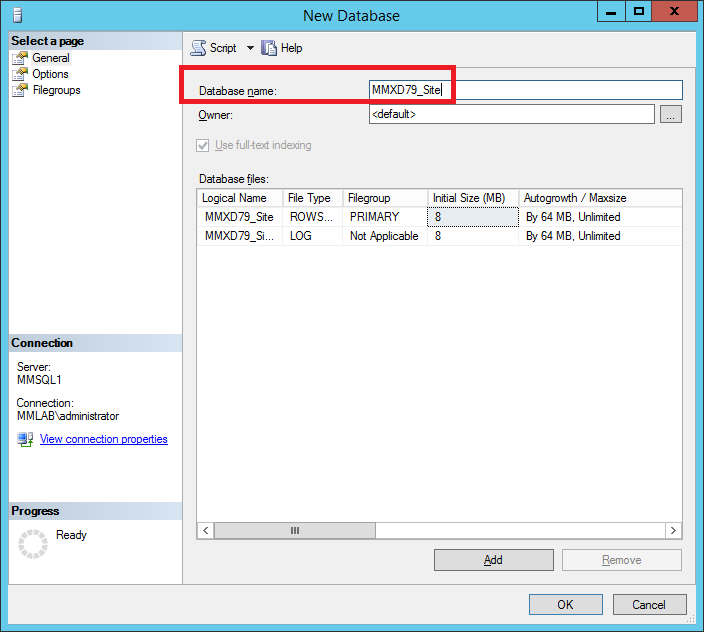
Enter a Database name, as shown in Figure 82.
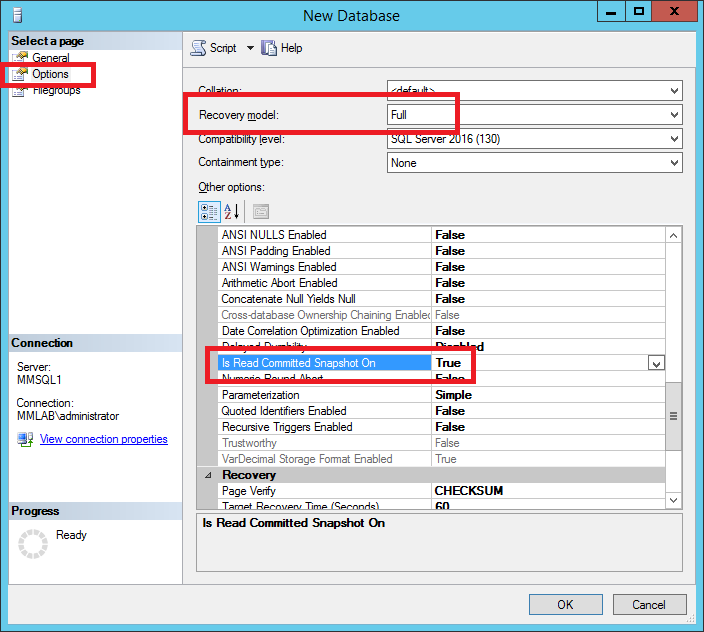
Click Options, set Recovery model to Full, scroll down in Other options, and set Is Read Committed Snapshot On to True and click OK, as shown in Figure 83.
https://docs.citrix.com/en-us/xenapp-and-xendesktop/7-9/technical-overview/databases.html
“For optimum performance, enable the SQL Server Read-Committed Snapshot. For details, see CTX 137161.”
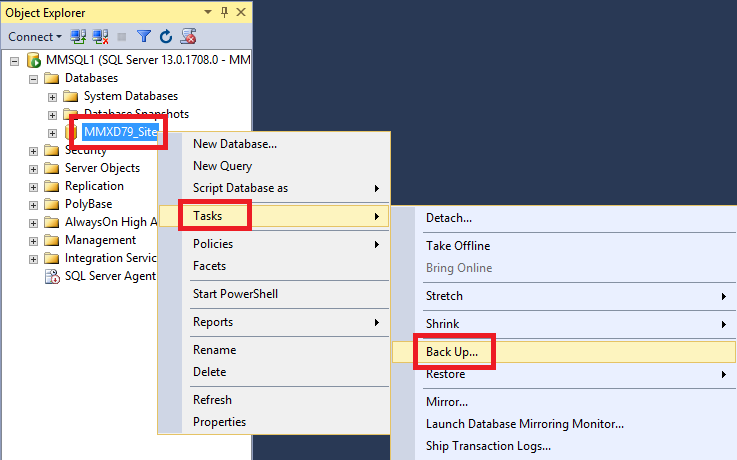
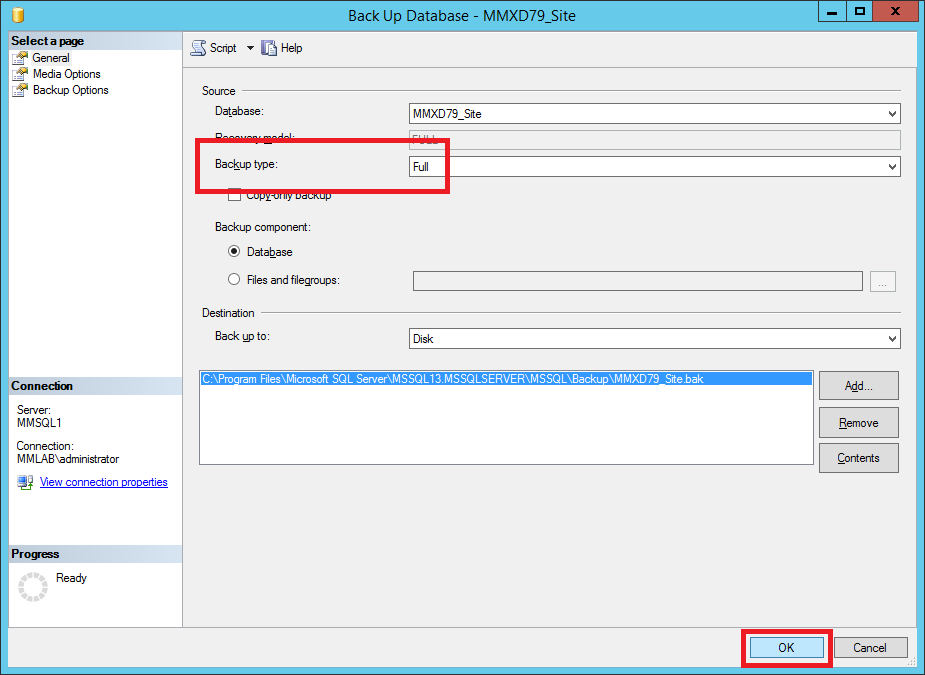
Expand Databases, right-click the new database, click Tasks, and click Backup…, as shown in Figure 84.
Before the Basic Availability Group is created, the database must have a full backup completed.
Make sure Backup type is set to Full and click OK, as shown in Figure 85.
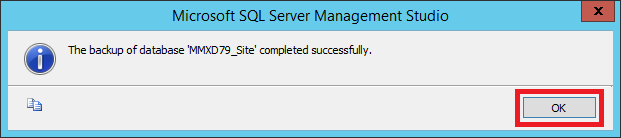
Click OK, as shown in Figure 86.
Repeat these steps to create and back up the Logging and Monitoring databases.
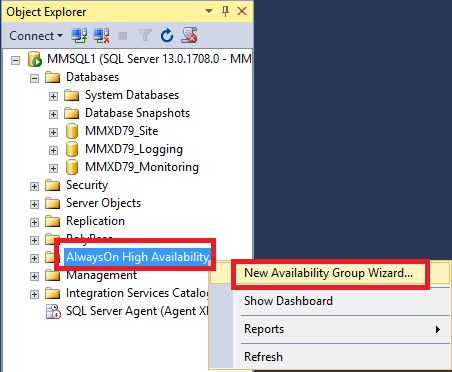
Now that all three databases are created and backed up, the Basic Availability Groups can be created.
Right-click AlwaysOn High Availability and click New Availability Group Wizard…, as shown in Figure 87
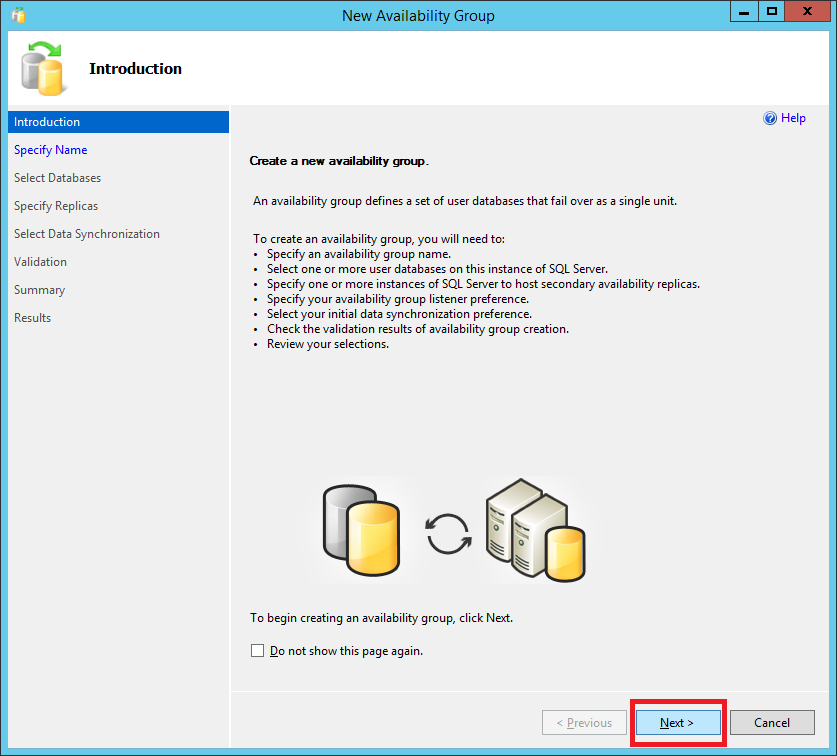
Click Next, as shown in Figure 88.
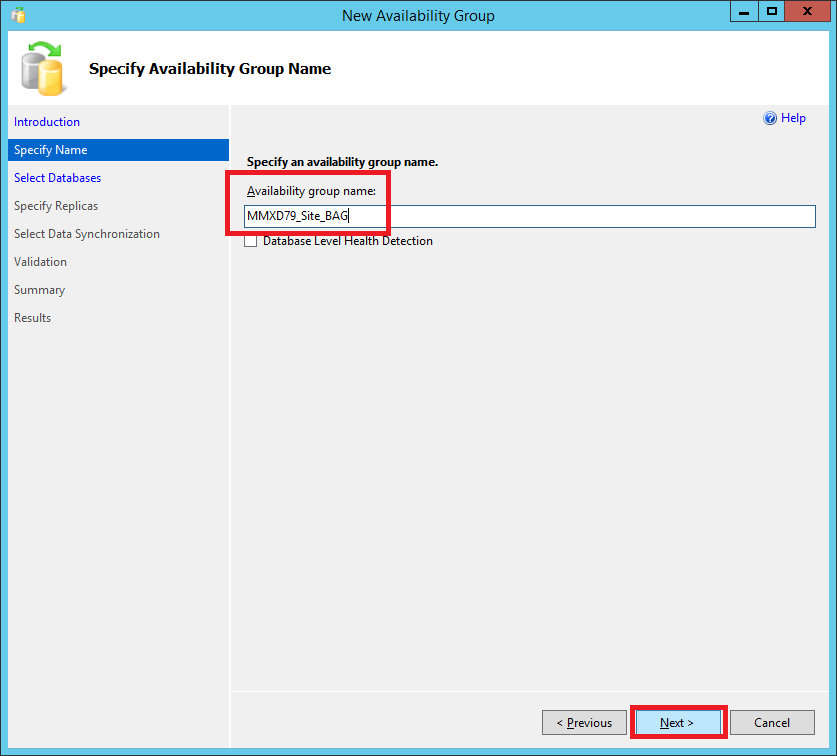
Enter an Availability group name and click Next, as shown in Figure 89.
Select the one database to include in the availability group and click Next, as shown in Figure 90.

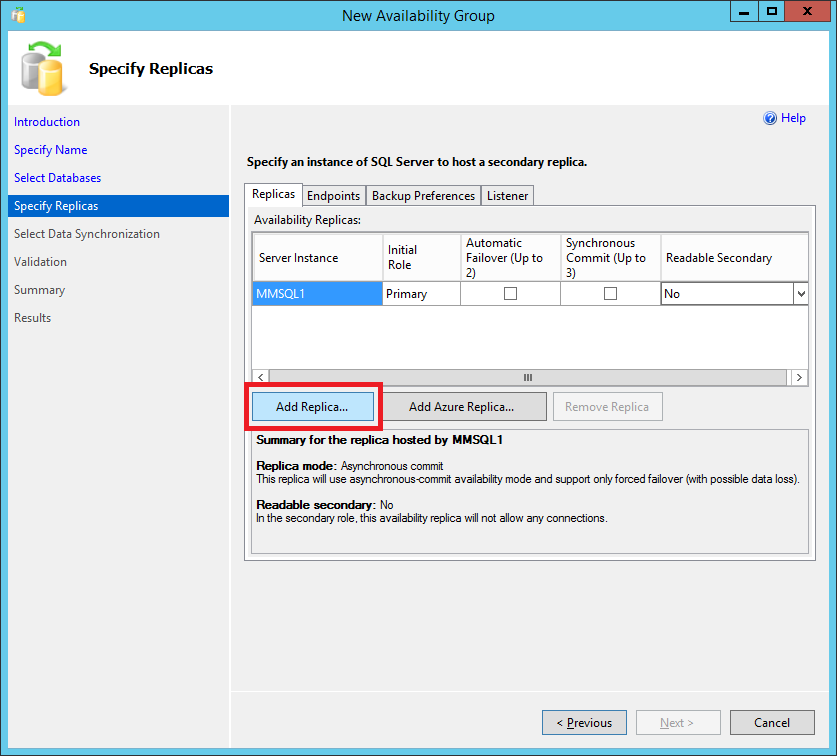
Click Add Replica…, as shown in Figure 91
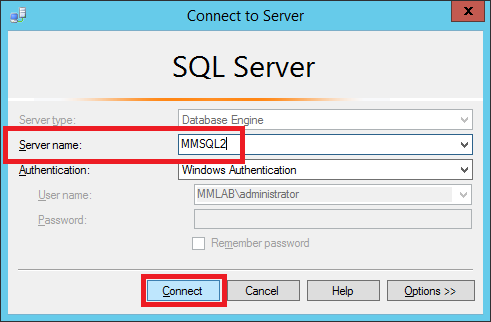
Enter the name of the second SQL server and click Connect, as shown in Figure 92.
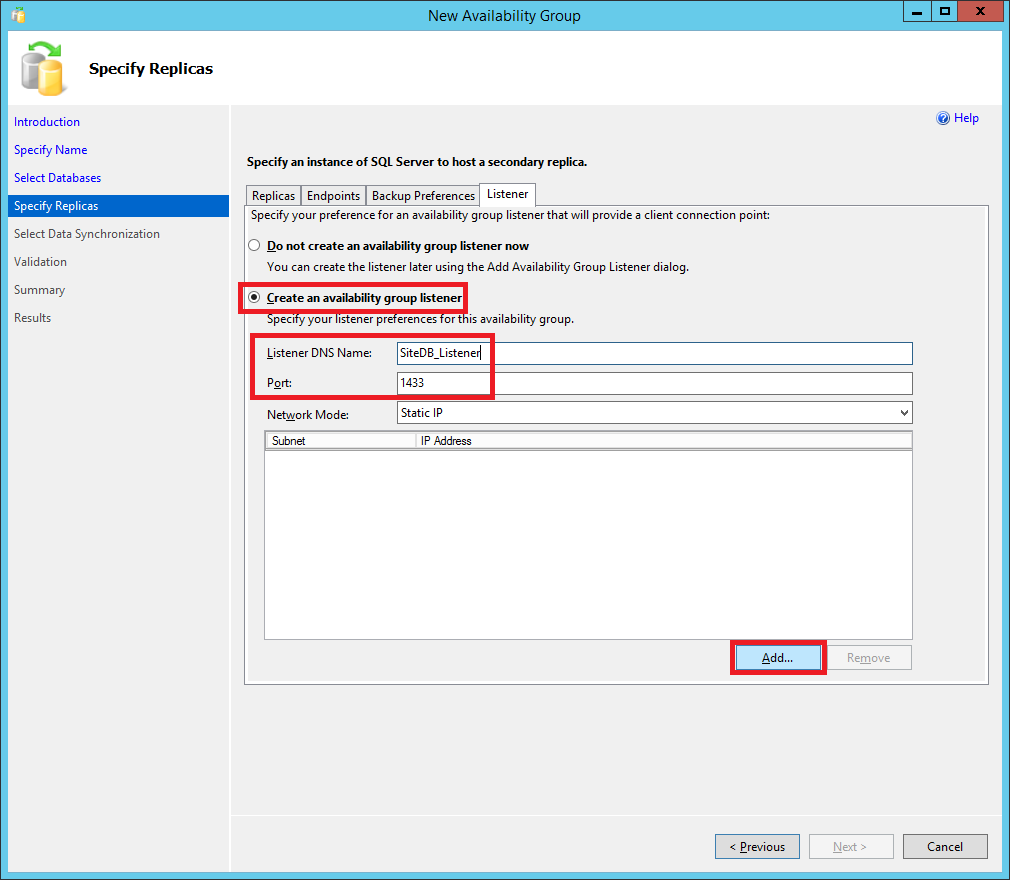
The second SQL server is added as a replica. Click the Listener tab, as shown in Figure 93.

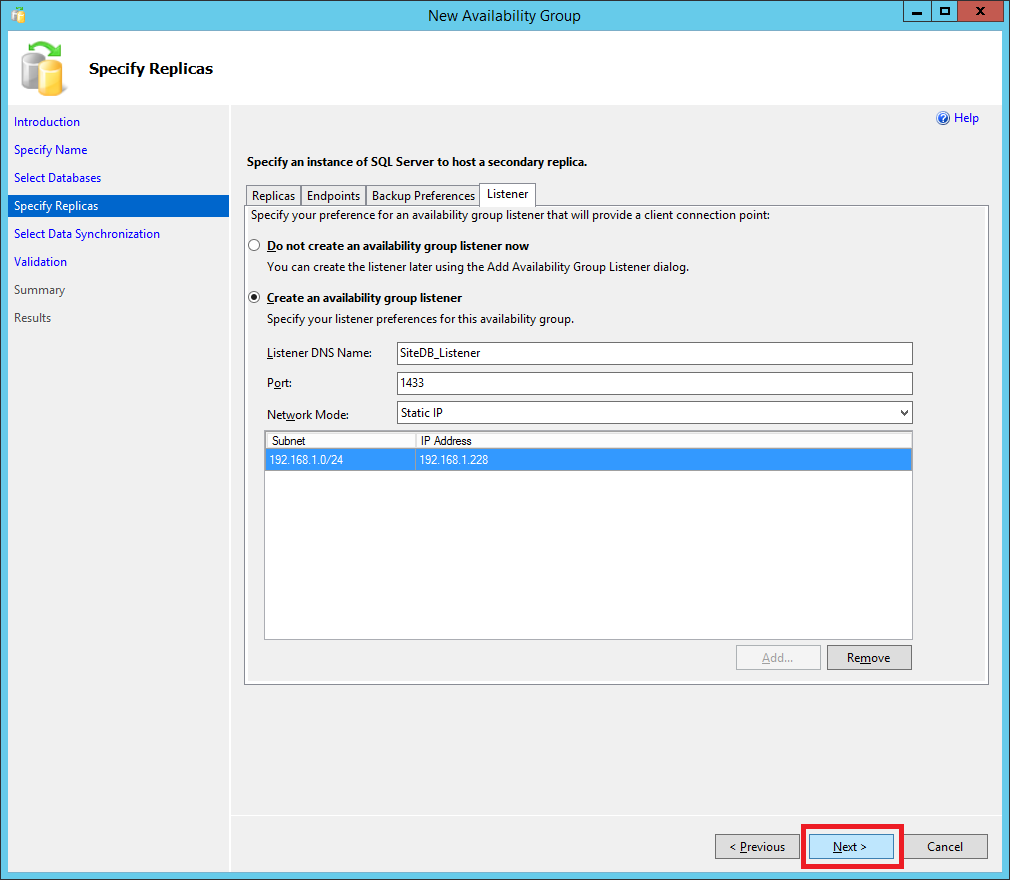
Expand the size of the wizard, select Create an availability group listener, enter a Listener DNS Name, a Port and click Add…, as shown in Figure 94
Note: The Listener DNS Name is limited to 15 characters. The Listener name is needed when the Site is created in Citrix Studio.
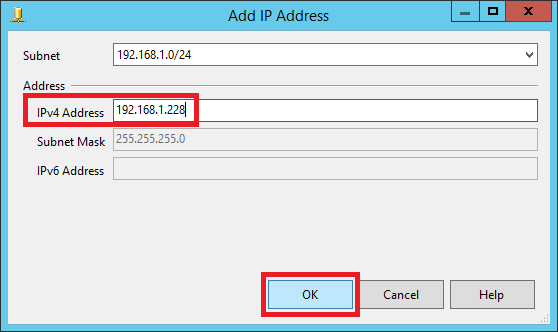
Enter a unique IP address for this Listener and click OK, as shown in Figure 95.
Note: If this is a multiple subnet cluster, enter an IP address for both subnets.
Click Next, as shown in Figure 96.
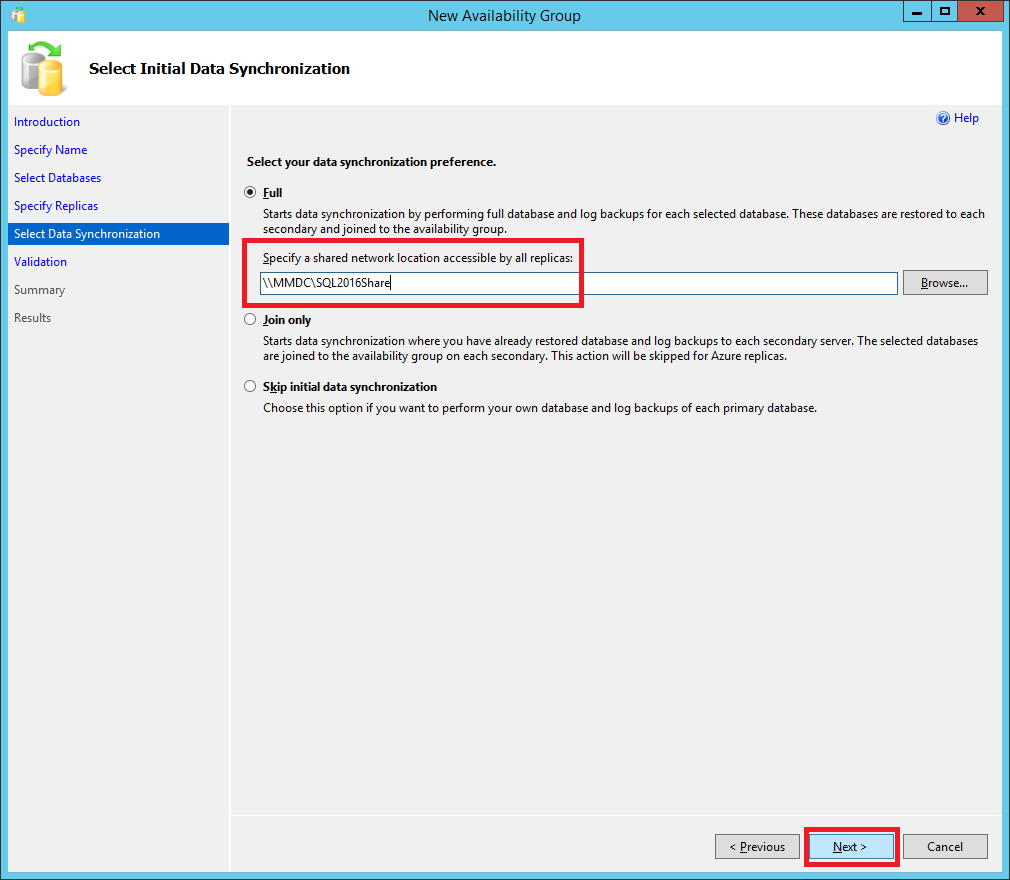
Select Full, enter a file share that the replicas can use for the initial data synchronization, and click Next, as shown in Figure 97.
Note: If this is a multiple subnet cluster or a cluster spanning different physical locations, make sure the file share is on a third subnet or location.
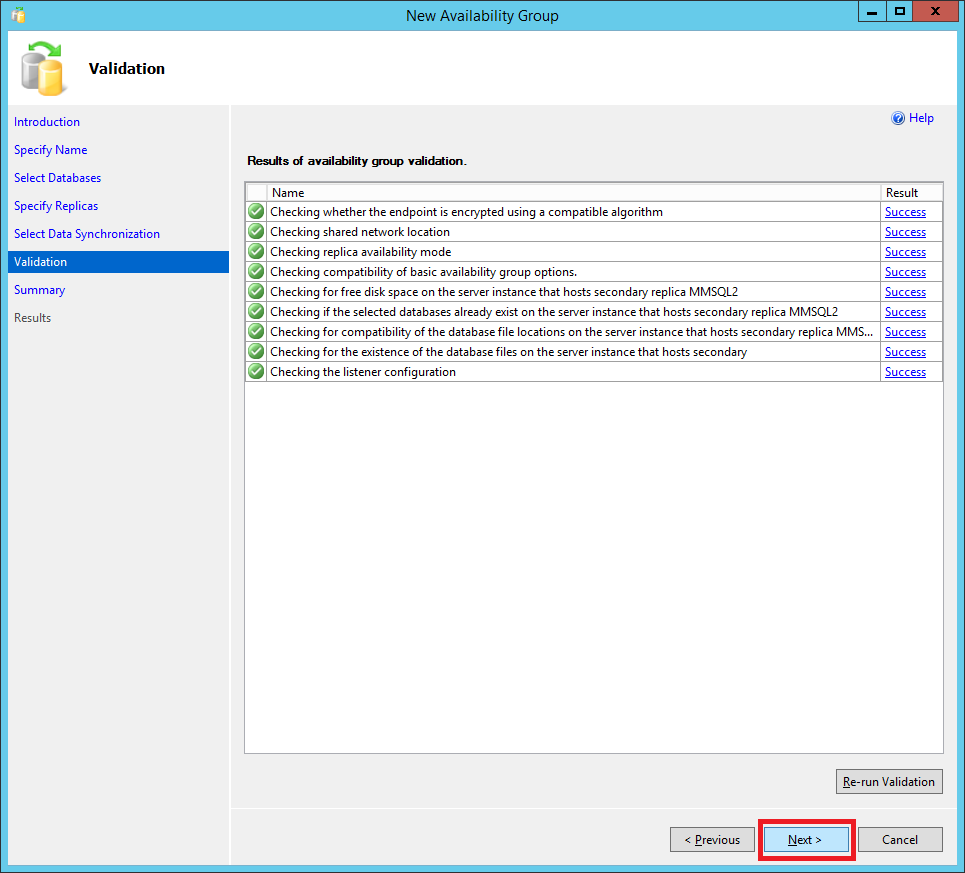
If there are any errors reported, resolve the errors and click Next, as shown in Figure 98.
Click Finish, as shown in Figure 99.
As shown in Figure 100, the Basic Availability Group is created.
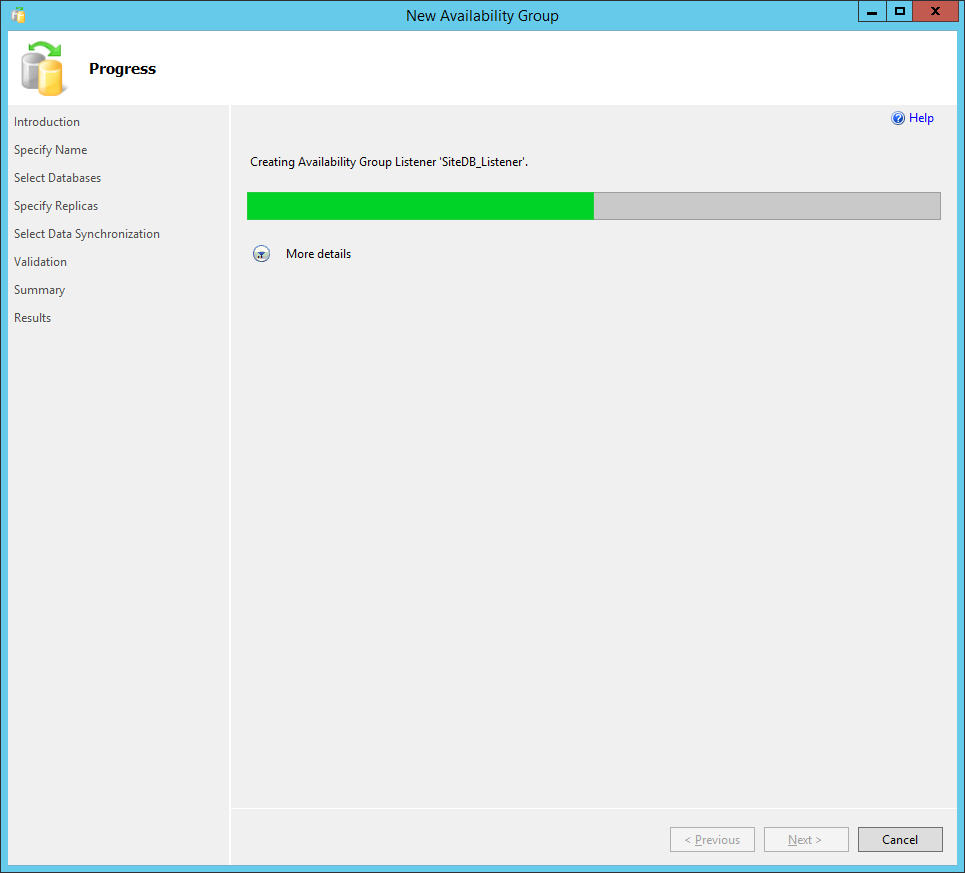
Click Close, as shown in Figure 101.

Repeat the steps to create Basic Availability Groups for the other two databases.
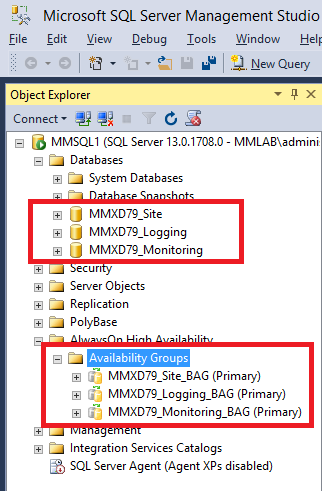
As shown in Figure 102, all three databases and Basic Availability Groups show on the first SQL server.
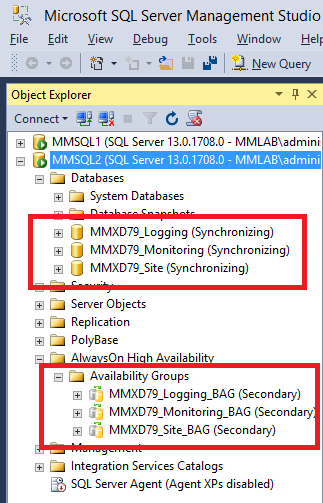
As shown in Figure 103, adding the second SQL server to Management Studio shows the databases and Basic Availability Groups in the Synchronizing and Secondary states.
Create CVAD Site
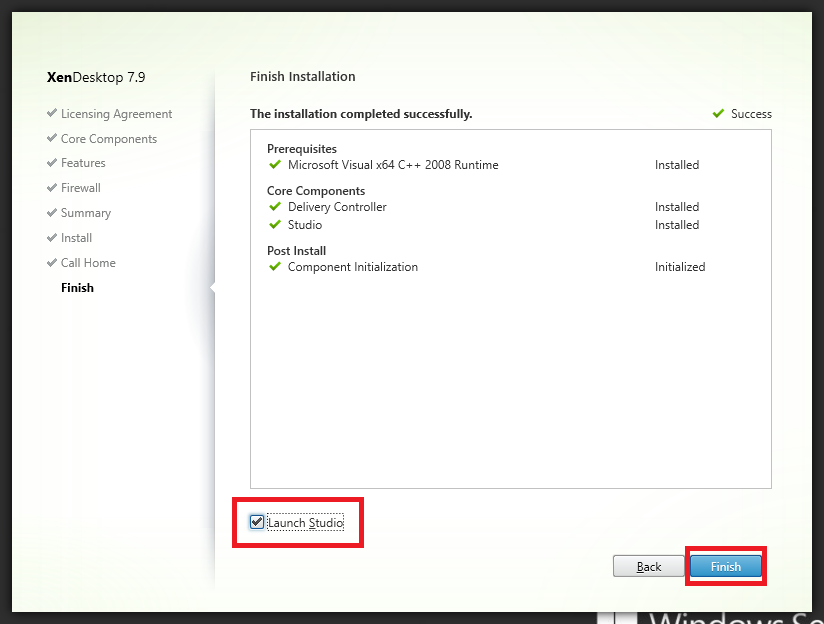
After installing CVAD, select Launch Studio and click Finish, as shown in Figure 104.
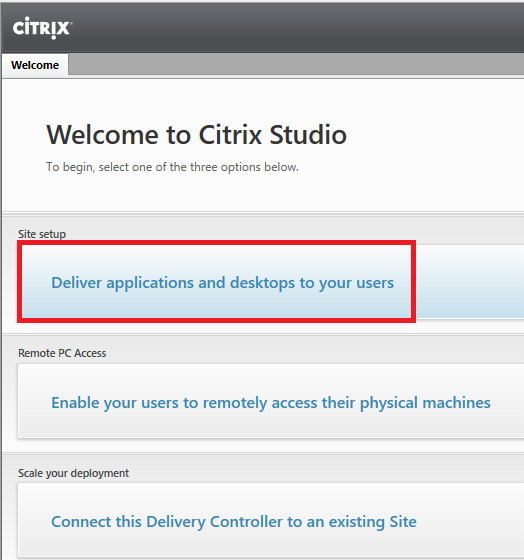
Click Deliver application and desktops to your users, as shown in Figure 105.
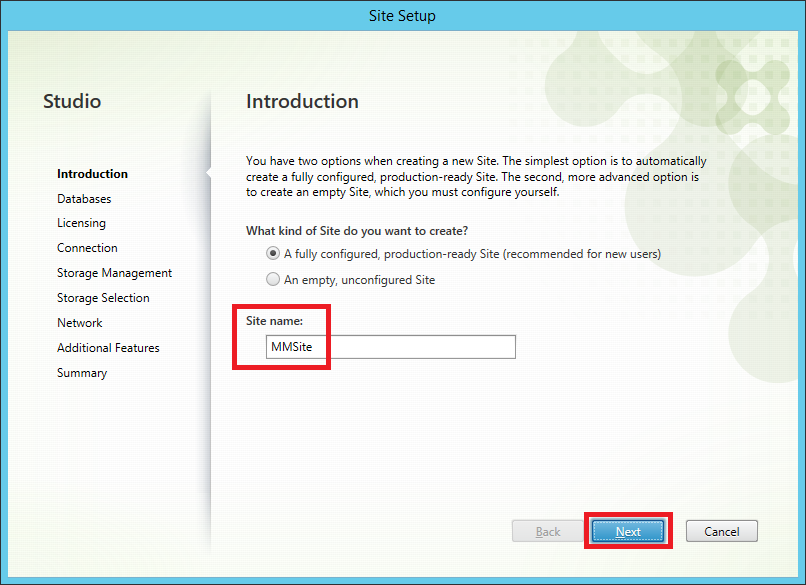
Enter a Site name and click Next, as shown in Figure 106.
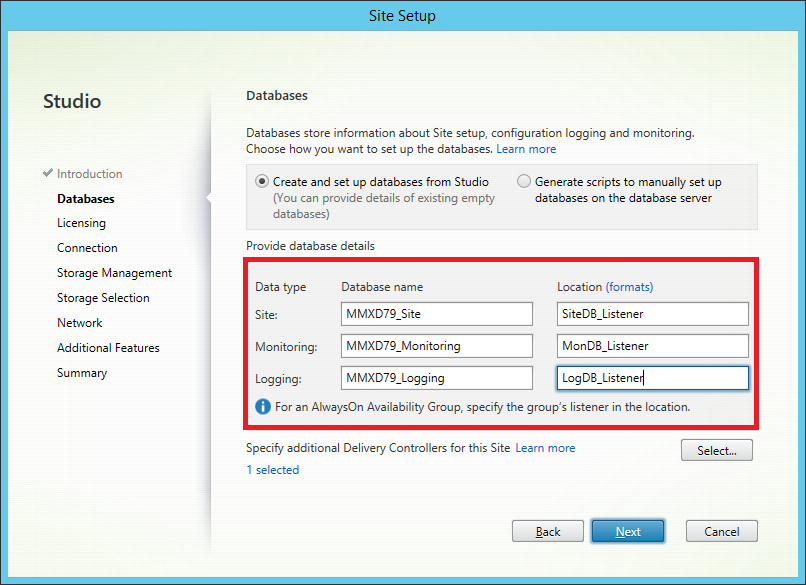
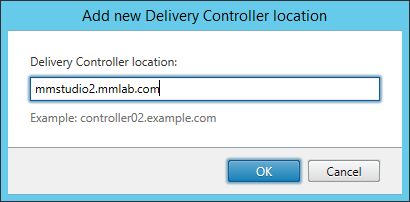
As shown in Figures 107 through 110. Enter the database names created earlier. For the location, enter the name of each Listener that matches the database. If there are additional Controllers for this Site, click Select, enter the additional Controller FQDNs and click Next.


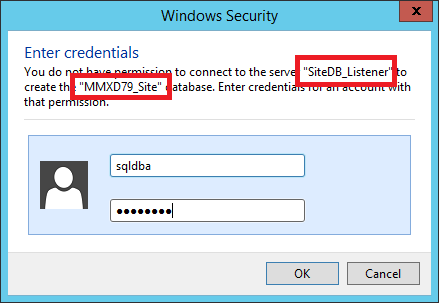
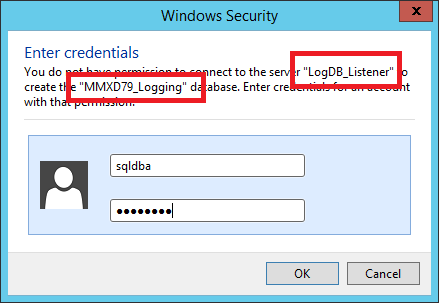
If the logon account does not have rights to create databases on the SQL server, you are prompted for credentials for each of the three Listeners, as shown in Figures 11 through 113.

Continue with the rest of the Configuration Wizard steps.
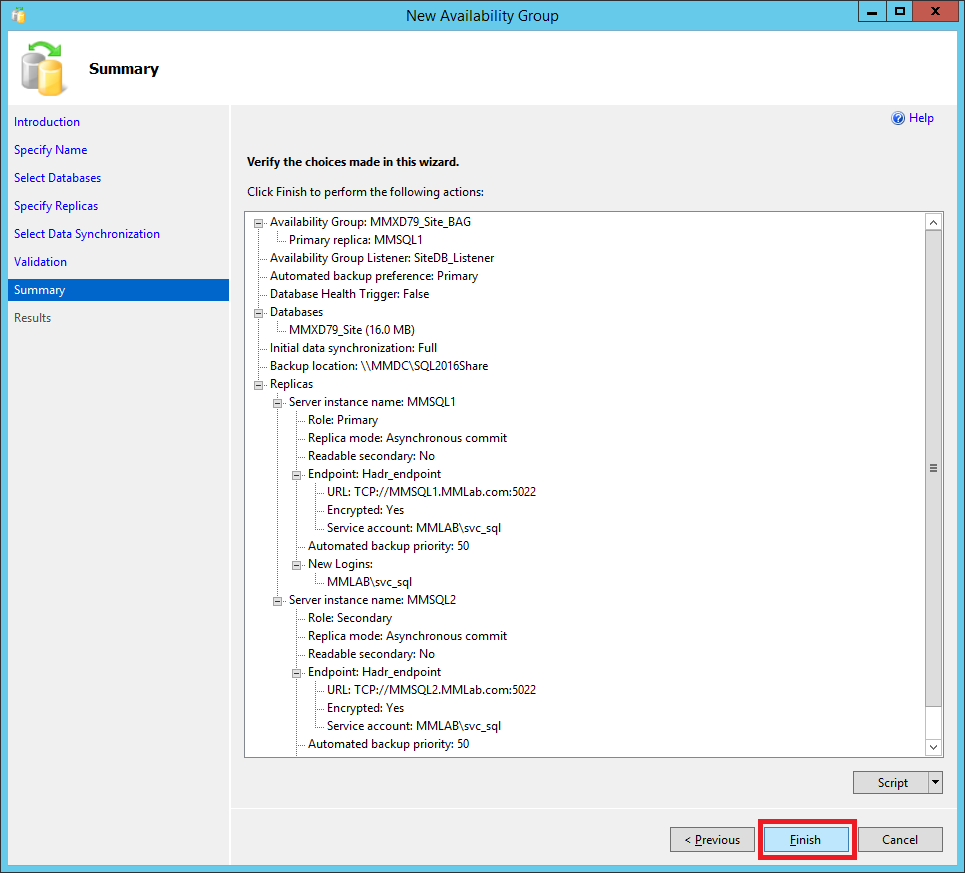
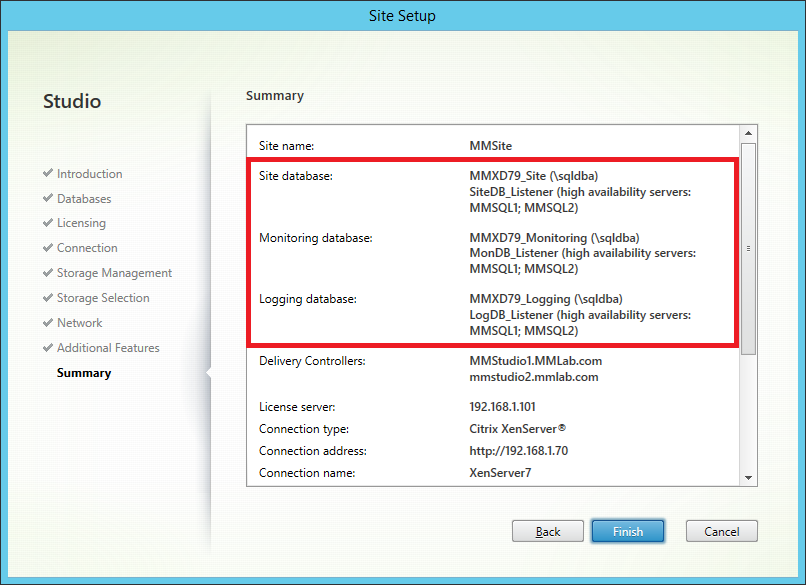
On the Summary step, verify the information and if correct, click Finish, as shown in Figure 114.
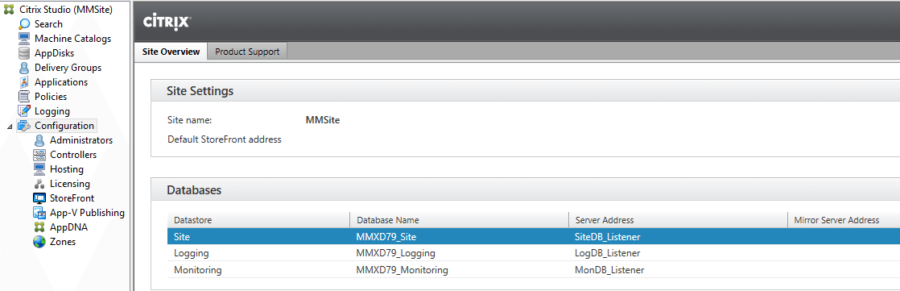
Once the Site creation process is complete, select the Configuration node in Studio, as shown in Figure 115.

You can see that the three databases with the Listener names.
In my opinion, it is far easier to set up the databases, BAGs, and Listeners before configuring the Site than to try to reconfigure the Site to use BAGs and Listeners later.
Thanks
Webster
So basically, you have created 3 different listeners for each database? I’ve tried this on our lab and I can only add 1 listener per AG.
No. One Listener per AG and each AG contains one database. So, one Listener per database.
Site database -> AG -> Listener
Monitoring database -> AG -> Listener
Config database -> AG -> Listener
Webster
Thank Carl, have you tried doing a BAG without WSFC? It seems that this can be done in SQL 2017 where you can only utilize BAG. Although in my experience the listener does not seem to work, without WSFC.
I have not tried using BAGs without WSFC.
Webster
Sir,
The presentation of database support is not very clear.
https://support.citrix.com/article/CTX114501
The x86 and x64 versions of SQL (version 2012 and later) have been validated with Always On, Clustered, Standalone and Mirrored modes.
I think 7.15 support:
1-Always On
2-Clustered
3-Only one SQL server
4-Mirrored
But in the following the article, there is not cluster, it only supports alwayOn.
https://docs.citrix.com/en-us/xenapp-and-xendesktop/7-15-ltsr/system-requirements.html
The following database high availability solutions are supported (except for SQL Server Express, which supports only standalone mode):
SQL Server AlwaysOn Failover Cluster Instances
SQL Server AlwaysOn Availability Groups (including Basic Availability Groups)
SQL Server Database Mirroring
You missed a link.
High availability
There are several high availability solutions to consider for ensuring automatic failover:
Webster
A very thorough helpful article. I thankyou you for sharing and putting in the time to document this process. And now that SQL 2017 is out BAGS can be used with 2 versions of SQL and folks are finding out that this is a good cost saving solution over Enterprise licensing.
Hello Carl,
Thank you for the article. Really helpful. We can pretty much follow the same procedure for setting up Always ON Availability groups as well right?
Thanks&Regards,
Pavan
I do not know. I have yet to setup AAG.
Webster
Hi Pavan
It is the same procedure, only that it is not done by database, the databases are added to the arrangement
I don’t understand your comment.
Webster
Hi,
Wondering have you tried this also for PVS database? Is that also supported?
I have not tried it. At this time, as of PVS 7.11, BAGs are not officially supported by any version of PVS. They may work but without official support, I would not use them.
Thanks
Webster
Are you sure about PVS is not supported?
https://docs.citrix.com/en-us/provisioning/7-11/whats-new.html
It’s not saying BAG specifically, but..
Absolutely. I checked with the person directly in charge of PVS at Citrix.
Webster
Addition: https://docs.citrix.com/en-us/provisioning/7-11/install/configure-sql-server-always-on.html
Always On is different than Basic Availability Groups. It may work but when something bad happens, don’t expect Citrix support to offer any help for an unsupported configuration.
Webster
got the problem solved, pre created the cno first and gave the cluster the permission.
now it is working, but i have a strange issue.
on the second sql server, the database was not restored, and in the group the second server has a red icon.
could this be a problem of the german sql server? i tried this 2 times, with reinstalling both test server again, same error.
Sorry but I just do not know. I know enough about SQL to get the basics done.
Webster
very nice article, get the following error on creating the cluster:
error 5894 WSFC API
i have installed a fresh demo setup, 2 sql server 2016 standard on windows server 2012 r2, like you describe in your article.
any ideas?
ERROR_CLUSTER_NETWORK_NOT_FOUND_FOR_IP; 5894
Check you IP address stuff.
Webster
strange issue, the database on the second sql server is not created, no error while creating the group.
could this be a language problem?
Sorry but I just do not know. I know enough about SQL to get the basics done.
Webster
Carl,
Good detailed article. One clarification however, since you are using BAGs on Standard Edition I believe Microsoft only supports one availability database. It appears that it will allow you to create multiple BAGs and one database per BAG, but doesn’t this infringe upon the license agreement?
Thanks,
Chad
I do not believe so. I can only find where a BAG is limited to 2 nodes. I see no mention anywhere of a SQL Server 2016 Standard server being limited to only one BAG. If you can find anything from Microsoft that states that, lease let me know.
https://msdn.microsoft.com/en-US/library/cc645993.aspx
Webster
Hello Carl,
This configuration has a problem if the group with the listener fails over, but remain the other groups on the server. Then you will not get access to the other databases on the listener.
Benjamin
A Basic Availability Group and its Listener can only have ONE database. So there are no other databases on the Listener to no get access to.
Webster