-
18 Building Webster’s Lab V2 – Additional XenCenter Configuration
Before getting to work adding Citrix Virtual Apps and Desktops (CVAD) and VMware Horizon to the lab, a few additional items are on the XenCenter to-do list.
- Update DNS server entries for each XenServer host
- Join the XenServer Pool to the lab’s Active Directory (AD) domain
- Create a Read-only account for use with monitoring software, like ControlUp and Goliath Technologies
The only way to create additional non-root accounts for use in XenCenter is by joining the resource pool to AD. Once the Pool is in AD, the Users tab allows us to select accounts for Role-Based Access Control.
Start and, if required, connect or log in to XenCenter.
DNS
Note: I rewrote this section on 25-Jul-2021 to work around a XenServer bug where the DNS server (nameserver) entries in /etc/resolv.conf created using the original method (and several others I tried) never survived a host reboot. This new method has survived several restarts of every host and a shutdown of the entire pool.
Before the Pool can join AD, you must reconfigure the XenServer hosts to use the AD DNS servers. There is no central way to change the DNS server information on every XenServer host at one time. You must change each host independently.
In the left pane, expand the resource pool, and in the right pane, click the Networking tab, as shown in Figure 1.

Figure 1 Click Configure…, as shown in Figure 2.
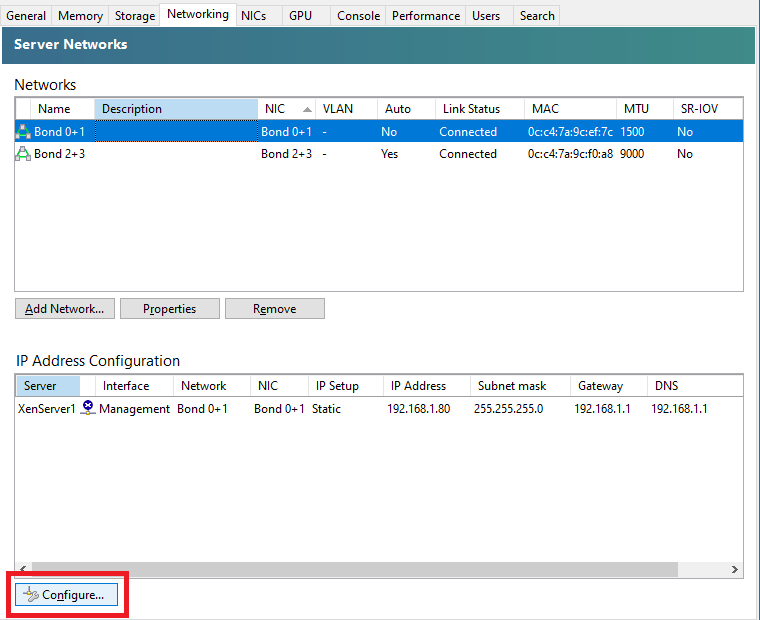
Figure 2 Verify the Network is the Management bond of Bond 0 + 1, enter the desired DNS servers for Preferred DNS server and Alternate DNS server 1, and click OK, as shown in Figure 3.
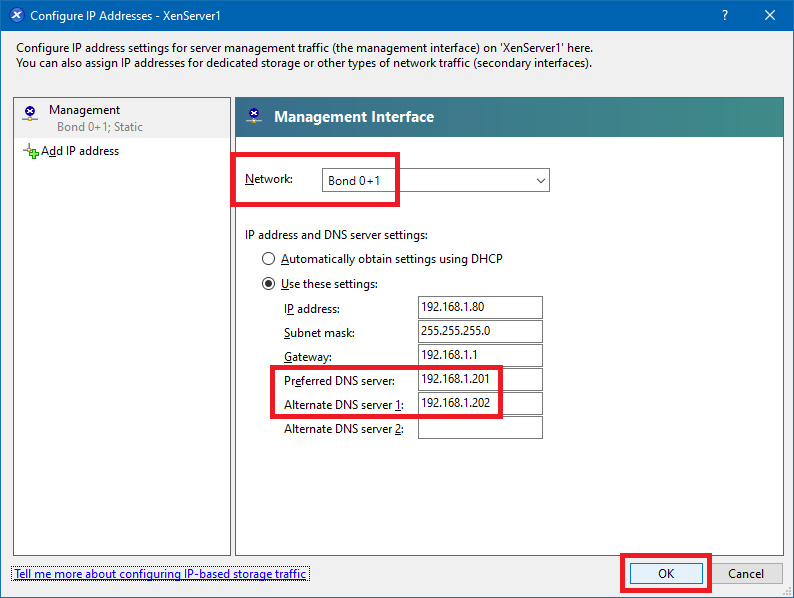
Figure 3 Right-click the host and click Reboot, as shown in Figure 4.
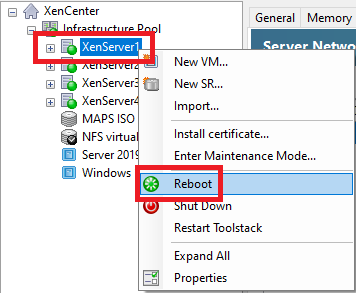
Figure 4 Click Yes, Reboot, as shown in Figure 5.
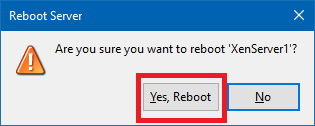
Figure 5 After the host reboots, click the Console tab and enter the password for the root account, as shown in Figure 6.
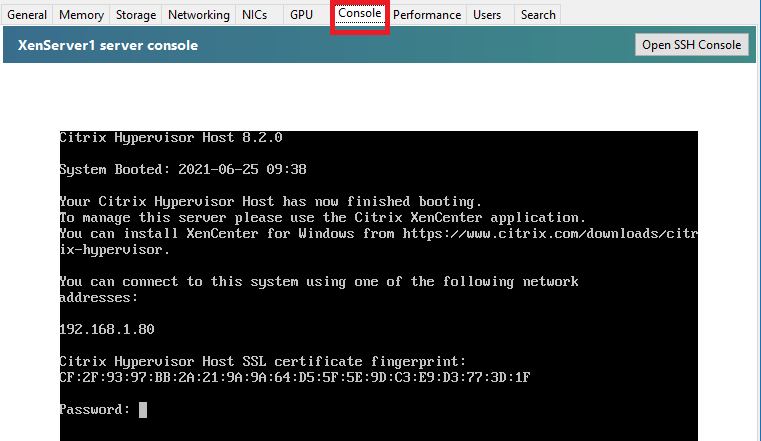
Figure 6 Type in cat /etc/resolv.conf and press Enter, as shown in Figure 7.
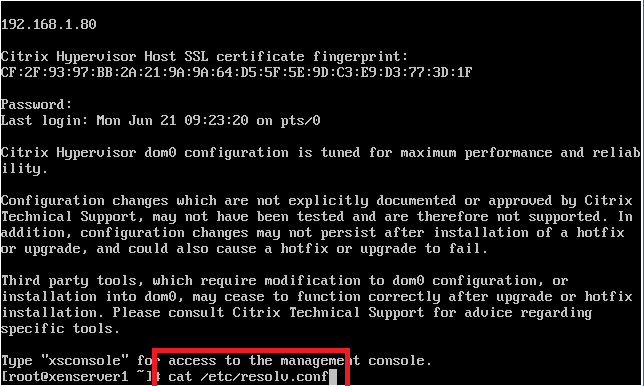
Figure 7 The two DNS servers should be there, as shown in Figure 8.
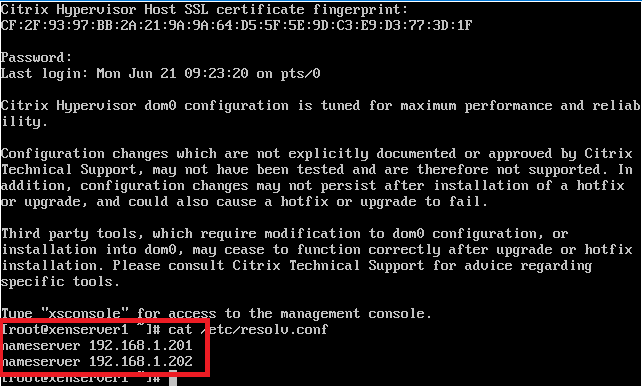
Figure 8 Repeat the process shown in Figures 1 through 8 for the remaining XenServer hosts.
Active Directory
In the left pane, click the resource pool and in the right pane, click the Users tab, and click Join Domain…, as shown in Figure 9.

Figure 9 Enter the name for the Domain and the domain’s administrator account and password, and press Enter, as shown in Figure 10.
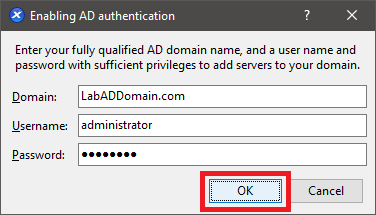
Figure 10 Figure 11 shows XenCenter enabling AD authentication.
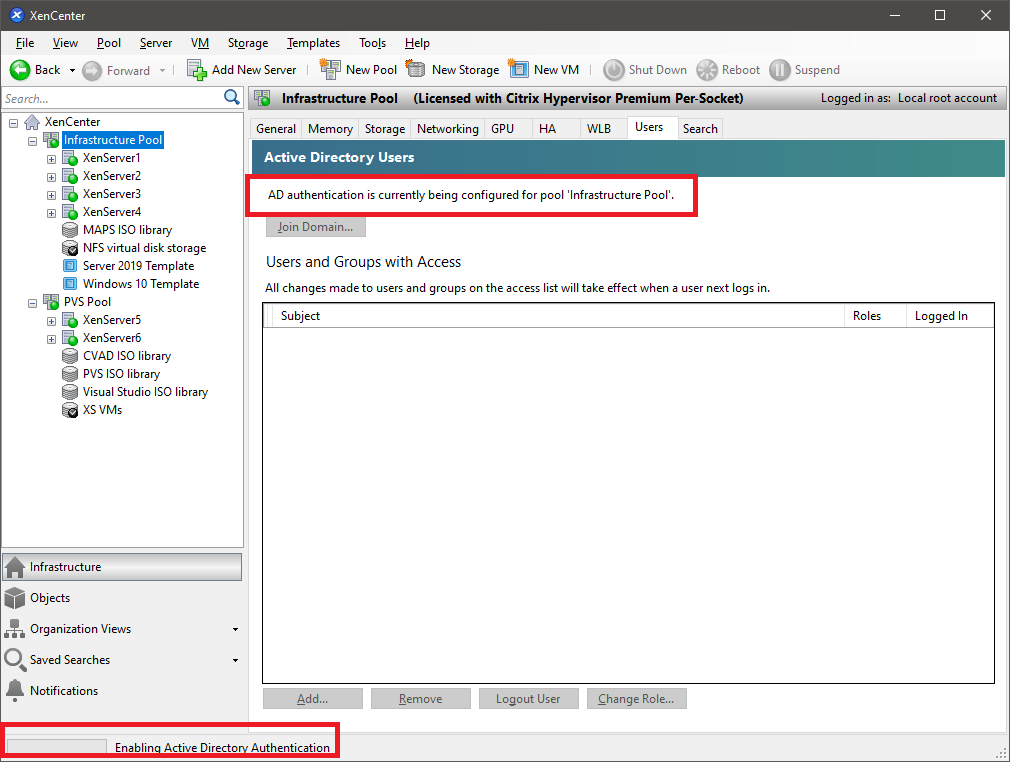
Figure 11 After a few seconds, XenCenter shows the Pool is a member of the AD domain, as shown in Figure 12.

Figure 12 On the first domain controller, open Active Directory Users and Computers.
As shown in Figure 13, the XenServer hosts are in the Computers container.

Figure 13 We could use PowerShell to move the four computer accounts from CN=Computers,DC=LabADDOmain,DC=COM to OU=Citrix,OU=Infrastructure,OU=Lab,DC=LabADDomain,DC=COM, but that would require four lines of PowerShell. In my opinion, the quickest way is to expand the Lab OU, and expand the Infrastructure OU. Now select all four XenServer hosts and Drag and Drop them into the Citrix OU, as shown in Figure 14.
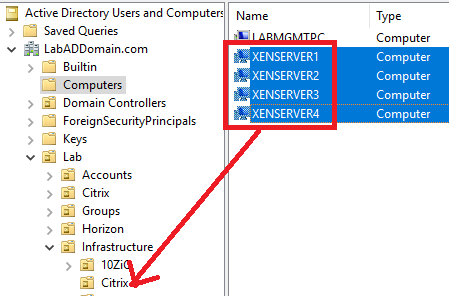
Figure 14 Click Yes, as shown in Figure 15.
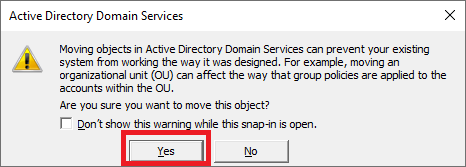
Figure 15 The XenServer hosts are now in the Citrix OU, as shown in Figure 16.
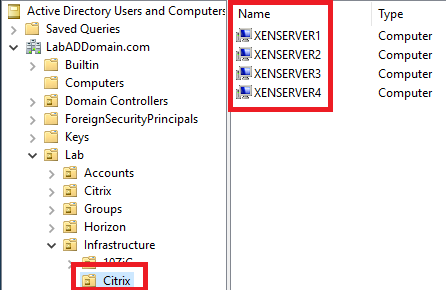
Figure 16 Create a Read-only Account
In my lab, I use monitoring software from vendors like ControlUp and Goliath Technologies. To provide for Least Privilege Access, use a Read-only account.
First, we need to create an AD service account to assign the XenCenter Read-only Role.
On the first DC, open an elevated PowerShell session.
Copy and paste the following into the elevated PowerShell session and press Enter, as shown in Figure 17.
Remember to set the values you need.
Note: Lines may wrap
123456789101112131415161718192021#Create the service account svc_CitrixReadOnly for Read-only XenCenter permissions$ADDomain="LabADDomain"$TLD="com"$Protect=$False$UserPwd=Read-Host-AsSecureString-Prompt"Enter password"New-ADUser-AccountPassword$UserPwd`-CannotChangePassword$True`-ChangePasswordAtLogon$False`-Description"DO NOT CHANGE THE PASSWORD OR DELETE/DISABLE ACCOUNT"`-DisplayName"svc_CitrixReadOnly"`-Enabled$True`-GivenName"svc_CitrixReadOnly"`-Name"svc_CitrixReadOnly"`-PasswordNeverExpires$True`-PasswordNotRequired$False`-Path"OU=Service,OU=Accounts,OU=Lab,DC=$ADDomain,DC=$TLD"`-SamAccountName"svc_CitrixReadOnly"`-UserPrincipalName"svc_CitrixReadOnly@LabADDomain.com"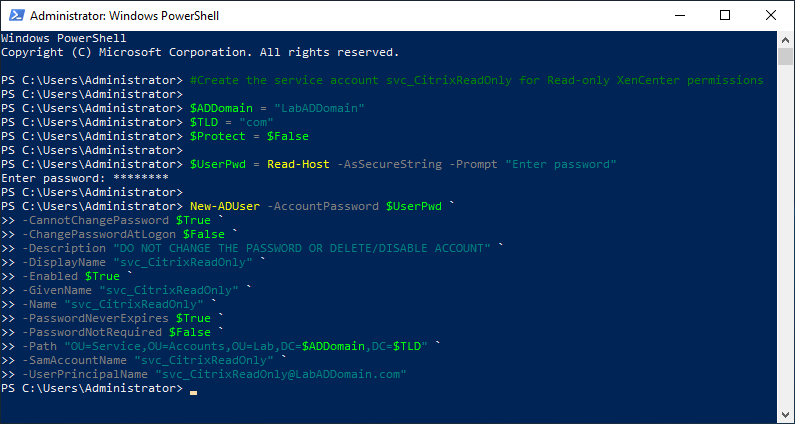
Figure 17 Back in XenCenter, click Add…, as shown in Figure 18.
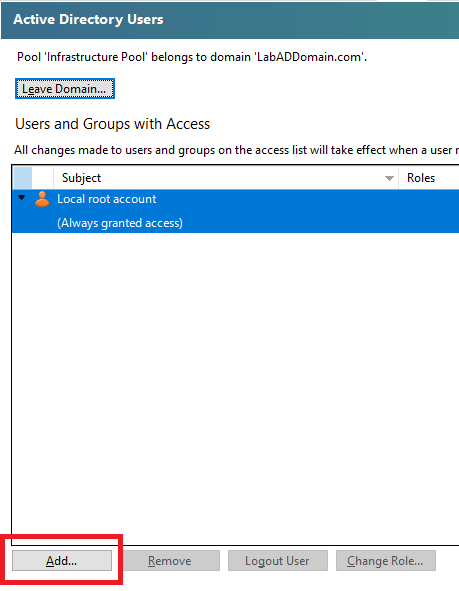
Figure 18 Enter the name of the new Citrix Read-only account and click Grant Access, as shown in Figure 19.

Figure 19 Click Close, as shown in Figure 20.
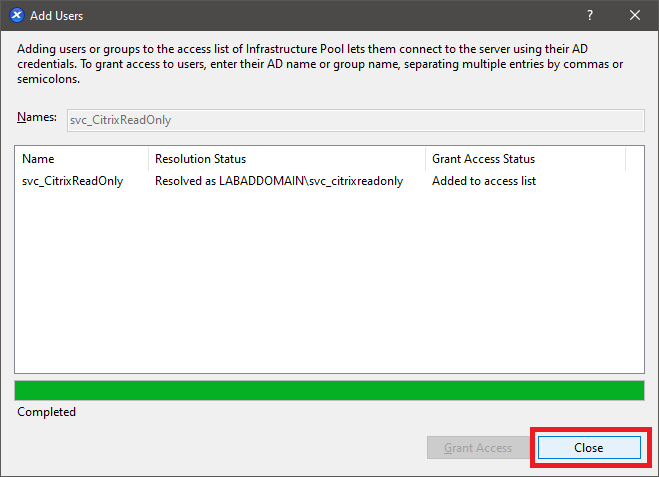
Figure 20 Select the Citrix Read-only account and click Change Role…, as shown in Figure 21.
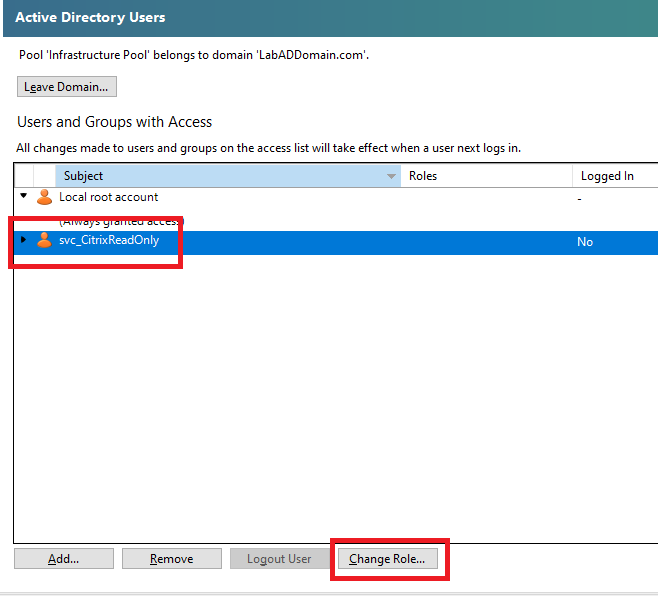
Figure 21 Select Read Only and click Save, as shown in Figure 22.
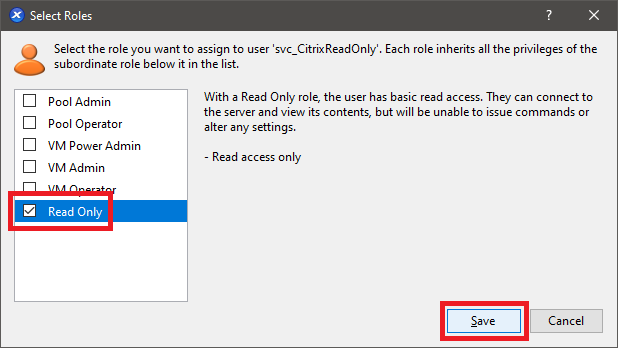
Figure 22 The account is ready for use, as shown in Figure 23.
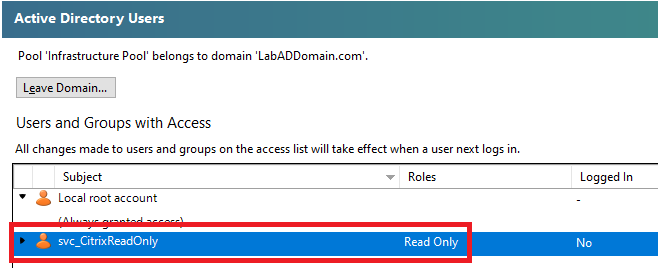
Figure 23 Next up: Create Additional Servers


June 16, 2021
Active Directory, XenServer