[Updated 29-Aug-2021]
Before getting to work adding Citrix Virtual Apps and Desktops (CVAD), and VMware Horizon to the lab, there are a few additional items on the vCenter to-do list.
- Join vCenter to the lab’s Active Directory (AD) domain
- Add the lab’s AD to the SSO
- Create a Citrix related service account with minimum vCenter permissions for the hosting connection in Citrix Studio and with Citrix App Layering
- Create a VMware related service account with minimum vCenter permissions for VMware Horizon
- Create a Read-only account for use with monitoring software, like ControlUp and Goliath Technologies
Log in to vCenter.
Active Directory
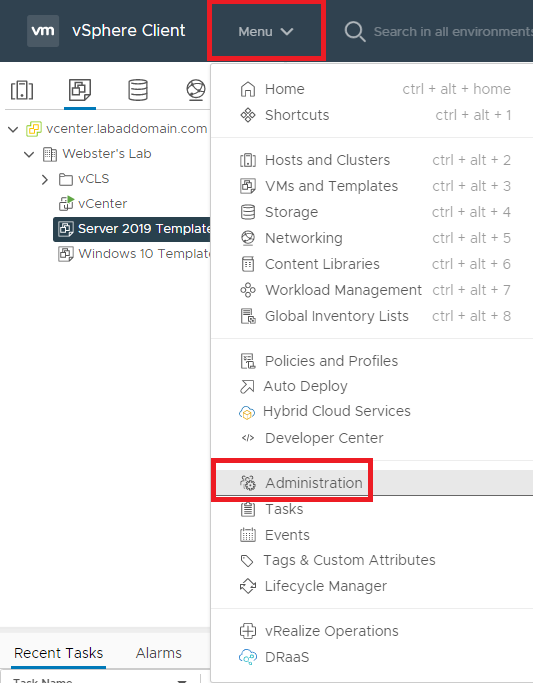
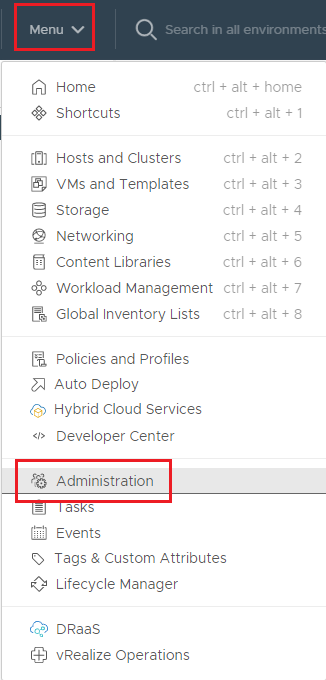
From the Menu dropdown, select Administration, as shown in Figure 1.
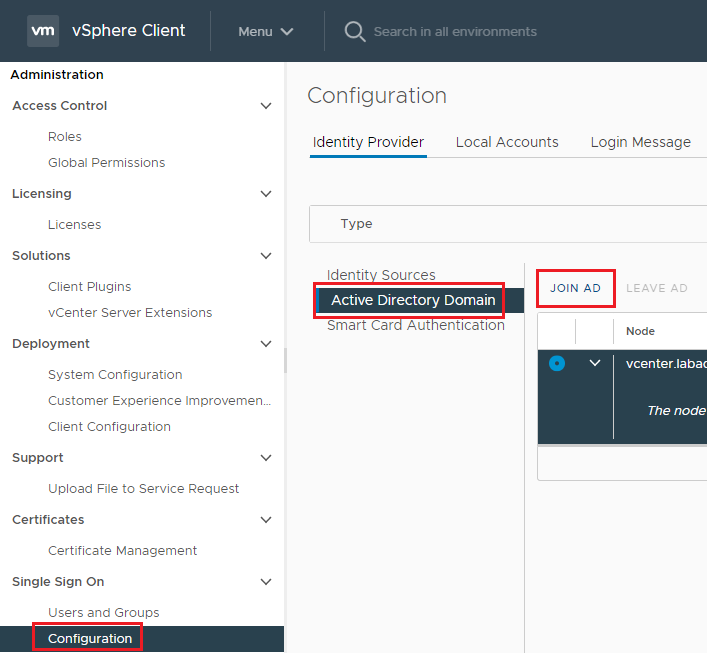
Click Configuration, Active Directory Domain, and click Join AD, as shown in Figure 2.
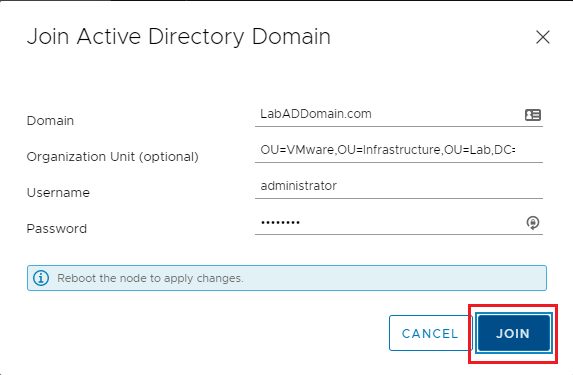
Enter the Domain, a Username, a Password, and click JOIN, as shown in Figure 3.
If you want the vCenter computer account in a specific Organizational Unit (OU), as I do, enter the Organization Unit.
The vCenter appliance is now a domain member but needs a restart.
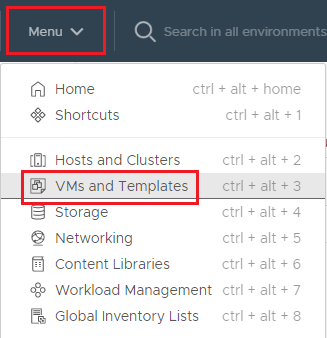
From the Menu dropdown, select VMs and Templates, as shown in Figure 4.
Expand the cluster, right-click the vCenter VM, click Power, and click Restart Guest OS, as shown in Figure 5.

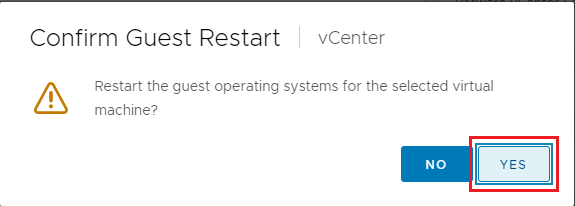
Click Yes to confirm the restart, as shown in Figure 6.
Wait about 10 minutes before trying to log in to vCenter.
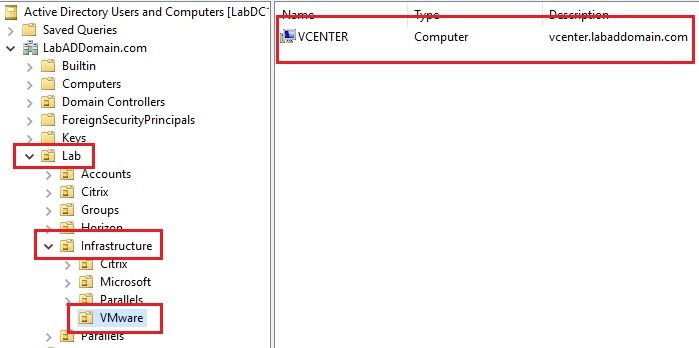
If you specified an OU to place the vCenter computer account while waiting for the vCenter appliance to restart, go to one of the domain controllers and open the Active Directory Users and Computers console. Browse to the OU specified and verify the vCenter computer account exists, as shown in Figure 7.
At this point, you must use the administrator vCenter account to log in. Even though we joined vCenter to the AD domain, the AD domain isn’t a Single Sign-On domain yet.
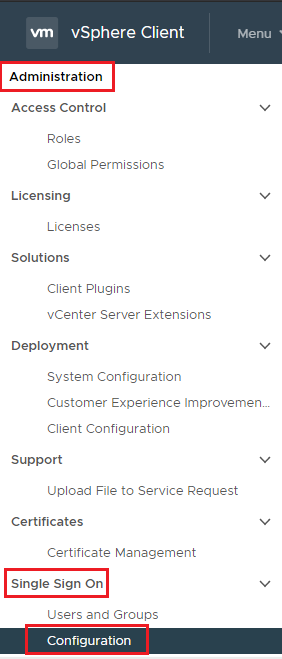
Once logged on to vCenter, go back to Administration/Single Sign On/Configuration, as shown in Figure 8.
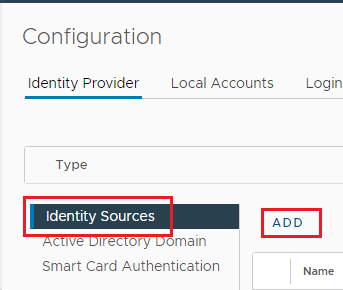
Click Identity Sources and click ADD IDENTITY SOURCE, as shown in Figure 9.
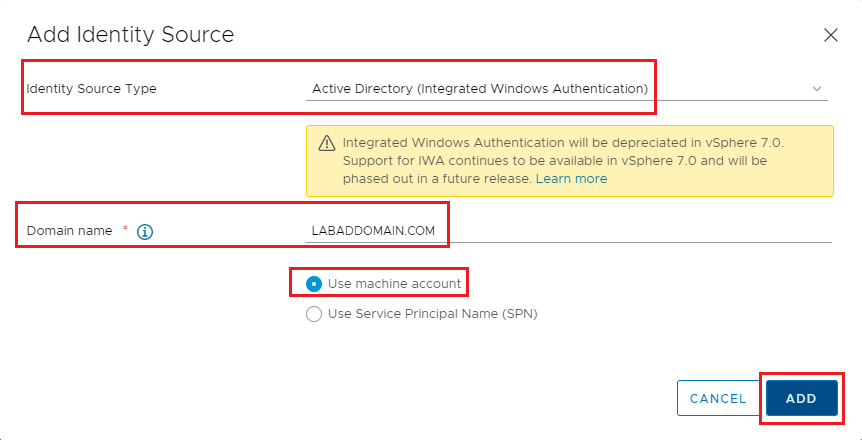
Select Active Directory (Windows Integrated Authentication) from the Identity source type dropdown. If it is not already populated, enter the Domain name, select Use machine account, and click ADD, as shown in Figure 10.
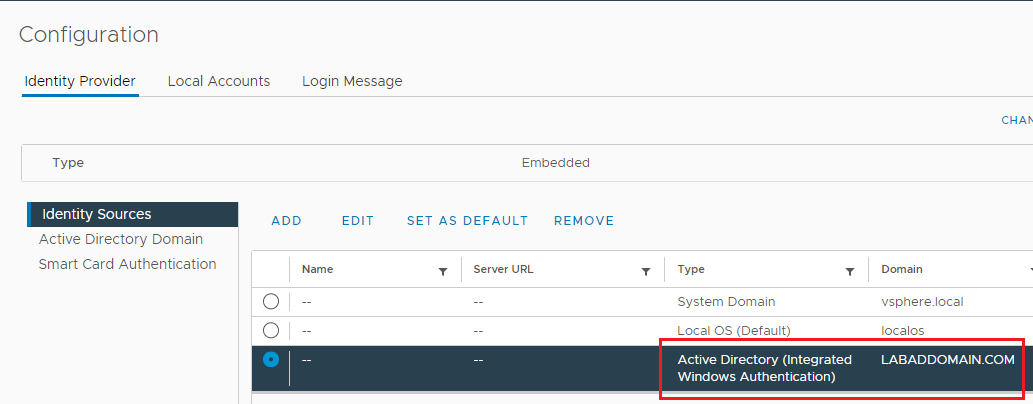
The AD domain now shows as an Identity Source, as shown in Figure 11.
We are not yet ready to log in to vCenter with AD credentials. First, we must add users and groups from the AD domain to a vCenter security role.
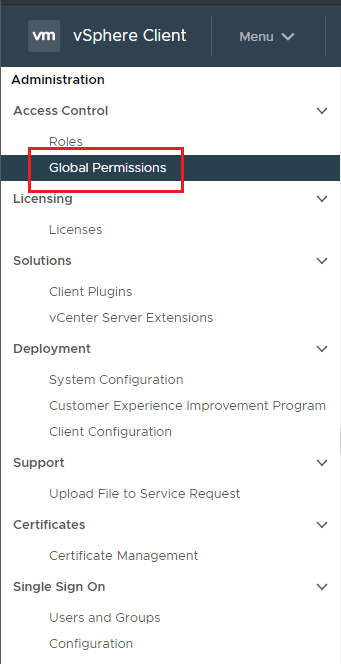
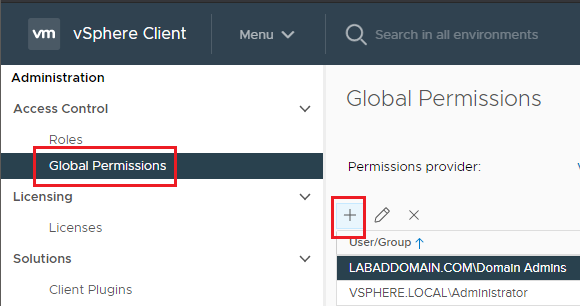
Click Global Permissions, as shown in Figure 12.
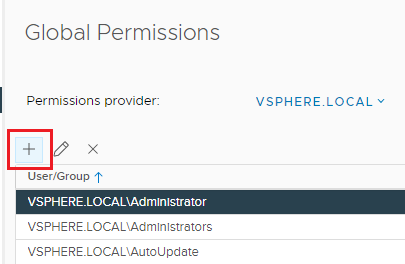
Click + (Plus sign) as shown in Figure 13.
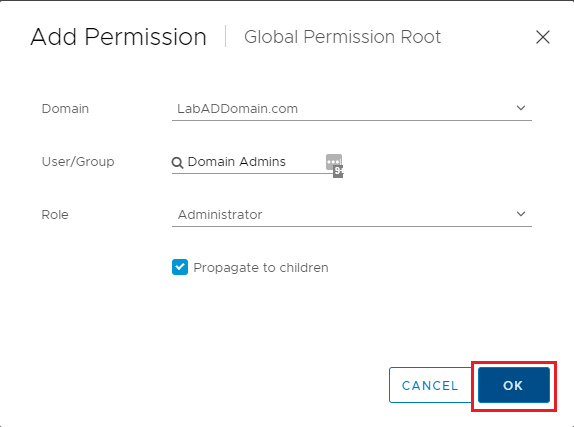
Select the AD domain name from the Domain dropdown, type Domain Admins in the User/Group field, for Role, select Administrator, select Propagate to children, and click OK, as shown in Figure 14.
Now we can log in to vCenter with an AD domain account.
Log off vCenter and log in with an AD domain account granted permission, as shown in Figures 15 and 16.
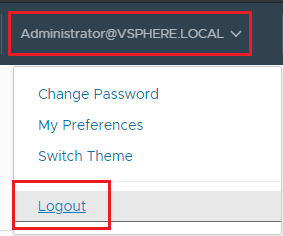
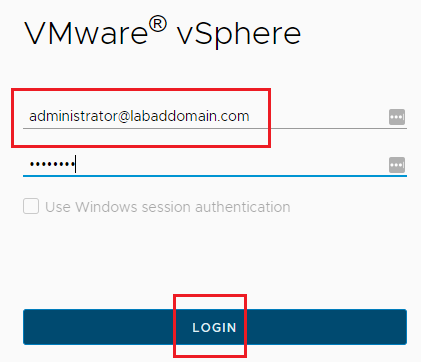
Figure 17 shows a successful login with AD domain credentials.

Next, we need permissions for service accounts for Citrix Virtual Apps and Desktops (CVAD) and VMware Horizon. First up, CVAD.
Citrix Virtual Apps and Desktops and App Layering vCenter Permissions
I need a vCenter account for my lab to use with both the CVAD Hosting Connection in Citrix Studio and Citrix App Layering.
Citrix details the required permissions at CVAD VMware virtualization environments and Citrix App Layering VMware vSphere.
To save time, here are the combined permissions with all the duplicates removed. I put an “(AL)” by the permissions that apply only to Citrix App Layering. If you do not use App Layering, you can safely ignore those permissions. I took these permissions from the CVAD 2103 and App Layering 2104 documentation. I also fixed the names of the permissions that Citrix has wrong in their documentation.
Table 1 vCenter Permissions for CVAD and App Layering
| Datastore > Allocate space |
| Datastore > Browse datastore |
| Datastore > Low level file operations |
| Folder > Create folder (AL) |
| Global > Cancel task (AL) |
| Global > Manage custom attributes |
| Global > Set custom attribute |
| Network > Assign network |
| Resource > Assign virtual machine to resource pool |
| vApp > Export (AL) |
| vApp > Import (AL) |
| Virtual machine > Configuration > Add existing disk |
| Virtual machine > Configuration > Add new disk |
| Virtual machine > Configuration > Add or remove device |
| Virtual machine > Configuration > Advanced Configuration |
| Virtual machine > Configuration > Change CPU Count |
| Virtual machine > Configuration > Change Memory |
| Virtual machine > Configuration > Change resource (AL) |
| Virtual machine > Configuration > Change Settings |
| Virtual machine > Configuration > Modify Device Settings (AL) |
| Virtual machine > Configuration > Remove disk |
| Virtual machine > Configuration > Rename (AL) |
| Virtual machine > Configuration > Set annotation (AL) |
| Virtual machine > Configuration > Upgrade virtual machine compatibility (AL) |
| Virtual machine > Edit Inventory > Create from existing |
| Virtual machine > Edit Inventory > Create new |
| Virtual machine > Edit Inventory > Remove |
| Virtual machine > Interaction > Configure CD media (AL) |
| Virtual machine > Interaction > Connect devices (AL) |
| Virtual machine > Interaction > Console interaction (AL) |
| Virtual machine > Interaction > Install VMware Tools (AL) |
| Virtual machine > Interaction > Power Off |
| Virtual machine > Interaction > Power On |
| Virtual machine > Interaction > Reset |
| Virtual machine > Interaction > Suspend |
| Virtual machine > Provisioning > Clone template |
| Virtual machine > Provisioning > Clone virtual machine |
| Virtual machine > Provisioning > Deploy template |
| Virtual machine > Snapshot management > Create snapshot |
We created the svc_CtxVMware account previously.
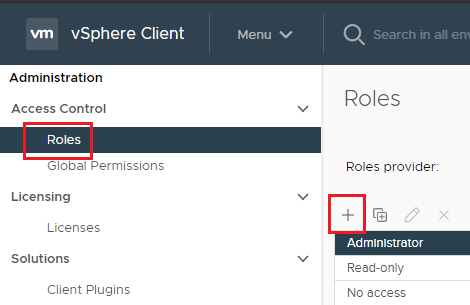
In the vCenter console, go to Menu -> Administration, as shown in Figure 18.
Expand Access Control, click Roles, and click the + (Plus sign), as shown in Figure 19.
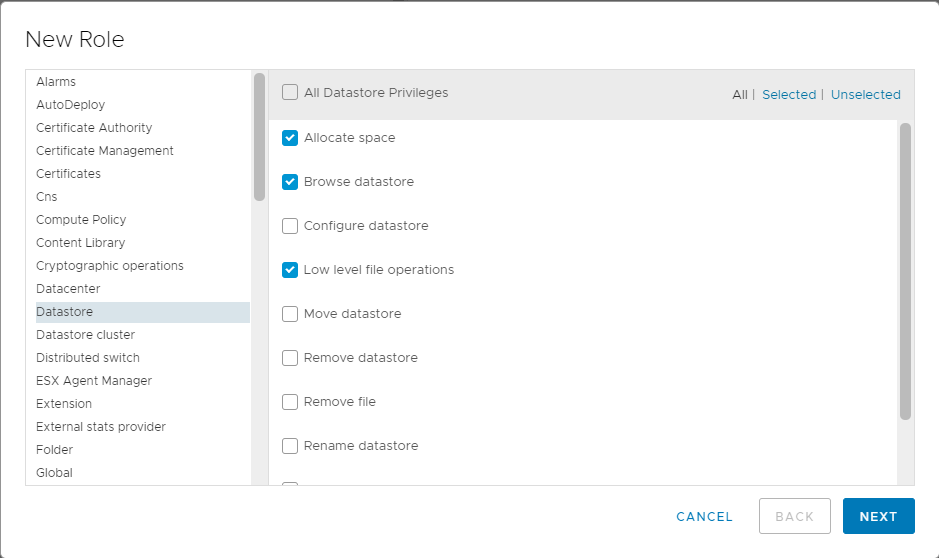
The hard part is going through all the settings in Table 1 and selecting the required permissions, as shown in Figure 20.
Hey VMware, it would be nice if this dialog box were resizable.
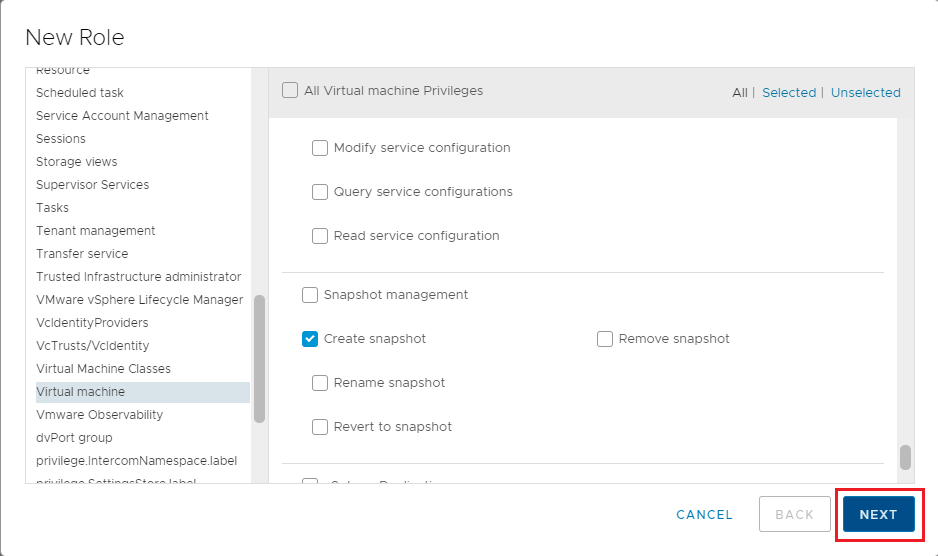
Continue selecting the required permissions. When all permissions are selected, click Next, as shown in Figure 21.
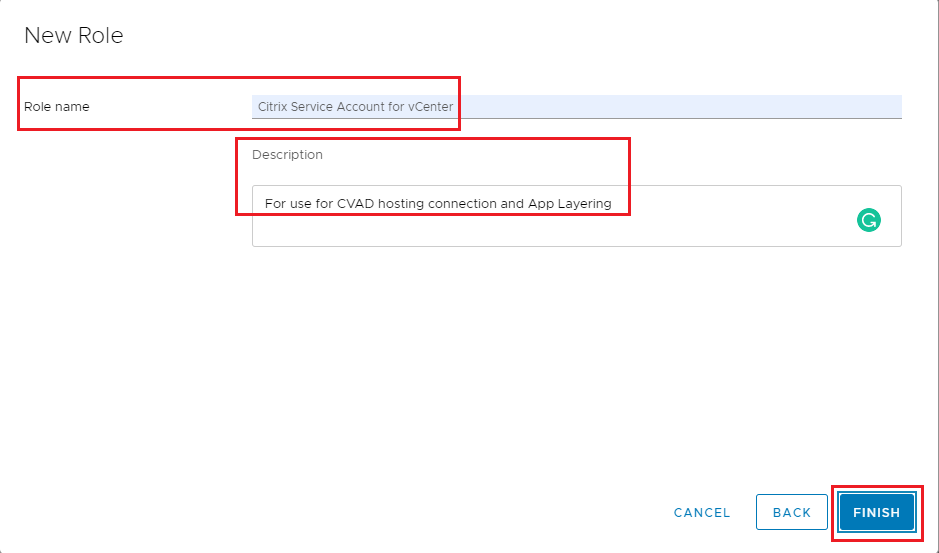
Enter a Role name and an optional Description, click Finish, as shown in Figure 22.
Click Global Permissions and click the + (Plus sign), as shown in Figure 23.
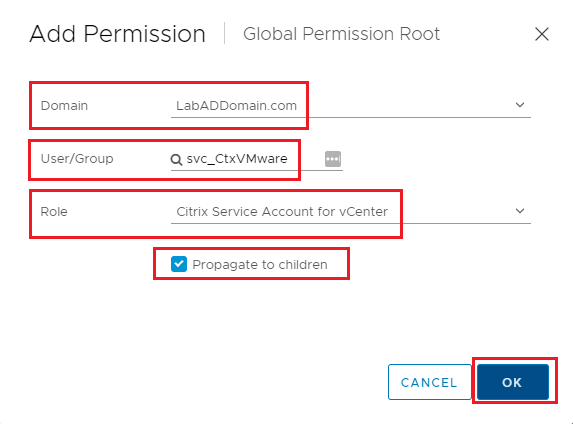
Select your AD domain in the Domain dropdown, then enter the service account name, select the just created Role, you must select Propagate to children, and click OK, as shown in Figure 24.
If you are following this article series, there is no CVAD infrastructure to test the account.
VMware Horizon vCenter Permissions
VMware lists their required permissions for Horizon 8 2106 at Privileges Required for the vCenter Server User.
Figures 25 and 26 show the required permissions for the VMware Horizon 8 2106 service account.
Hey VMware, it would be better to list the Privilege Group on vCenter Server and Privileges to Enable in the same order they appear in the vCenter New Role wizard.
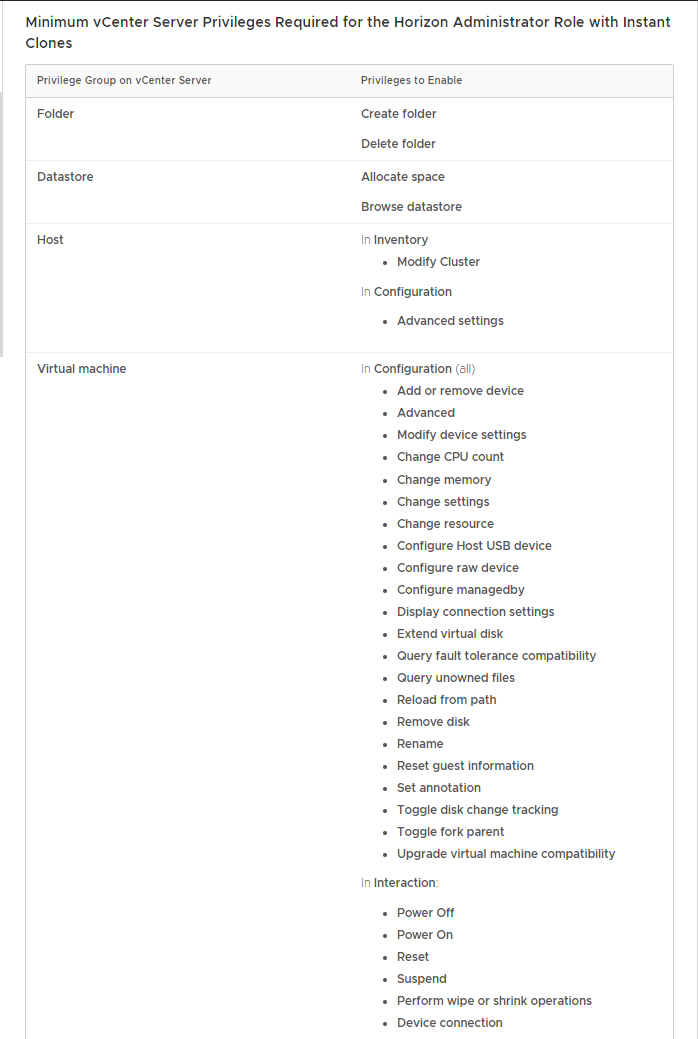
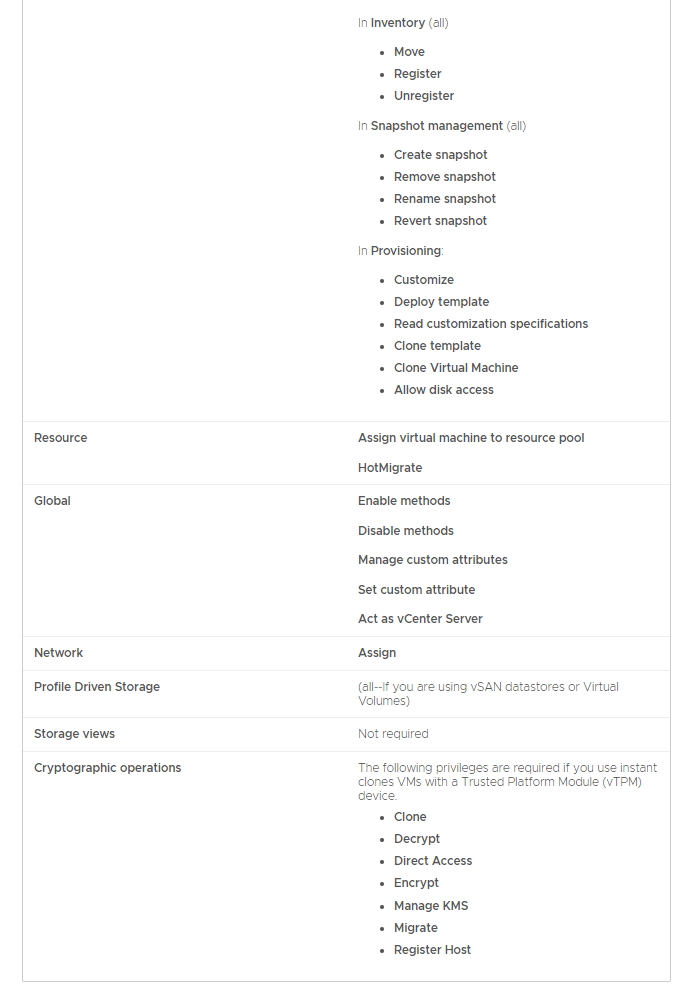
Table 2 vCenter Permissions for Horizon – Ordered List
| Datastore/Allocate space |
| Datastore/Browse datastore |
| Folder/Create folder |
| Folder/Delete folder |
| Global/Act as vCenter Server |
| Global/Disable methods |
| Global/Enable methods |
| Global/Manage custom attributes |
| Global/Set custom attribute |
| Host/Configuration/Advanced settings |
| Host/Inventory/Modify cluster |
| Network/Assign network |
| Resource/Assign virtual machine to resource pool |
| Resource/Migrate powered off virtual machine |
| Resource/Migrate powered on virtual machine |
| Virtual machine/Change Configuration/Add or remove device |
| Virtual machine/Change Configuration/Advanced configuration |
| Virtual machine/Change Configuration/Change CPU count |
| Virtual machine/Change Configuration/Change Memory |
| Virtual machine/Change Configuration/Change resource |
| Virtual machine/Change Configuration/Change Settings |
| Virtual machine/Change Configuration/Configure Host USB device |
| Virtual machine/Change Configuration/Configure managedBy |
| Virtual machine/Change Configuration/Configure Raw device |
| Virtual machine/Change Configuration/Display connection settings |
| Virtual machine/Change Configuration/Extend virtual disk |
| Virtual machine/Change Configuration/Modify device settings |
| Virtual machine/Change Configuration/Query Fault Tolerance compatibility |
| Virtual machine/Change Configuration/Query unowned files |
| Virtual machine/Change Configuration/Reload from path |
| Virtual machine/Change Configuration/Remove disk |
| Virtual machine/Change Configuration/Rename |
| Virtual machine/Change Configuration/Reset guest information |
| Virtual machine/Change Configuration/Set annotation |
| Virtual machine/Change Configuration/Toggle disk change tracking |
| Virtual machine/Change Configuration/Toggle fork parent |
| Virtual machine/Change Configuration/Upgrade virtual machine compatibility |
| Virtual machine/Edit Inventory/Move |
| Virtual machine/Edit Inventory/Register |
| Virtual machine/Edit Inventory/Unregister |
| Virtual machine/Interaction/Connect devices |
| Virtual machine/Interaction/Perform wipe or shrink operations |
| Virtual machine/Interaction/Power off |
| Virtual machine/Interaction/Power on |
| Virtual machine/Interaction/Reset |
| Virtual machine/Interaction/Suspend |
| Virtual machine/Provisioning/Allow disk access |
| Virtual machine/Provisioning/Clone template |
| Virtual machine/Provisioning/Clone virtual machine |
| Virtual machine/Provisioning/Customize guest |
| Virtual machine/Provisioning/Deploy template |
| Virtual machine/Provisioning/Read customization specifications |
| Virtual machine/Snapshot management/Create snapshot |
| Virtual machine/Snapshot management/Remove snapshot |
| Virtual machine/Snapshot management/Rename snapshot |
| Virtual machine/Snapshot management/Revert to snapshot |
We created the svc_VMwareHorizon AD account previously.
Expand Access Control, click Roles, and click the + (Plus sign), as shown in Figure 27.

The hard part is going through all the settings and selecting the required permissions, as shown in Figure 28.
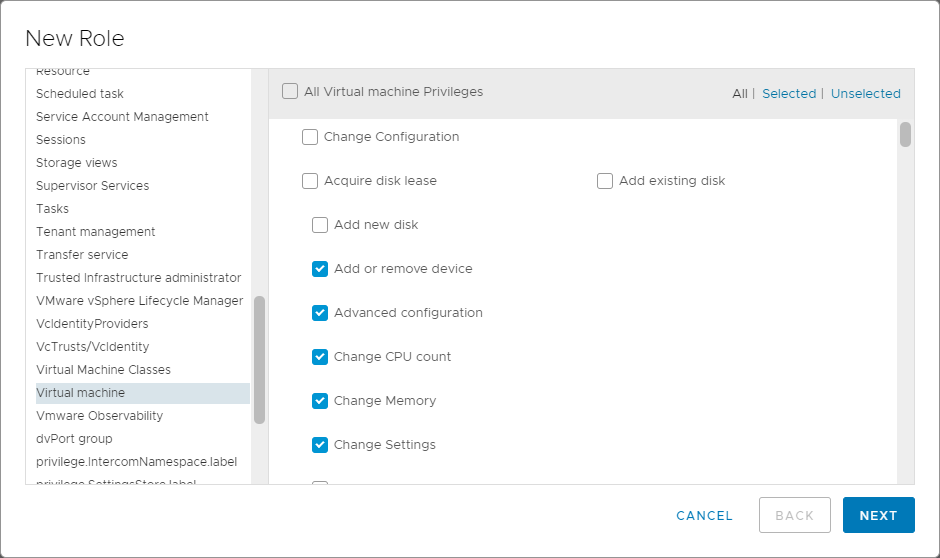
Continue selecting the required permissions. When all permissions are selected, click Next, as shown in Figure 29.

Enter a Role name and an optional Description, click Finish, as shown in Figure 30.

Click Global Permissions and click the + (Plus sign), as shown in Figure 31.

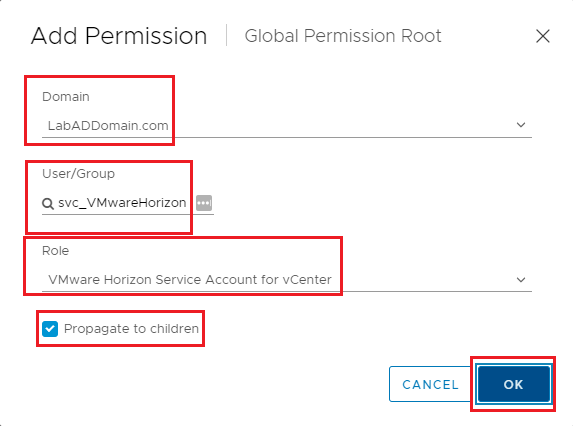
Select your AD domain in the Domain dropdown, enter the service account name, select the just created Role, select Propagate to children, and click OK, as shown in Figure 32.
If you are following this article series, there is no Horizon infrastructure to test the account.
Leave the vCenter console open to Global Permissions.
Create a Read-only Account
In my lab, I use monitoring software from vendors like ControlUp and Goliath Technologies. To provide for Least Privilege Access, use a Read-only account.
First, we need to create an AD service account to assign the vCenter Read-only Role.
On the first DC, open an elevated PowerShell session.
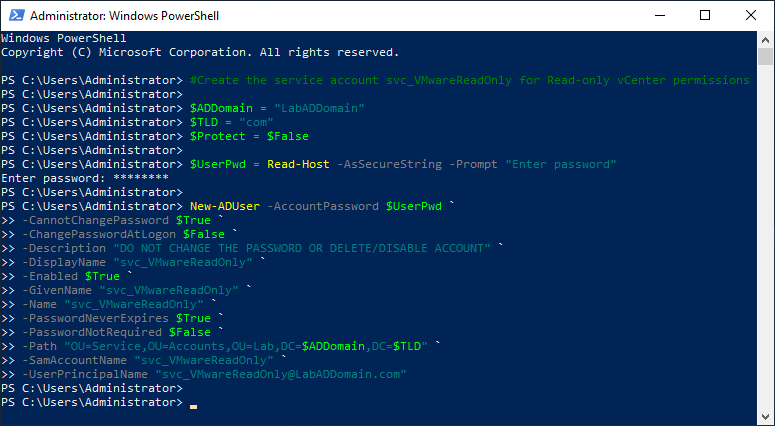
Copy and paste the following into the elevated PowerShell session and press Enter, as shown in Figure 33.
Remember to set the values you need.
Note: Lines may wrap
#Create the service account svc_VMwareReadOnly for Read-only vCenter permissions

$ADDomain = "LabADDomain"
$TLD = "com"
$Protect = $False

$UserPwd = Read-Host -AsSecureString -Prompt "Enter password"

New-ADUser -AccountPassword $UserPwd `
-CannotChangePassword $True `
-ChangePasswordAtLogon $False `
-Description "DO NOT CHANGE THE PASSWORD OR DELETE/DISABLE ACCOUNT" `
-DisplayName "svc_VMwareReadOnly" `
-Enabled $True `
-GivenName "svc_VMwareReadOnly" `
-Name "svc_VMwareReadOnly" `
-PasswordNeverExpires $True `
-PasswordNotRequired $False `
-Path "OU=Service,OU=Accounts,OU=Lab,DC=$ADDomain,DC=$TLD" `
-SamAccountName "svc_VMwareReadOnly" `
-UserPrincipalName "[email protected]"
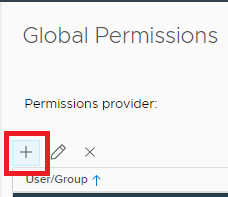
In Global Permissions, click the “+“, as shown in Figure 34.
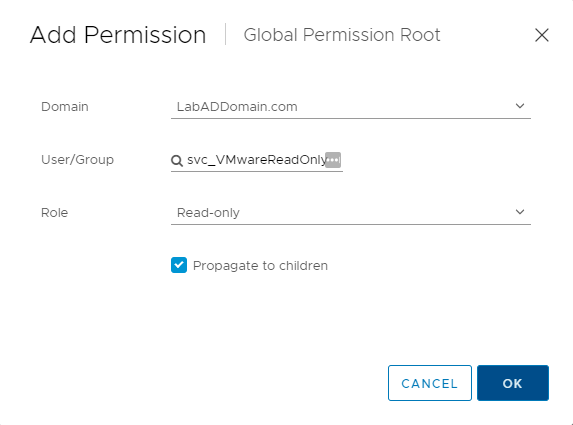
Change the Domain to the AD domain, select the new Read-only account for User/Group, select the Read-only Role, select Propagate to children, and click OK, as shown in Figure 35.
The new Read-only account is added to the list, as shown in Figure 36.

Next up: Additional XenCenter Configuration