With the release of Microsoft Windows Server 2022, I added this new article to the series.
You can download Server 2022 from MSDN/Visual Studio or the Microsoft Evaluation Center. I downloaded the ISO and uploaded it to my vCenter ISO data store. As of 28-Aug-2021, only vCenter 7.02 U2 supports Server 2022. Citrix XenServer 8.2, at this time, does not offer support for Server 2022.
For this article, I used Windows Server 2022 Standard Edition.
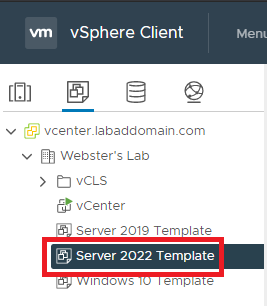
This article covers creating a template in VMware vCenter.
VMware
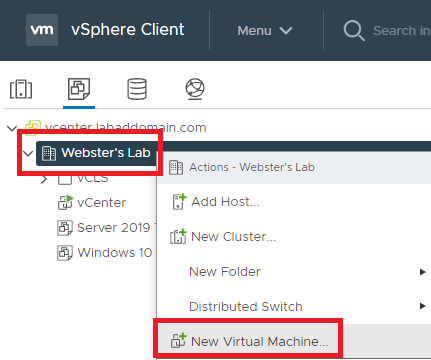
In vCenter, right-click the cluster and click on New Virtual Machine…, as shown in Figure 1.
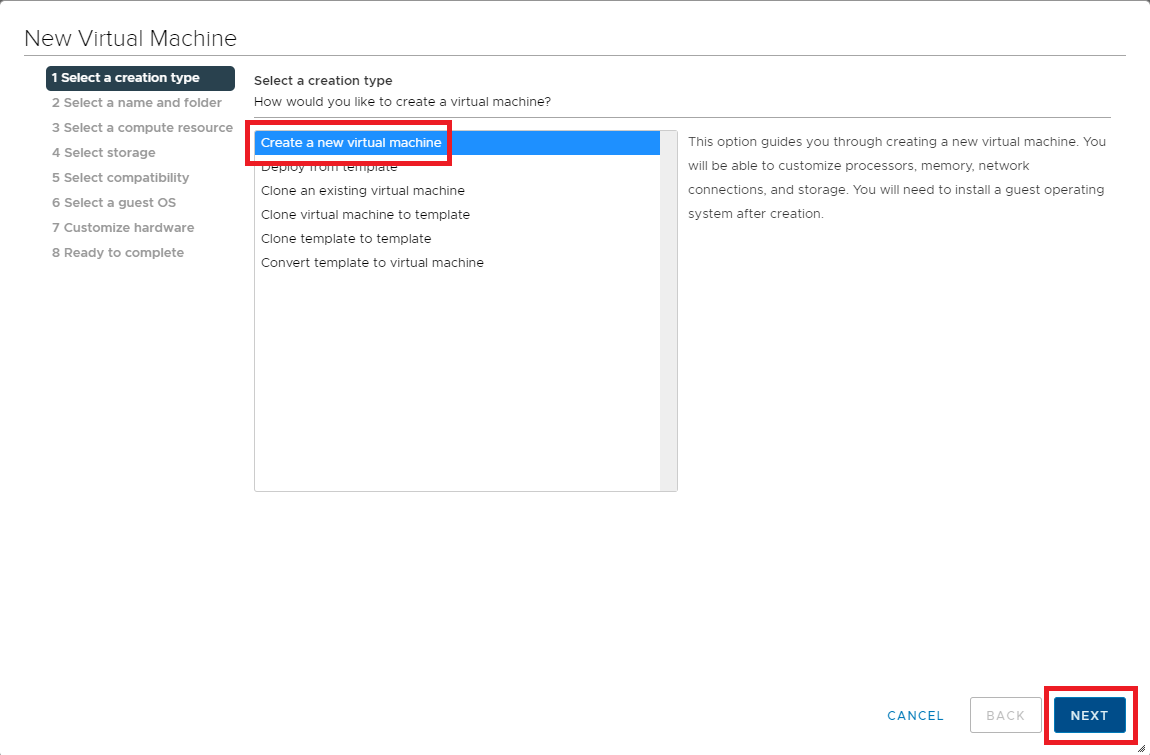
Select Create a new virtual machine and click Next, as shown in Figure 2.
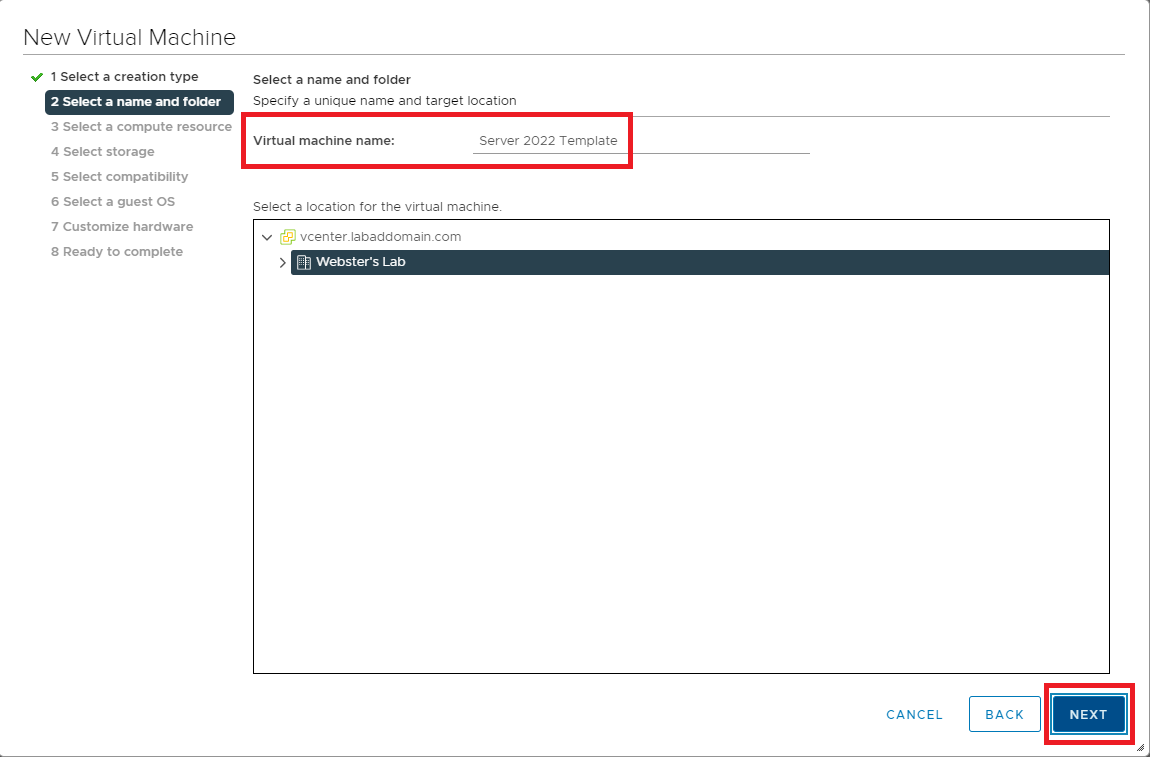
Enter a Virtual machine name and click Next, as shown in Figure 3.
Click Next, as shown in Figure 4.
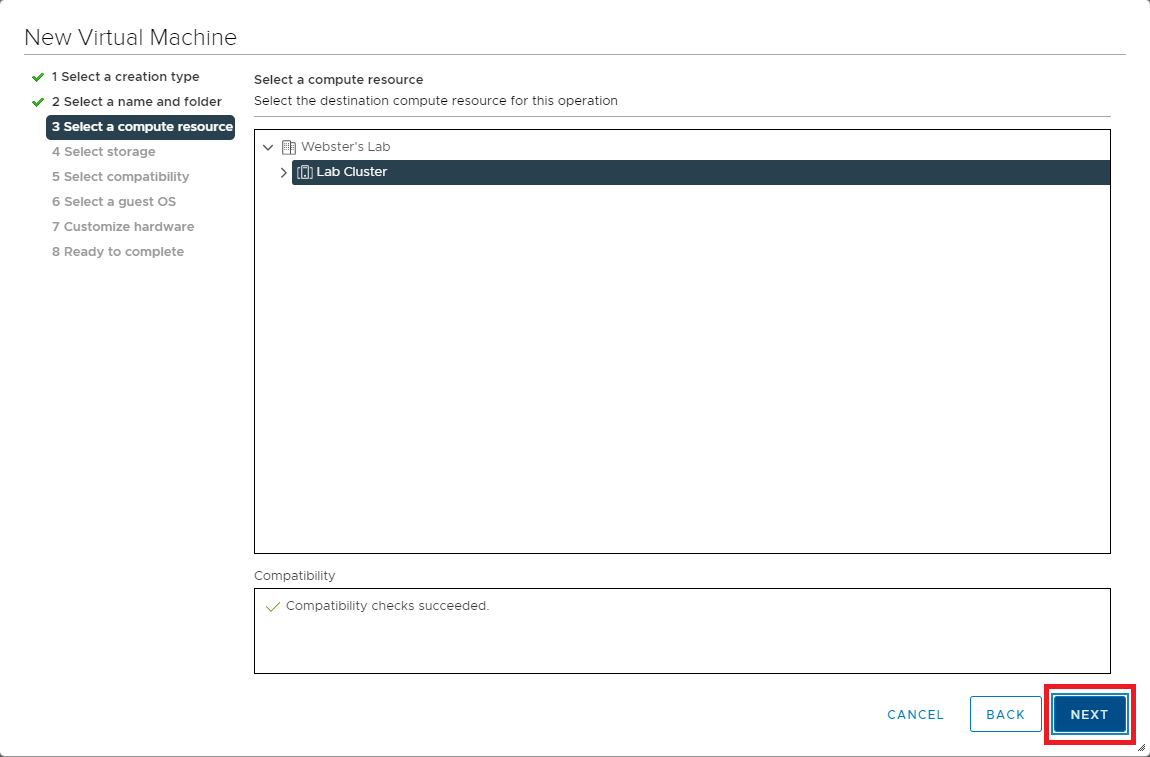
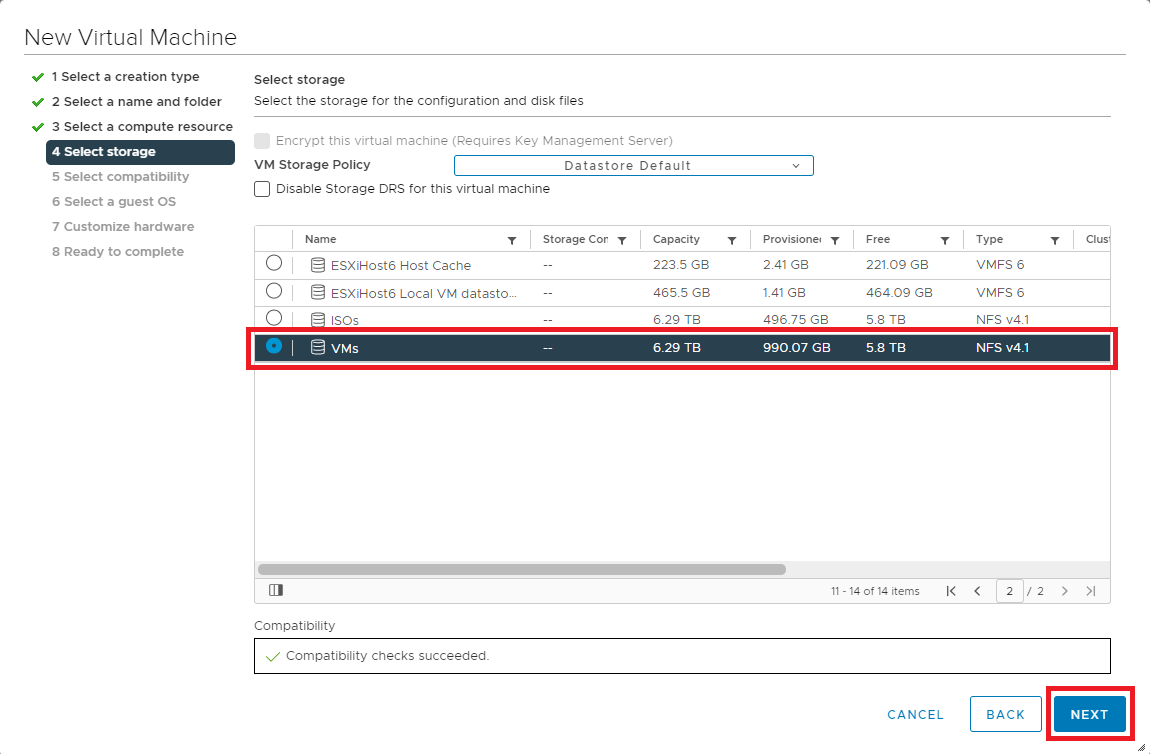
Select the NFS shared datastore created earlier in this series and click Next, as shown in Figure 5.
Keep the default Compatible with the value of ESXi 7.0 U2 and later and click Next, as shown in Figure 6.

Verify that the Guest OS Family is Windows and that the Guest OS Version is Microsoft Windows Server 2022 (64-bit) and click Next, as shown in Figure 7.

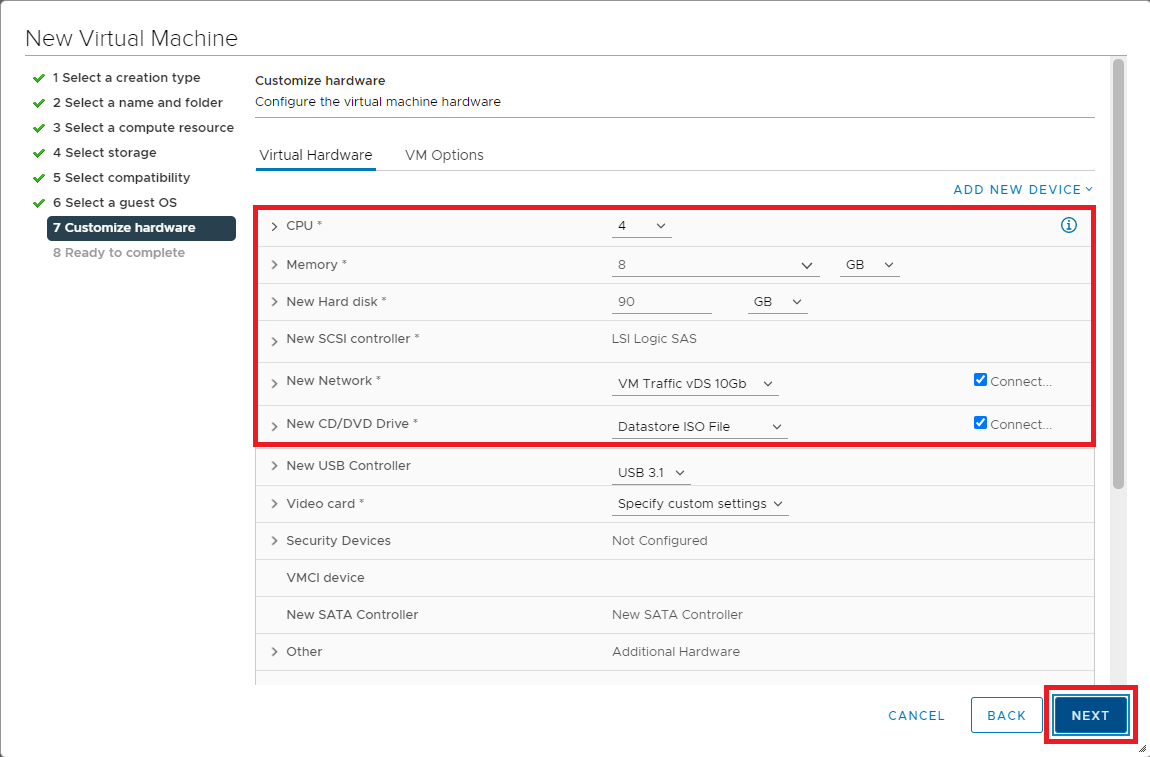
For CPU and Memory, use what works for your environment. For me, as shown in Figure 8, I used the following values:
- CPU: 4
- Memory: 8 GB
- New Hard disk: 90GB with Disk Provisioning type Thin Provision
- New SCSI controller: LSI Logic SAS
- New Network: VM Traffic vDS 10Gb (or whatever VM traffic vDS you created) and Adapter Type must be vmxnet3
- New CD/DVD Drive: Select the Windows Server 2022 ISO file from the ISO Datastore. Make sure to also select Connect At Power On
Use default values for the remaining options and click Next, as shown in Figure 8.
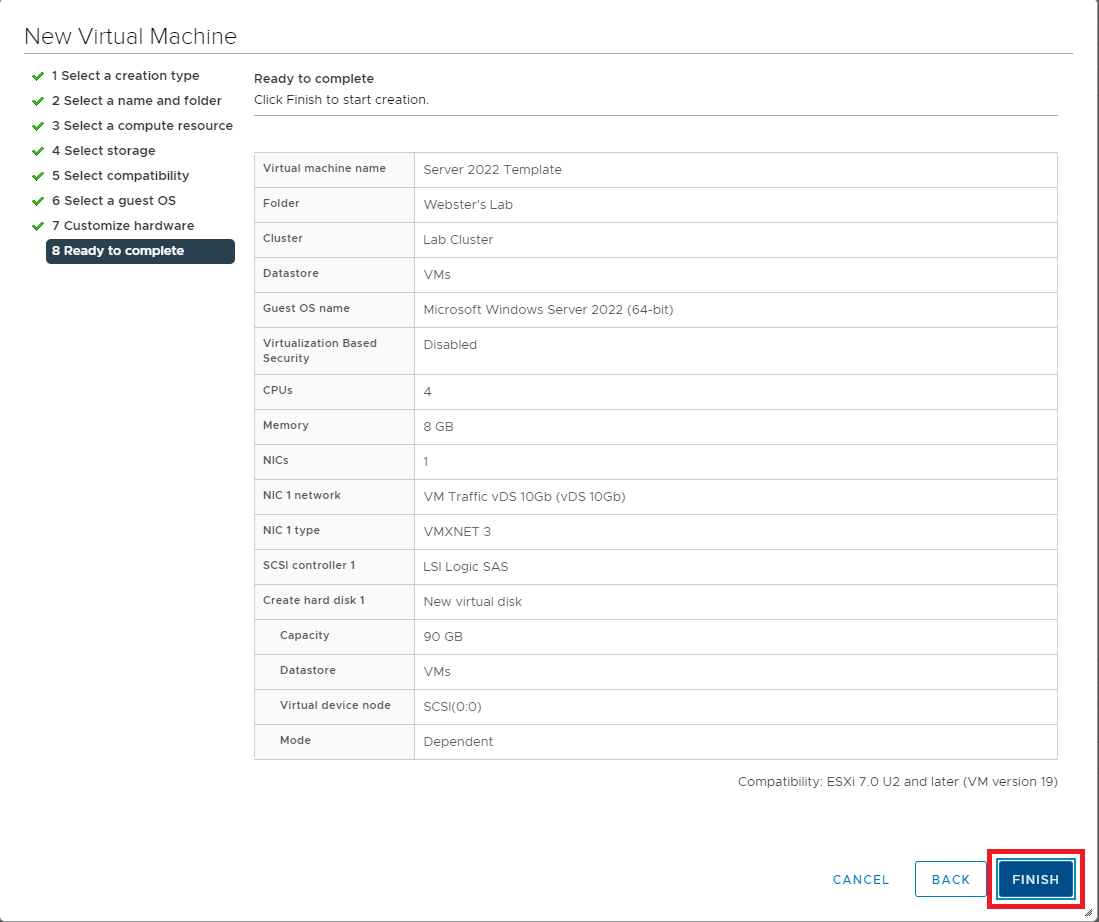
Verify that the configuration data for the new VM is correct and click Finish, as shown in Figure 9. If any item is incorrect, click Back, correct the item(s), and continue.
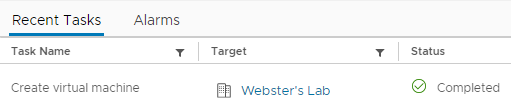
Wait for the creation of the VM to complete, as shown in Figure 10.
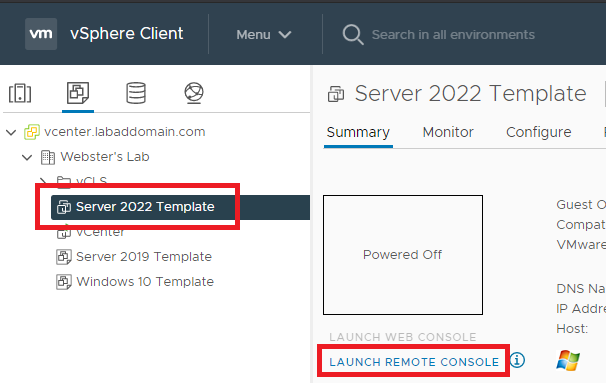
In vCenter, select the new template VM, and in the right pane, click LAUNCH REMOTE CONSOLE, as shown in Figure 11.
Note: From Abdullah Abdullah. You can use the Web Console instead of the Remote Console, but the VM must be powered on first to make the option available.
If you receive a popup stating You’ll need a new app to open this vrmc link, as shown in Figure 12, press Esc.

In vCenter, click the circled lower case I, as shown in Figure 13.

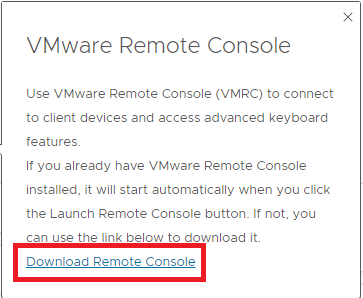
In the popup that appears, click Download Remote Console, as shown in Figure 14.
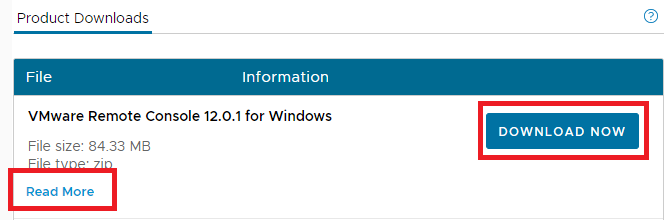
Follow the steps to install the VMware Remote Console, as shown in Figure 15.
Once you install the console, in vCenter, select the new template VM, and in the right pane, click LAUNCH REMOTE CONSOLE, as shown in Figure 11.
Depending on the speed of your ESXi hosts, you need to be quick in the following steps.
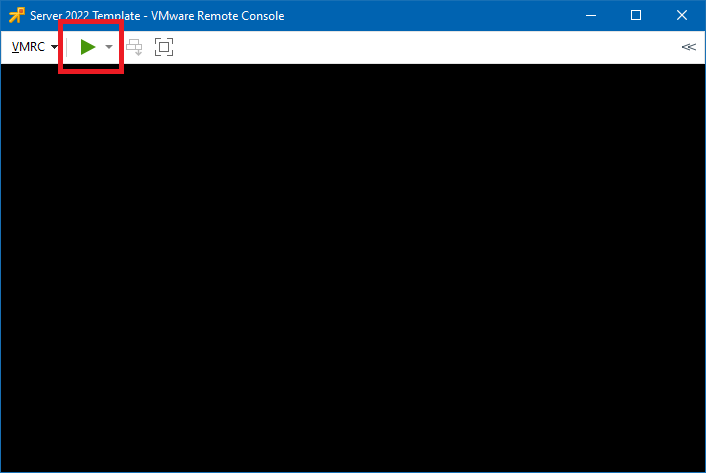
- Click the Green start button, as shown in Figure 16,
- Click inside the console window,
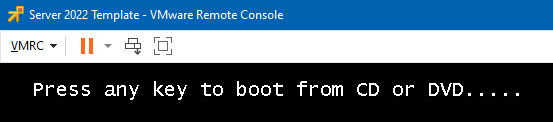
- Press a key, for example, the spacebar when prompted, as shown in Figure 17.
The installation of Windows Server 2022 begins.
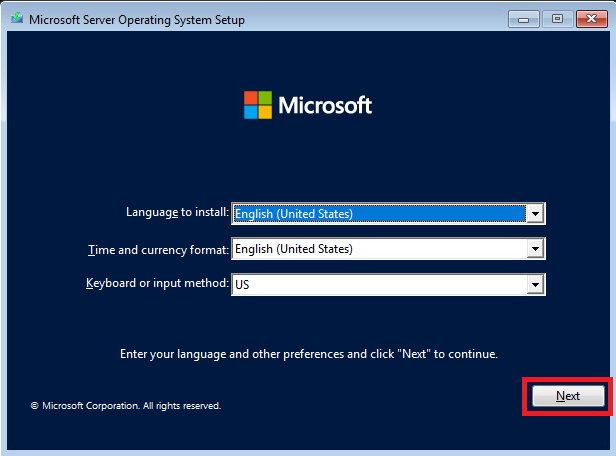
Select the options appropriate for you and click Next, as shown in Figure 18.
Click Install now, as shown in Figure 19.

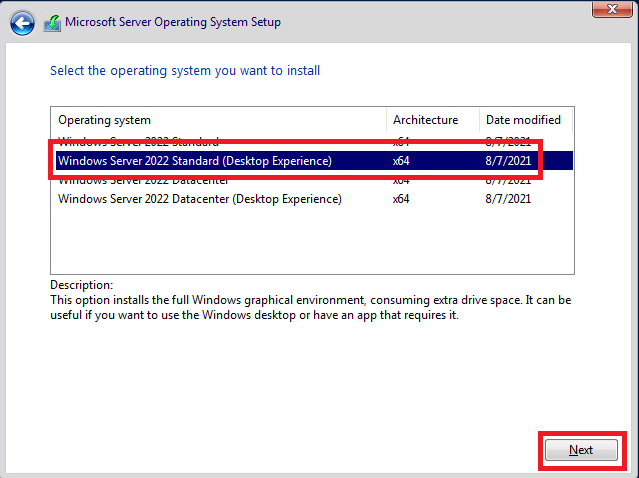
The Microsoft Action Pack Subscription has licenses for Windows Server 2022 Standard. I selected Windows Server 2022 Standard (Desktop Experience). Select either Standard or Datacenter, depending on the license you have.
Click Next, as shown in Figure 20.
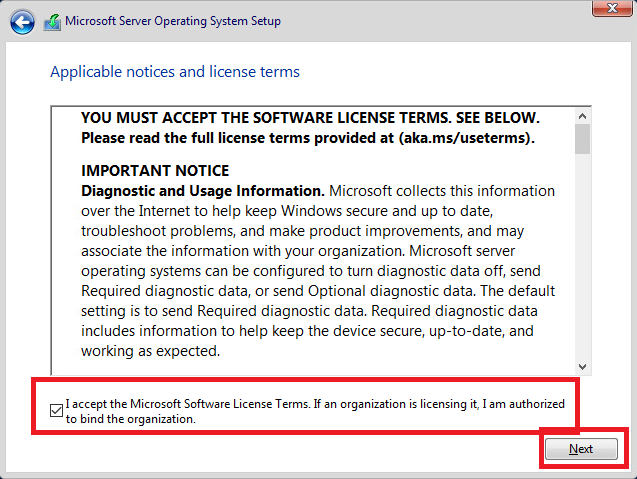
Select I accept the Microsoft Software License Terms and click Next, as shown in Figure 21.
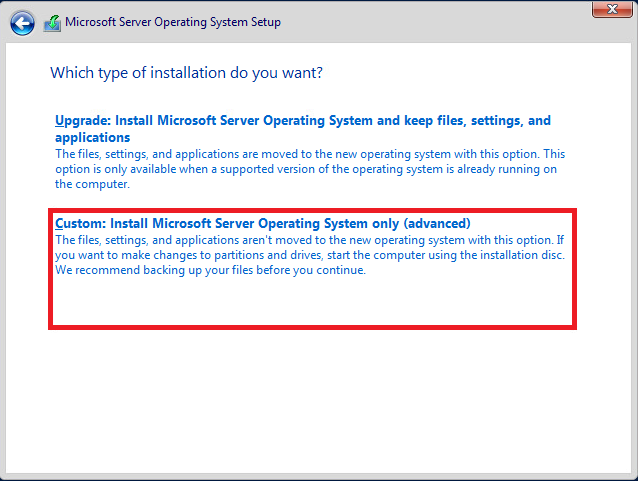
Select Custom: Install Microsoft Server Operating System only (advanced), as shown in Figure 22.
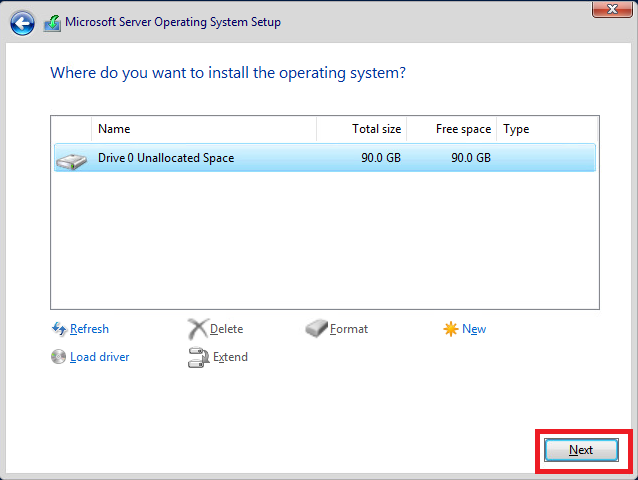
Click Next, as shown in Figure 23.
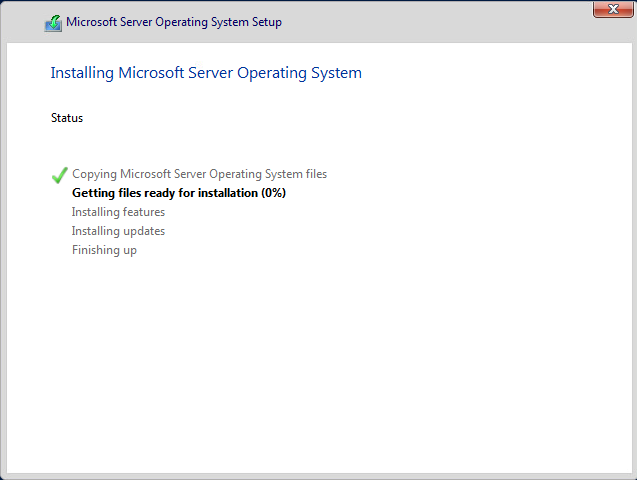
The Server 2022 installation begins, as shown in Figure 24.
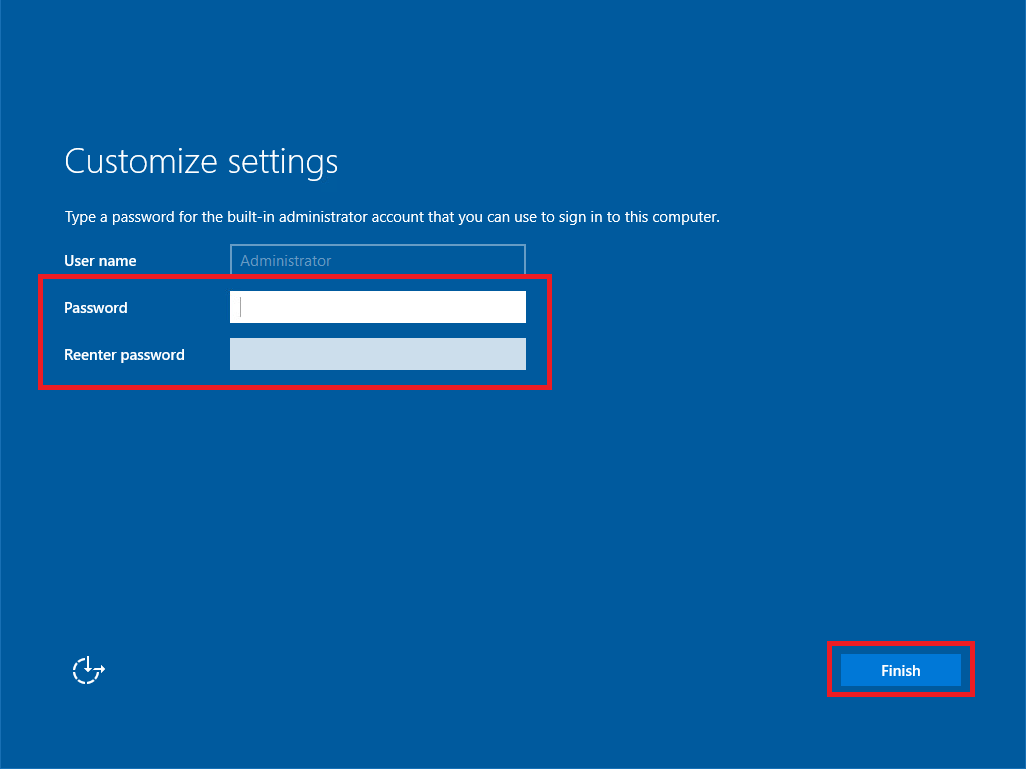
After the VM restarts, enter a password for the local Administrator account and click Finish, as shown in Figure 25.
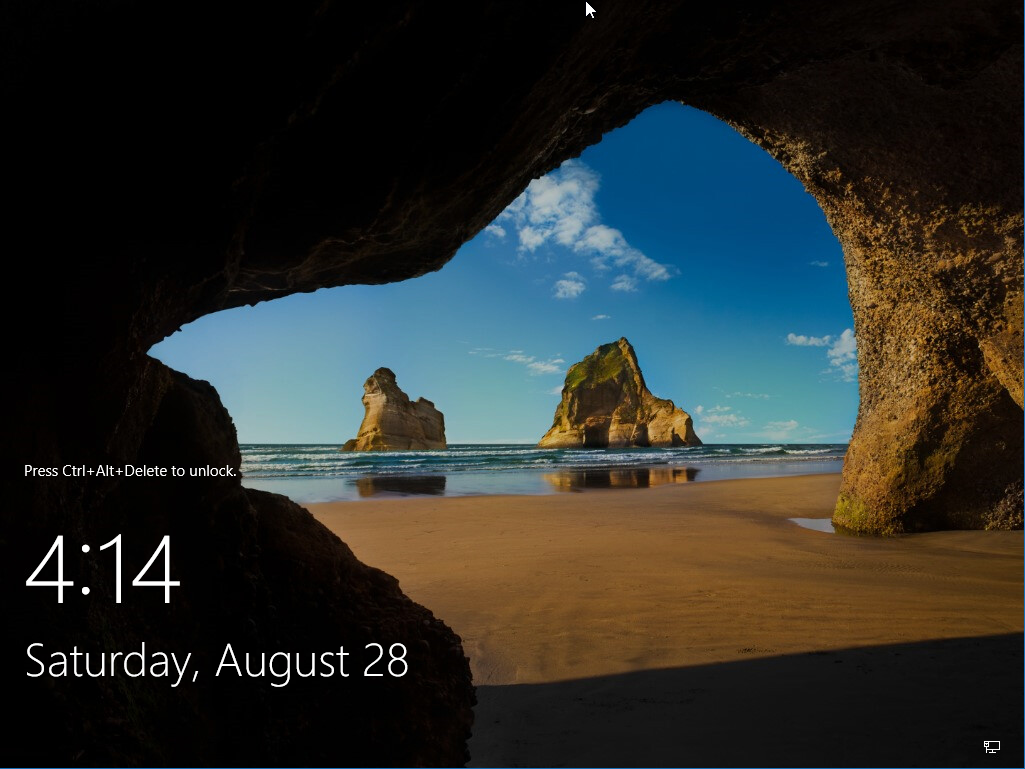
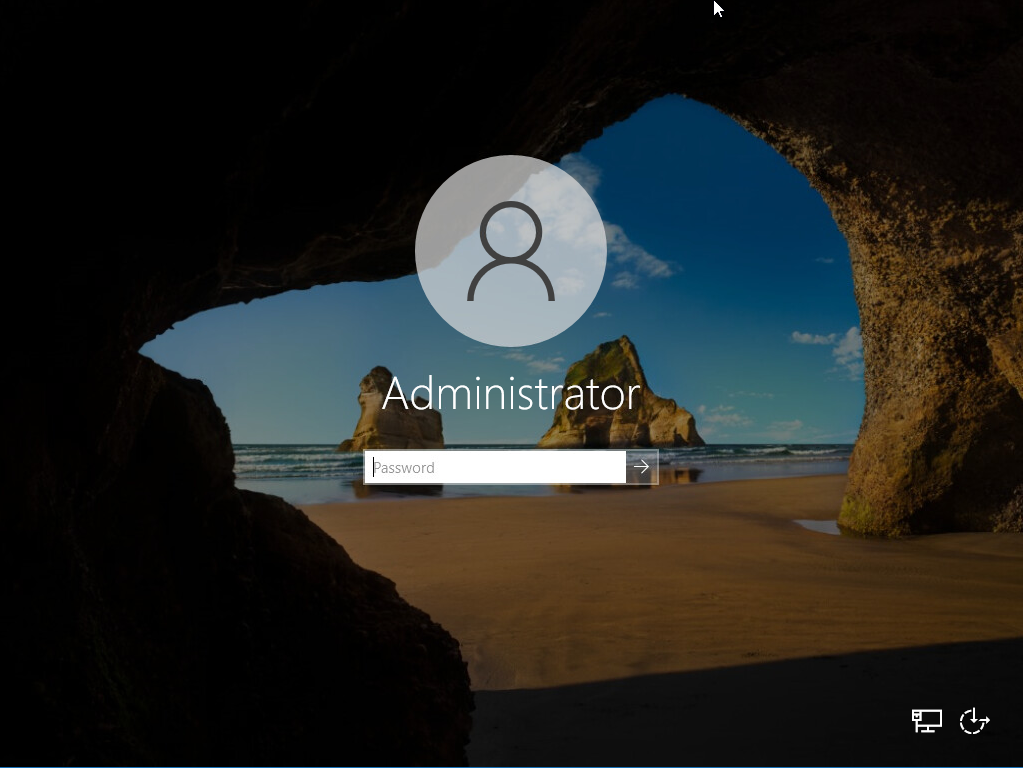
Press Ctrl-Alt-Insert, enter the password for the Administrator account, and press Enter, as shown in Figures 26 and 27.
Note: If you press Ctrl-Alt-Delete, your local computer processes that key combination. Ctrl-Alt-Insert is what most virtualization and remote consoles accept as Ctrl-Alt-Delete.
Note: Unlike with Windows Server 2019, Server 2022 appears to have some VMware network capability built-in. I checked the VM, and there were no VMware Tools installed, yet the network icon in the lower right corner does not have a red slash as Server 2019 did at this point in the installation and configuration.
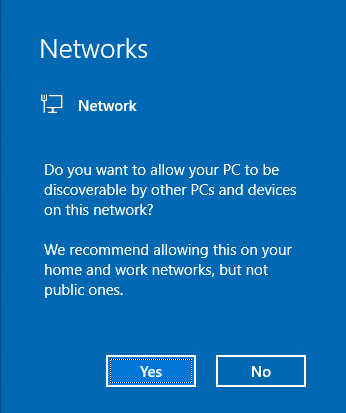
You may receive a Networks popup message. Decide whether you want this VM discoverable on your network and click either Yes or No, as shown in Figure 28.
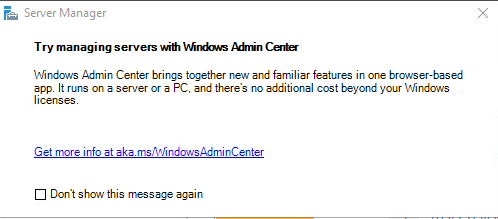
Close the popup shown in Figure 29 for Windows Admin Center. If you don’t want to see this popup again, select Don’t show this message again.
We need to install the VMware tools. Please see Overview of VMware Tools for a complete description.
Overview of VMware Tools
VMware Tools is a suite of utilities that enhances the performance of the virtual machine’s guest operating system and improves the management of the virtual machine. Without VMware Tools installed in your guest operating system, guest performance lacks important functionality. Installing VMware Tools eliminates or improves these issues:
- Low video resolution
- Inadequate color depth
- Incorrect display of network speed
- Restricted movement of the mouse
- Inability to copy and paste and drag-and-drop files
- Missing sound
- Provides the ability to take quiesced snapshots of the guest OS
- Synchronizes the time in the guest operating system with the time on the host
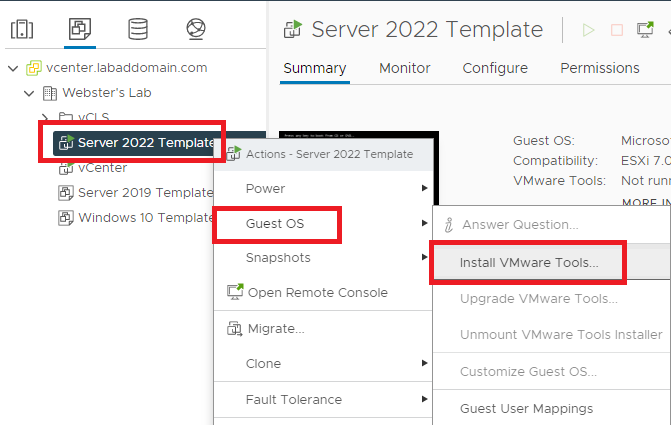
In vCenter, right-click the VM, click Guest OS, and click Install VMware Tools…, as shown in Figure 30.
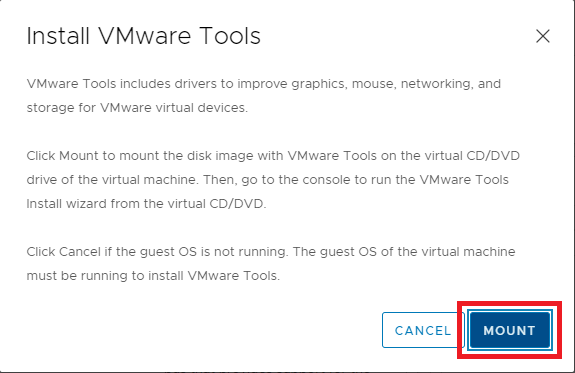
Click Mount, as shown in Figure 31.
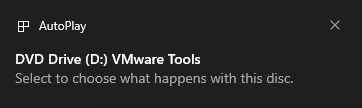
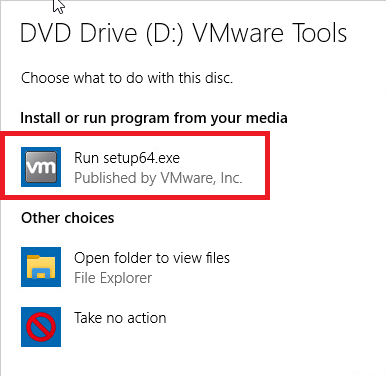
In the VM, you see a popup in the lower right corner, as shown in Figure 32.
Click that popup and then click Run setup64.exe in the popup that appears in the upper right corner, as shown in Figure 33.
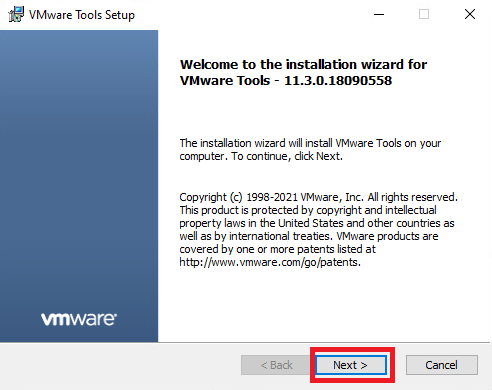
Click Next, as shown in Figure 34.
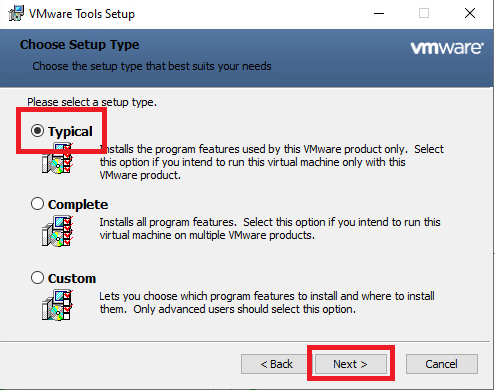
Select Typical and click Next, as shown in Figure 35.
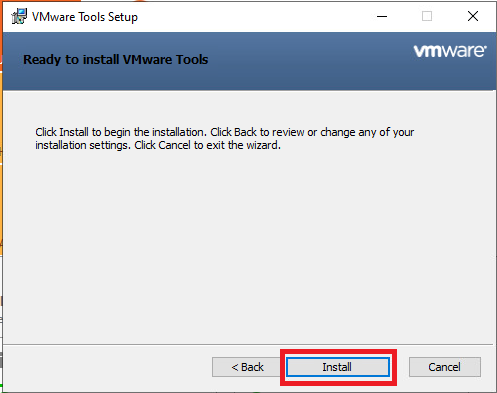
Click Install, as shown in Figure 36.
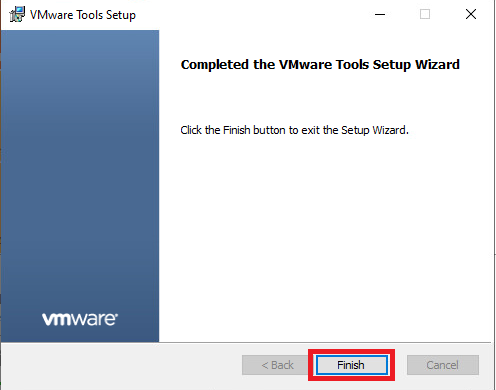
Click Finish, as shown in Figure 37.
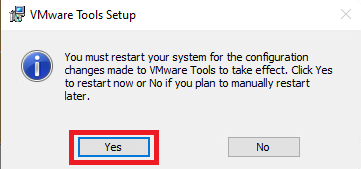
Click Yes, as shown in Figure 38.
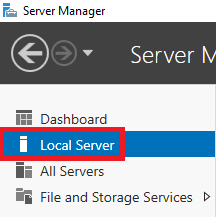
After the VM restarts, log back in and click Local Server in the left pane of Server Manager, as shown in Figure 39.
We use a template to create additional VMs. These additional VMs, when first powered on, go through what Microsoft calls the Out of Box Experience or OOBE.
When customers turn on their Windows PCs for the first time, they see the Windows Out of Box Experience (OOBE). OOBE consists of a series of screens that require customers to accept the license agreement, connect to the internet, log in with or sign up for a Microsoft Account, and share information with the OEM.
The following items are available to customize. Some make no sense to customize as the OOBE resets them to default values.
Note: I made the settings in bold to my template VM.
- Computer name: Don’t change
- Workgroup: Changeable
- Windows Defender Firewall: Changeable
- Remote management: Changeable
- Remote Desktop: Changeable
- Allow remote connections to this computer
- NIC Teaming: No need to change as there is only one network card at this time
- Ethernet0: Don’t change
- Last installed updates: Keeps date from Template VM
- Windows Update: Changeable
- Last checked for updates: Keeps date from Template VM
- Windows Defender Antivirus: Changeable
- Feedback & Diagnostics: Changeable
- Feedback frequency: Never
- IE Enhanced Security Configuration: Changeable
- Admin: Off
- User: Off
- Time zone: Changeable
- Change time zone: Central Time
- Deselect Notify me when the clock changes
- Product ID: Don’t change
If you wish, you can install all Windows Updates, as I always do.
After you install all Windows Updates, reboot the server to clear any pending restart required flags.
After the VM restarts, log back in.
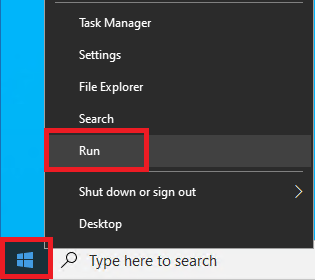
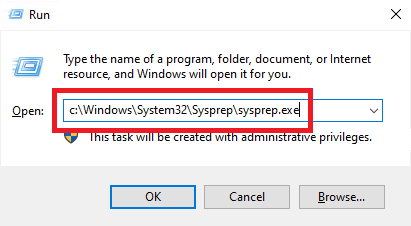
Right-click the Start button, click Run, as shown in Figure 40.
Type in c:\windows\system32\sysprep\sysprep.exe, and press Enter, as shown in Figure 41.
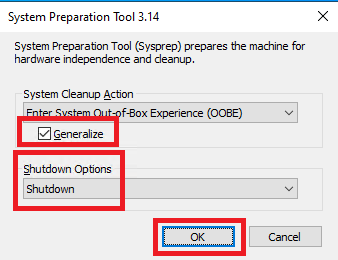
Select Generalize, select Shutdown from the Shutdown Options dropdown list, and click OK, as shown in Figure 42.
When the server is at the login screen, shut down the server.
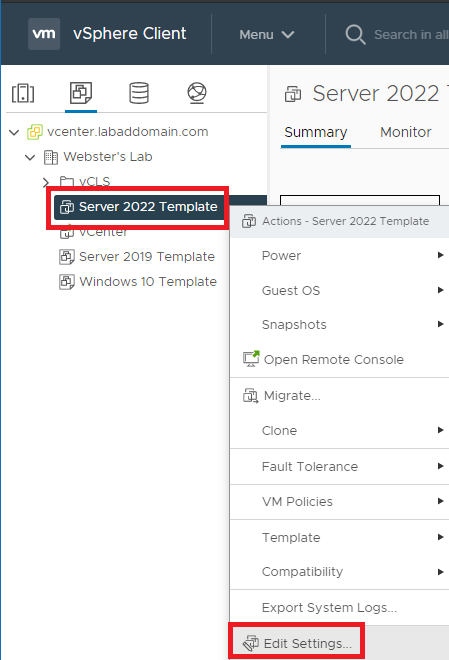
After the VM completes the shutdown process, right-click the VM, click Edit Settings…, as shown in Figure 43.
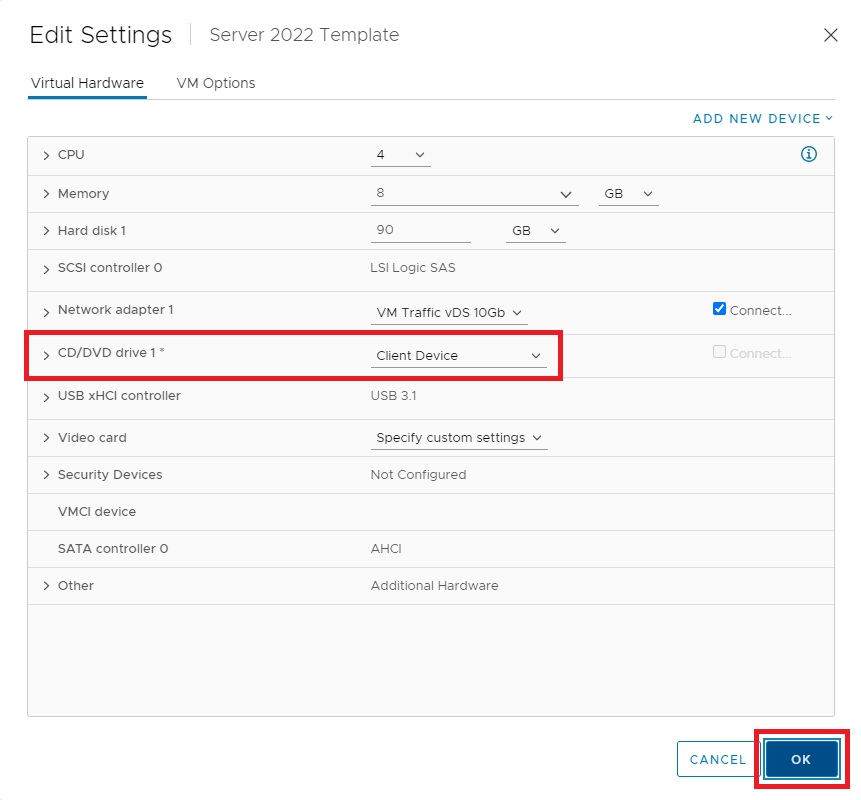
Change CD/DVD drive 1 to Client Device and click OK, as shown in Figure 44.
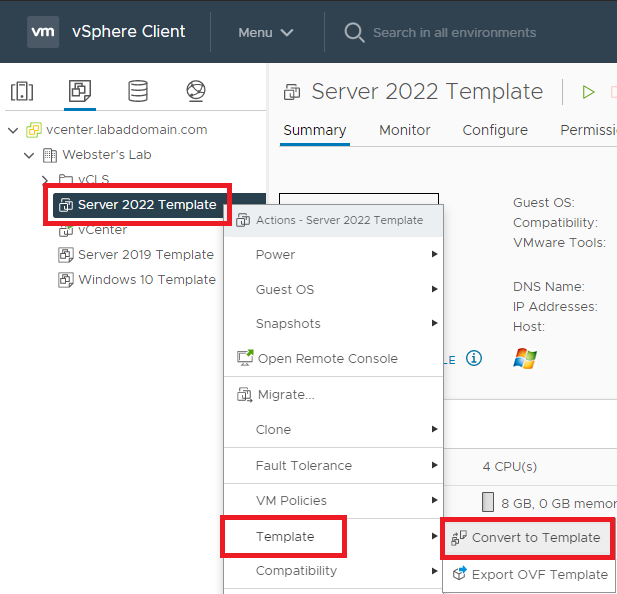
Right-click the VM, click Template, and click Convert to Template, as shown in Figure 45.
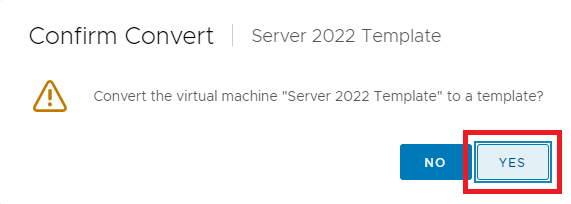
Click Yes, as shown in Figure 46.
The VM is now a template, as shown in Figure 47.