[Updated 8-Nov-2021]
On September 9, 2019, I published the Building Webster’s Lab V1 article series that used vSphere/vCenter 6.7 U3 and XenServer 8.0. This is a follow-up series on building the lab with vSphere/vCenter 7.0 and XenServer 8.2. I want to rebuild the lab as I’m not too fond of upgrades. Building new allows for learning new stuff and a chance to start clean. There are more details about the lab building process in this series. We cover the hypervisor details and create an Active Directory, a Microsoft Certificate Authority, Group Policies, and some basic server builds. Once I complete the lab build, I start the article series Learning the Basics of VMware Horizon 8 2106.
One of the significant issues I had with the original build process with all versions of vSphere 6.x was that I could not get NFS V4.1 to work between my Synology NAS and vSphere/vCenter 6.x. I tried for months to get it working and threw in the towel. Finally, someone on Twitter recommended using NFS V3, and everything worked. I was hopeful that NFS V4.1 would work between my Synology NAS and vSphere/vCenter 7.x. I let out a big YAHOO when it did work. WHEW!
Synology support told me back in 2019 that they thought the issue was on the VMware side. I was skeptical of their conclusion, but it appears they were correct. Nothing changed on the Synology side. The Synology NFS plug-in for VMware VAAI hadn’t changed since 25-Jun-2019 when it was updated to support ESXi 6.7. The same plug-in installed in ESXi 7 works with no issues.
VMware has an article to show the differences in the capabilities of NFS 3 and NFS 4.1. Please see NFS Protocols and ESXi.
Before continuing this introduction article, let me explain the products and technology that I list below. Not everyone has years of virtualization experience and virtualization knowledge. I spend many hours answering questions that come to me in emails and answering questions on Experts Exchange. Many people are new to the world of Citrix, Microsoft, Parallels, VMware, hypervisors, and application, desktop, and server virtualization.
There are two types of hypervisors: Type 1 and Type 2.
Type 1 hypervisors run directly on or take complete control of the system hardware (bare metal hardware). These include, but are not limited to:
Citrix Hypervisor (Formerly Citrix XenServer, which is the name I still use)
Type 2 hypervisors run under a host operating system. These include, but are not limited to:
VMware Workstation for Windows
Other terminology and abbreviations:
Virtualization Host: a physical computer that runs the Type 1 hypervisor.
Virtual Machine (VM): an operating system environment composed entirely of software that runs its operating system and applications like a physical computer. A VM behaves like a physical computer and contains its virtual processors (CPU), memory (RAM), hard disk, and networking (NIC).
Cluster or Pool: a single managed entity that binds together multiple physical hosts running the same Type 1 hypervisor and the VMs of those hosts.
Datastore or Storage Repository (SR): a storage container that stores one or more virtual hard disks.
Virtual Hard Disk: A virtual hard disk is a disk drive with similar functionalities as a typical hard drive but is accessed, managed, and installed on a virtual machine infrastructure.
Server Virtualization: Server virtualization is the masking of server resources, including the number and identity of individual physical servers, processors, and operating systems, from server users.
Application Virtualization: Application virtualization is the separation of an application from the client computer accessing the application.
Desktop Virtualization: Desktop virtualization is the concept of isolating a logical operating system (OS) instance from the client used to access it.
There are several products mentioned and used in this article series:
Citrix Virtual Apps and Desktops (CVAD, formerly XenApp and XenDesktop).
Microsoft Remote Desktop Services (RDS)
Parallels Remote Application Server (RAS)
VMware Horizon (Horizon)
Citrix uses XenCenter to manage XenServer resources, and VMware uses vCenter to manage vSphere resources. Both XenCenter and vCenter are centralized graphical consoles for managing, automating, and delivering virtual infrastructures.
In Webster’s Lab, I always try to use the latest Citrix XenServer, VMware Workstation, and VMware vSphere. This article series records the adventures of a networking amateur building a vSphere 7.0 cluster from start to finish.
Like most Citrix and Active Directory (AD) consultants, I can work with the various vSphere and vCenter clients. I can work with virtual machines (VMs), snapshots, templates, cloning, and customization templates. Most consultants don’t regularly install and configure new ESXi hosts, vCenter, networking, and storage, which can be confusing, at least the first few times.
I found much misinformation on the Internet as well as many helpful blogs on this journey. I ran into so much grief along the way that I thought that sharing this learning experience with the community was a good idea.
Have I got this all figured out? I seriously doubt it. Have I built the VMware part of the lab in the best way possible? Again, I doubt it. To figure this out, I experienced trials and errors (mainly errors!) in many scenarios. I found many videos and articles that used a single “server” with a single NIC. That meant there was essentially no network configuration to do once the installation of ESXi was complete. Many people used VMware Workstation and nested ESXi VMs. I never saw a video or article where the author used a real server with multiple NICs and configured networking and storage.
If you want to offer advice on my lab build, please email me at [email protected].
I watched many videos on this journey — some useless and rife with editing errors, some very useful and highly polished. The three most helpful video series came from Pluralsight. Disclaimer: As a Citrix Technology Professional (CTP), I receive a complimentary subscription to Pluralsight as a CTP Perk.
These are the videos I watched for the original article series.
VMware vSphere 6 Data Center Virtualization (VCP6-DCV) by Greg Shields
https://www.pluralsight.com/paths/vsphere-6-dcv
What’s New in vSphere 6.5 by Josh Coen
https://www.pluralsight.com/courses/whats-new-vsphere-6-5
VMware vSphere 6.5 Foundations by David Davis
I did not watch any Pluralsight videos on vSphere 7, but David Davis has several new courses in his Implementing and Managing VMware vSphere Learning Path.
The physical servers I use as my VMware and XenServer hosts are from TinkerTry and Wired Zone.
Supermicro Mini Tower Intel Xeon D-1541 Bundle 2 – US Version
Paul Braren at TinkerTry takes great pride in the servers he recommends and has a very informative blog.
For the ESXi hosts, I have six of the 8-core servers with the following specifications:
- Mini tower case
- Intel Xeon D-1541 processor
- 64GB DDR4 RAM
- Two 1Gb NIC
- Two 10Gb NIC
- Crucial BX300 120GB SSD (ESXi install)
- Samsung 970 EVO 500GB NVMe PCIe M.2 SSD (Local datastore)
- Crucial MX500 250GB SSD (Host cache)
For the XenServer hosts, I have four of the 12-core servers with the following specifications:
- Mini tower case
- Intel Xeon D-1567 processor
- 64GB DDR4 RAM
- Two 1Gb NIC
- Two 10Gb NIC
- Samsung 970 EVO 500GB NVMe PCIe M.2 SSD (XenServer install and local SR)
- Samsung 860 EVO 1TB 2.5 Inch SATA III Internal SSD (Local SR for VMs)
NOTE: I would never buy or recommend the 12-core servers as I have had nothing but problems with the 10Gb NICs on the servers.
For VMware product licenses, I used VMUG Advantage and the EVALExperience. If you would like to try EVALExperience, Paul Braren has a 10% discount code on his site.
I am fortunate that Citrix supplies CTPs with licenses that work with most on-premises products.
Now that Citrix and other vendors support vSphere/vCenter 7, it is time to rebuild the lab with the latest version of both.
For XenServer, I went with XenServer 8.2, the latest version.
I decided to go with the Network File System (NFS) instead of the Internet Small Computer Systems Interface (iSCSI) for storage. Gregory Thompson was the first to tell me to use NFS instead of iSCSI for VMware. If you Google “VMware NFS iSCSI”, you find many articles that explain why NFS is better than iSCSI for VMware environments. For me, NFS is easier to configure on an ESXi host than iSCSI. I also found out my Synology 1817+ storage unit supported NFS. Synology 1817 and 1817+ support NFS 4.1, and Synology has provided a VAAI plug-in for NFS since 2014.
For XenServer, NFS is also simple to configure and use and requires no additional drivers or software.
The following is a noncomprehensive list of some of the activities this article series covers:
- Configuring a Synology 1817+ NAS for NFS, ESXi 7.0, and XenServer 8.2
- Install VMware ESXi 7.0
- Initial VMware ESXi Host Configuration
- VMware ESXi Host Configuration
- Install the VMware vCenter Server Appliance
- Create vSphere Networking and Network Storage
- Backup the vCenter Server Appliance using NFS
- Updating the vCenter Server Appliance
- Install Citrix XenServer 8.2
- Citrix XenServer Host and Pool Configuration
- Create a Server 2019 Template Image
- Create VMs from the Server 2019 Template
- Create Active Directory
- Create a Microsoft Certificate Authority
- Create Initial Group Policy Objects
- Additional vCenter Configuration
- Additional XenCenter Configuration
- Create Additional Servers
- Create a Management Computer
- Create a 10ZiG Management Server
- Create a Goliath Technologies Management Server
- Create an IGEL Management Server
- Create a ControlUp Management Server
- Update ESXi Hosts using VMware Lifecycle Manager
- Advice, Conclusions, and Lessons Learned
There are two classes of VMs in my lab: permanent and temporary. The permanent VMs are, for example, the domain controllers, CA, file server, SQL server, utility server, management PC, and others. The permanent VMs reside in Citrix XenServer, and I use the vSphere cluster for the virtual desktops and servers created by the various virtualization products. All the Microsoft-related infrastructure servers reside in XenServer.
Since I have built and rebuilt my hosts several times in this learning experience, below is the lab configuration.
Table 1 Lab Configuration
| Name | IP Address (Purpose) |
| NETGEAR 48-port 10Gb Switch | 192.168.1.251 |
| NETGEAR 48-port 1Gb Switch | 192.168.1.250 |
| Synology1817+ | 192.168.1.253 (NFS Storage) |
| Synology1817 | 192.168.1.254 (Contains all downloaded ISOs) |
| ESXiHost1 | 192.168.1.53 (Management) 192.168.1.54 (IPMI) 192.168.1.55 (vMotion) 192.168.1.56 (NFS) |
| ESXiHost2 | 192.168.1.57 (Management) 192.168.1.58 (IPMI) 192.168.1.59 (vMotion) 192.168.1.60 (NFS) |
| ESXiHost3 | 192.168.1.61 (Management) 192.168.1.62 (IPMI) 192.168.1.63 (vMotion) 192.168.1.64 (NFS) |
| ESXiHost4 | 192.168.1.65 (Management) 192.168.1.66 (IPMI) 192.168.1.67 (vMotion) 192.168.1.68 (NFS) |
| ESXiHost5 | 192.168.1.69 (Management) 192.168.1.70 (IPMI) 192.168.1.71 (vMotion) 192.168.1.72 (NFS) |
| ESXiHost6 | 192.168.1.73 (Management) 192.168.1.74 (IPMI) 192.168.1.75 (vMotion) 192.168.1.76 (NFS) |
| XenServer1 | 192.168.1.80 (Management) 192.168.1.81 (IPMI) |
| XenServer2 | 192.168.1.82 (Management) 192.168.1.83 (IPMI) |
| XenServer3 | 192.168.1.84 (Management) 192.168.1.85 (IPMI) |
| XenServer4 | 192.168.1.86 (Management) 192.168.1.87 (IPMI) |
| NFS Server on the Synology 1817+ NAS | 192.168.1.253 |
| NFS Shares | /volume1/ISOs /volume1/VMwareVMs /volume1/XSVMs |
Servers and appliances that exist in the lab after I complete this article series.
| Name | Description | IP Address |
| LabMgmtPC | VM with management consoles, PowerShell stuff, and Office | 192.168.1.200 |
| LabDC1 | Domain Controller, DNS, DHCP | 192.168.1.201 |
| LabDC2 | Domain Controller, DNS, Citrix, and RDS License Server | 192.168.1.202 |
| LabCA | Certificate Authority | 192.168.1.203 |
| LabFS | File Server | 192.168.1.204 |
| LabSQL | SQL Server | 192.168.1.205 |
| Lab10ZiG | 10ZiG Server | 192.168.1.206 |
| LabControlUp | ControlUp Server, ControlUp Monitor | 192.168.1.207 |
| LabGoliath | Goliath Technologies Server | 192.168.1.208 |
| LabIGEL | IGEL UMS Server | 192.168.1.209 |
| vCenter | vCenter Server Appliance | 192.168.1.90 |
| Citrix App Layering Appliance | 192.168.1.91 |
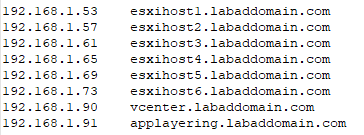
I temporarily have DHCP running in my temporary AD, so when DHCP assigns an IP address, DHCP appends the AD domain name to the device’s hostname. For example, when I built the host ESXiHost1, it was given an IP address of 192.168.1.107. I then give the host a static IP address of 192.168.1.53. When I connect to that host using Google Chrome, the hostname is ESXiHost1.LabADDomain.com, even though the host is not a member of the LabADDomain.com domain.
To work around the initial self-signed certificate issues when connecting to a host using a browser, add the Fully Qualified Domain Name (FQDN) of the various hosts to your AD’s DNS. If your computer, like mine, is not domain joined, you should also consider adding the IP address and FQDN to your computer’s hosts file (located in c:\Windows\System32\Drivers\etc).
Figures 1 through 3 show my DNS Forward and Reverse Lookup Zones and my computer’s hosts file.
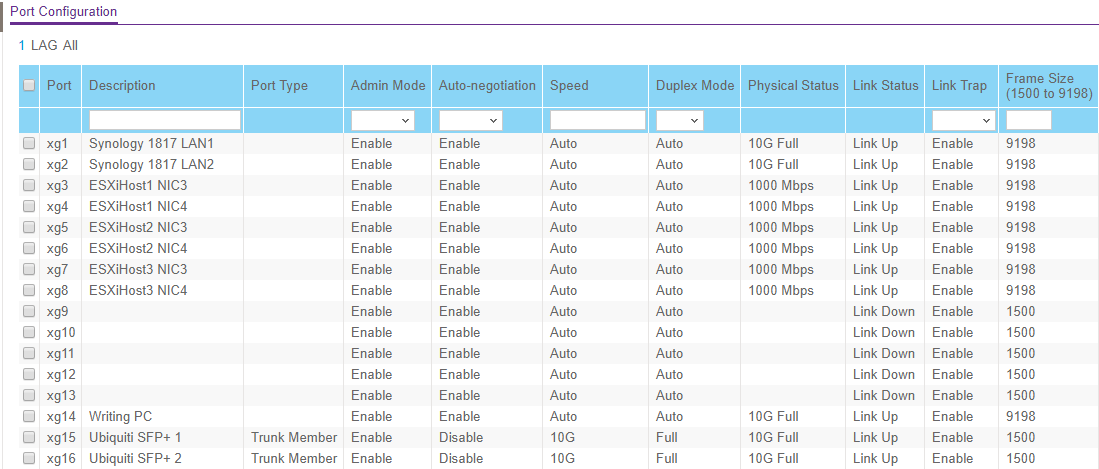
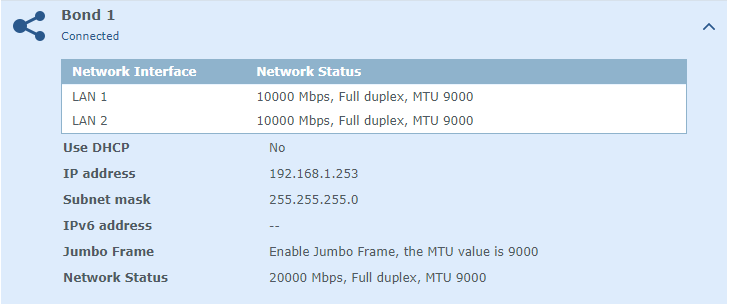
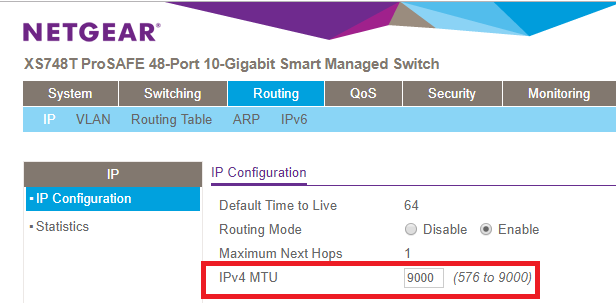
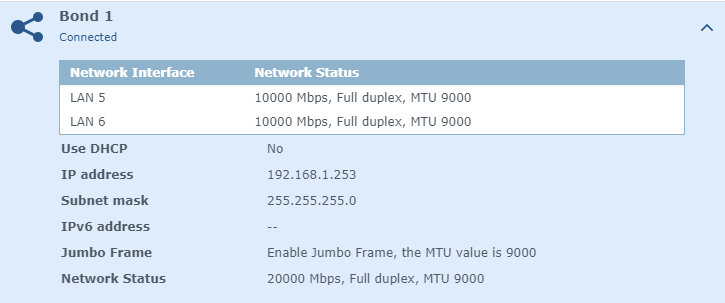
Since I have a 10Gb switch and my Synology 1817+ NAS supports 10Gb I use Jumbo Frames. After much research, asking NETGEAR support, and talking with friends who know networking, I configured the following Maximum Transmission Unit (MTU) sizes:
- 10G Switch: 9000 as shown in Figure 4
- Synology 1817+: 9000 as shown in Figure 5
- (When created) 10G related Virtual Switch: 9000
- (When created) VMkernel NICs that connect to the 10G Virtual Switch: 9000
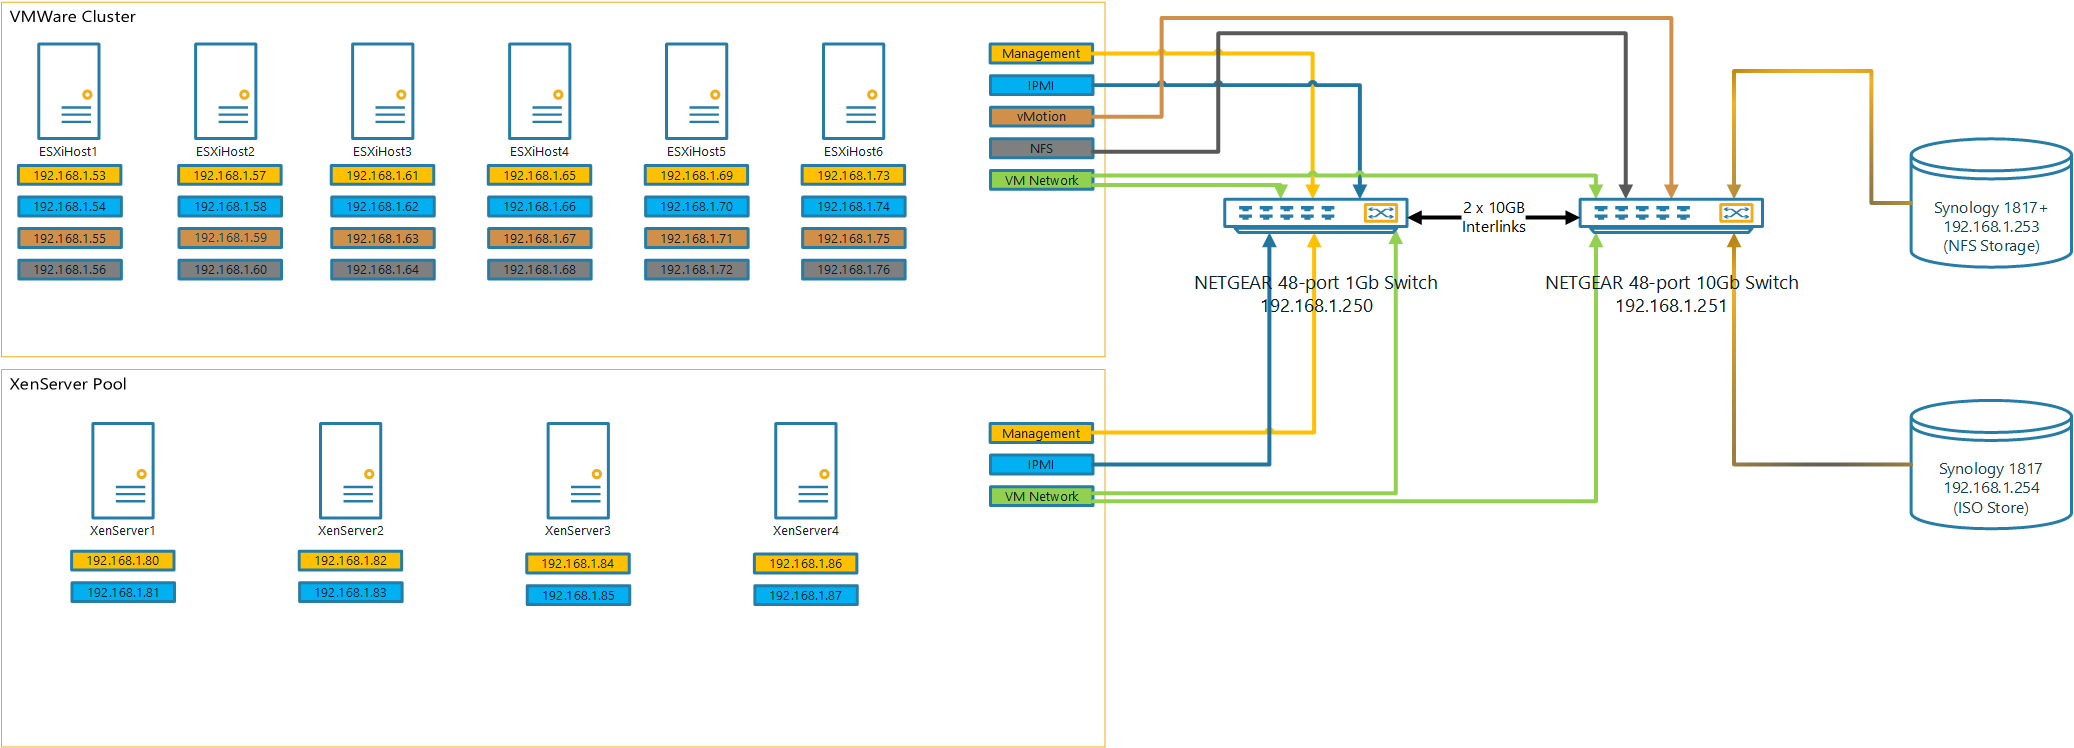
Fellow CTP, Leee Jeffries, provided Figure 6 after reviewing several of the articles in this series. Figure 6 is an overview of the networking in the lab.
This foray into installing and configuring the VMware Lab has been a painful but rewarding learning experience. I hope that through all my pain and errors, you can also gain from my experiences.
Along the way, several community members helped provide information, answered questions, and even did remote sessions with me when I ran into stumbling blocks.
This article series is better because of the grammar, spelling, punctuation, style, and technical input from Michael B. Smith, Leee Jeffries (darn that British English), Tobias Kreidl, and Greg Thompson.
Up next: Configuring a Synology 1817+ NAS for NFS, ESXi 7.0, and XenServer 8.2.
Thanks for the update. I always thought the I in iSCSI stood for “infernal” rather than “internet”. Kidding aside, a good article.
Pat