UPDATED April 18, 2009, for Acrobat Read 9.1
Portable Document Format (PDF) files are a popular way to transfer documents between computer users. A PDF file retains formatting for the file being transferred. There are over 600 free viewers available on http://www.download.com which allows the viewing of PDF files.
In this article, you will learn:
- how to sign up to distribute the free Adobe Acrobat Reader version 9.1
- download the distributable file
- download the Adobe Customization Wizard
- extract the Acrobat Reader MSI file
- customize the MSI file
- install the customized file on your XenApp server
- remove additional menu items using JavaScript
While it may be less time-consuming to just download the free Acrobat Reader and use that MSI file, Adobe requires any entity that will install the program for multiple users to agree to the Adobe Reader Distribution Agreement.
For this article, two versions of XenApp were tested:
- Citrix XenApp 5 for Server 2003 Platinum (x86) with Hotfix Rollup Package 3
- Citrix XenApp 5 for Windows Server 2008 Platinum (x86)
Server 2003 will be the main testing version. Any differences for Server 2008 will be noted.
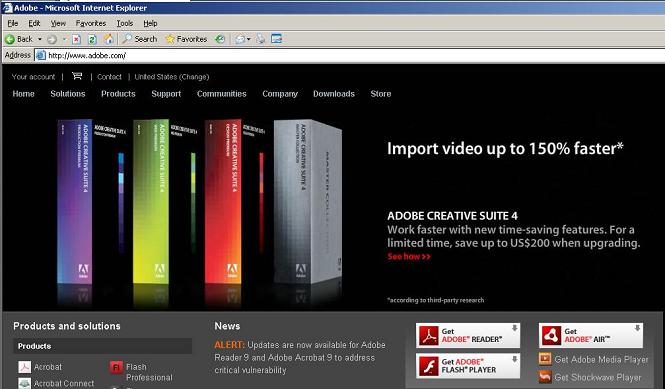
To get started, open up your browser and go to http://www.adobe.com (Figure 1).

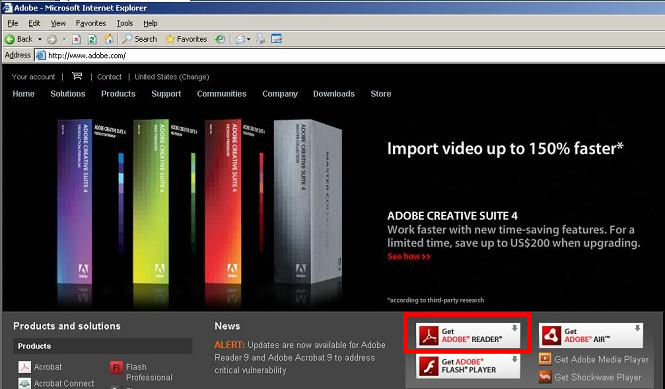
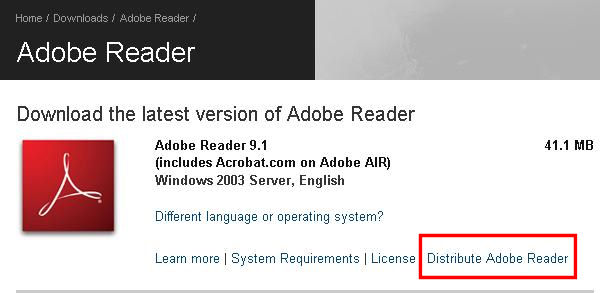
Click on the Get Adobe Reader button (Figure 2).
Click Distribute Adobe Reader (Figure 3).
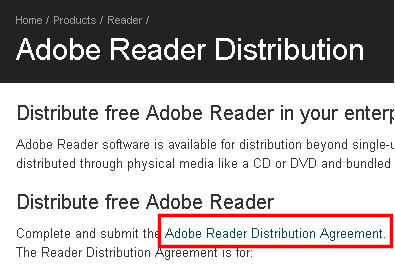
A new browser window opens. Click Adobe Reader Distribution Agreement (Figure 4).
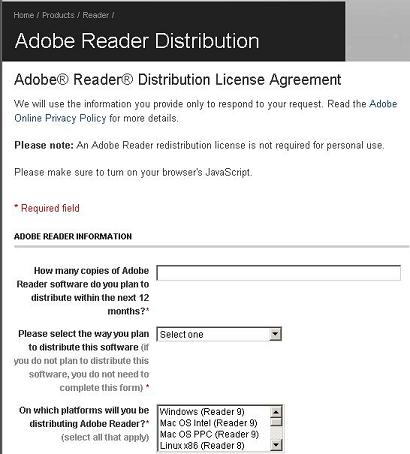
Fill in the necessary information (Figure 5).
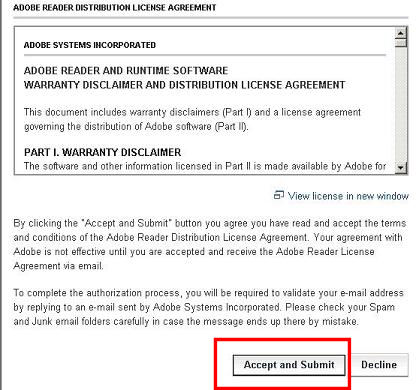
Then click Accept and Submit (Figure 6).
You will receive an e-mail from Adobe to verify the e-mail address you entered. Click the verification link in the e-mail. Adobe will send you another e-mail with the information necessary to download the Redistributable version of Acrobat Reader 9.1. In the second e-mail, click the link to download Adobe Reader 9.
Select the operating system and language that matches your XenApp server and click Continue (Figure 7).

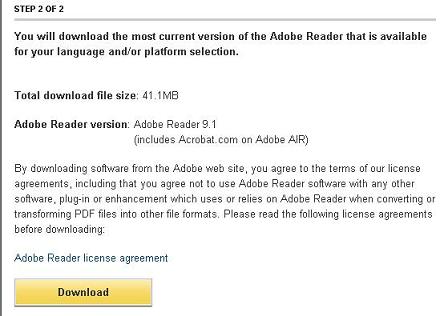
Scroll down and click Download (Figure 8).
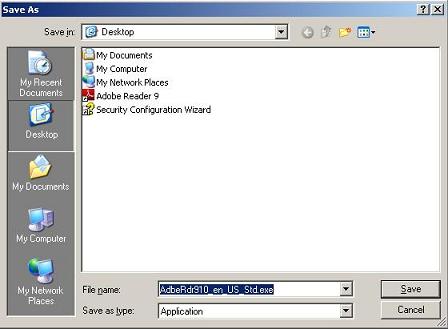
Save the file to the server’s desktop (Figure 9).
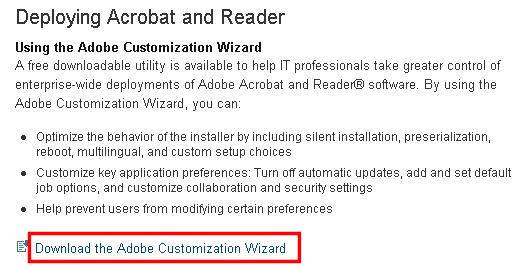
In the second e-mail from Adobe, click the link for Adobe enterprise deployment tools. Scroll down and click on Download the Adobe Customization Wizard (Figure 10).
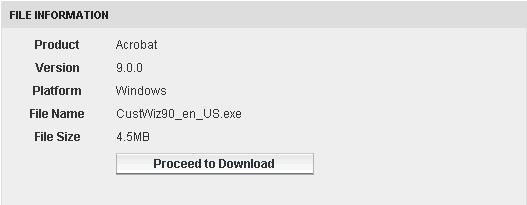
On the Adobe Customization Wizard 9 web page, scroll down and click on Proceed to Download (Figure 11).
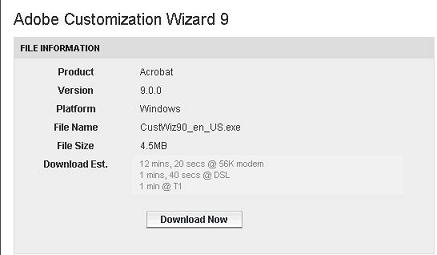
Click Download Now (Figure 12).
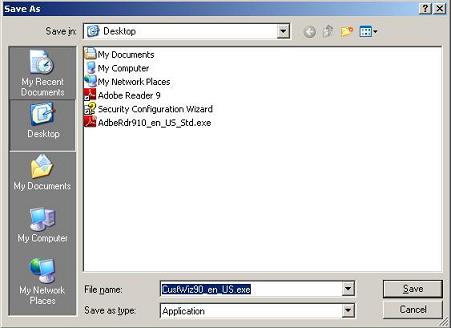
Save the file to the Server’s desktop (Figure 13).
Exit your browser.
Double-click CustWiz90_en_US.exe to install the Customization Wizard. Accept all the defaults during the installation.
The Acrobat Reader MSI file needs to be extracted. Click Start, Run, type in “%UserProfile%\desktop\adberdr910_en_us_std.exe” -nos_ne and press Enter. For Server 2003, the MSI file is extracted to %UserProfile%\Local Settings\Application Data\Adobe\Reader 9.1\Setup Files\READER9. For Server 2008, the MSI file is extracted to %UserProfile%\AppData\Local\Adobe\Reader 9.1\Setup Files\READER9.
Copy the READER 9.1 folder to the root of the C: drive.
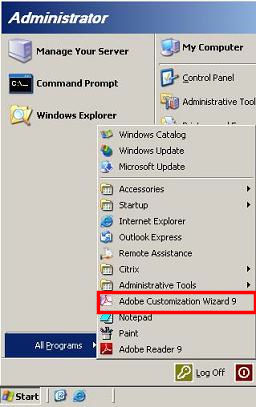
Click Start, All Programs, Adobe Customization Wizard 9 (Figure 14).
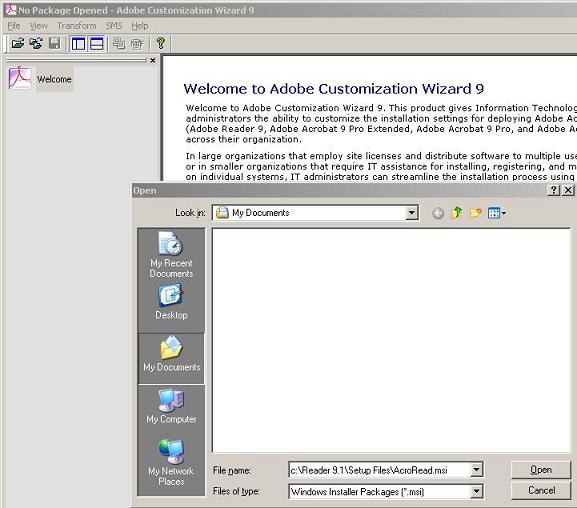
Click File, Open Package, type in C:\Reader 9.1\Setup Files\AcroRead.msi, and press Enter (Figure 15).
Click Installation Options (Figure 16).
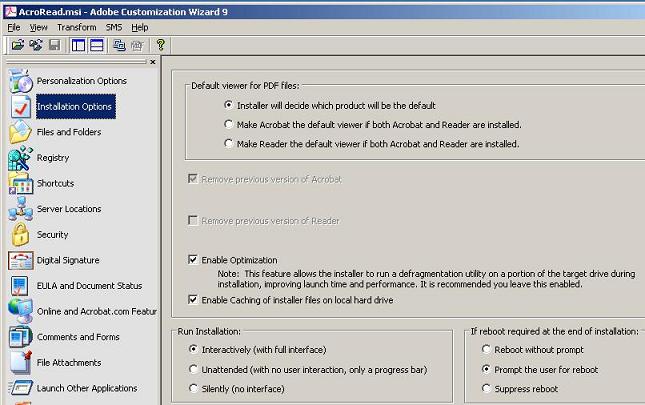
If you have both the full Adobe Acrobat and Acrobat Reader installed on the server, select which one will be the default. Since you will be installing the customized Acrobat Reader, the options in Run Installation and If reboot required at the end of installation can be ignored.
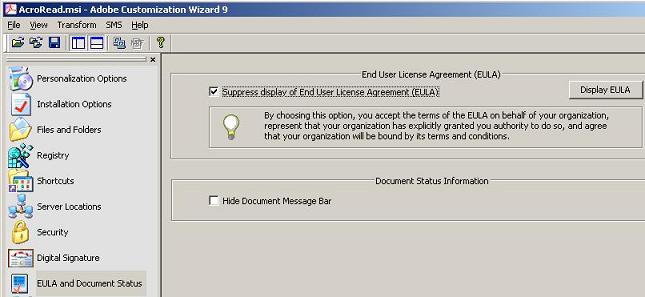
Click EULA and Document Status (Figure 17). Check the box Suppress display of End User License Agreement (EULA). This will prevent the EULA Agreement page from being displayed for every user the first time Acrobat Reader is run.
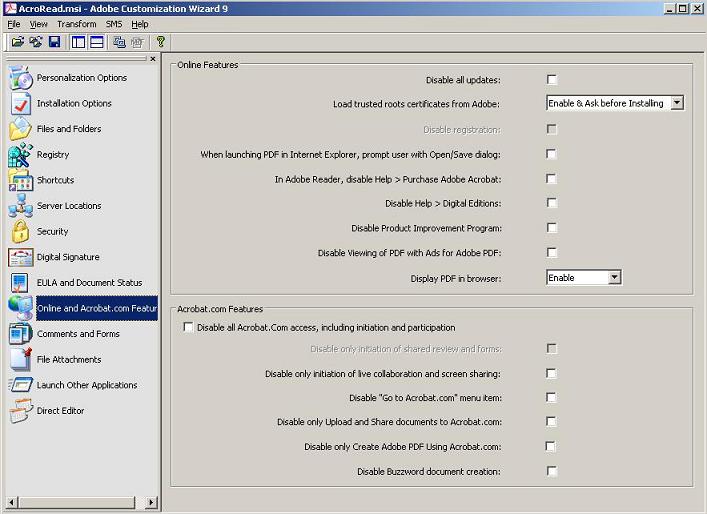
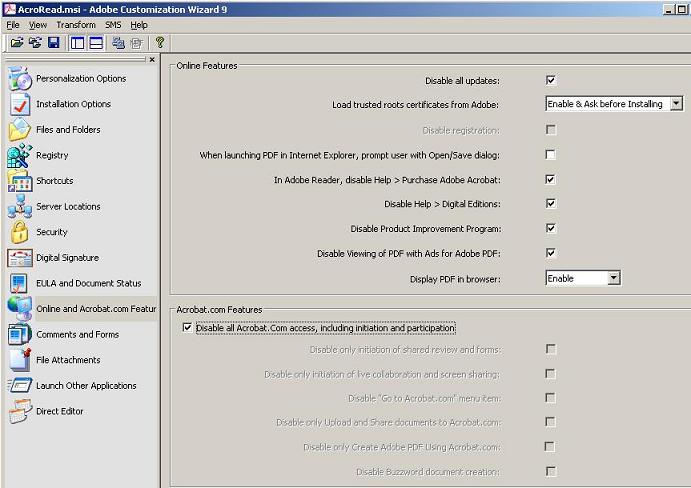
Click Online and Acrobat.com Features (Figure 18).
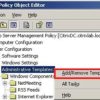
This page allows you to restrict updates, various help options, and Acrobat.com features. The following are recommended for Terminal Server and Citrix environments (Figure 19):
- Disable all updates
- In Adobe Reader, disable Help -> Purchase Adobe Acrobat
- Disable Help -> Digital Editions
- Disable Product Improvement Program
- Disable Viewing of PDF with Ads for Adobe PDF
- Disable all Acrobat.com access, including initiation and participation
Note: There are some reports of problems with viewing PDFs within a browser window. Some reports state that the AcroRd32 process does not release memory until all browser instances are exited. If you want to disable this ability, change Display PDF in browser to Disable & Lock.
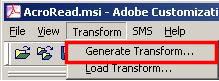
Click Transform, Generate Transform (Figure 20).
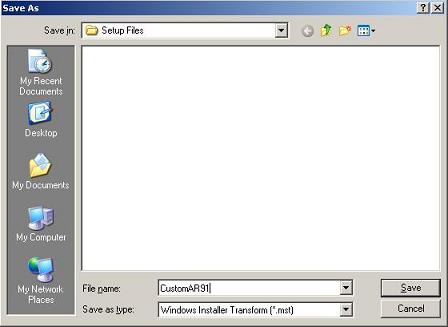
Name the Transform file and save it in the Setup Files folder (Figure 21).
Exit the Adobe Customization Wizard 9 program.
To install Acrobat Reader 9.1 with your customizations:
Click Start, Run, type in msiexec /i “c:\reader 9.1\setup files\acroread.msi” TRANSFORMS=”c:\reader 9.1\setup files\CustomAR91.mst” and press Enter.
Note: Using MSIEXEC, it is not necessary to place the server into install mode first and then execute mode after installation. Please see http://msdn.microsoft.com/en-us/library/aa369521(VS.85).aspx and pages 255 and 256 of the Windows Server 2008 Terminal Services Resource Kit.
Start Acrobat Reader 9.1 and the EULA Agreement page is not displayed.
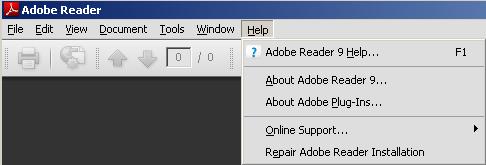
Click the Help menu and you will see two options there you do not want in a multi-user environment: Repair Adobe Reader Installation and Online Support (Figure 22).
Note: The following information is adapted from https://stealthpuppy.com/deploying-adobe-reader-81/.
There is no way to remove those options from the customization wizard or via a registry key. In order to remove the options, you will need to create a JavaScript file and place it in the C:\Program Files\Adobe\Reader 9.0\Reader\Javascripts folder.
//HideMenu.js
//Hides Help - Repair Adobe Reader Installation
app.hideMenuItem("DetectAndRepair");
//Help - Online Support
app.hideMenuItem("OnlineSupport");
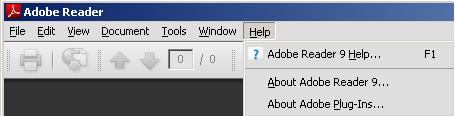
When Acrobat Reader is started, it may take a few seconds for the JavaScript file to remove the Help menu items (Figure 23). On my lab server, with Acrobat Reader 9 it took around 15 to 20 seconds for the Help menu items to be removed. With Acrobat Reader 9.1, the same process takes less than two seconds.
There are many other menu items that can be removed using the JavaScript file. See the link “JavaScript to Hide Menu Items” at http://blog.stealthpuppy.com/deployment/deploying-adobe-reader-81.
You have now successfully customized your Acrobat Reader 9.1 to work better in a Terminal Server and Citrix environment.
In this article, you learned to:
- sign up to distribute the free Adobe Acrobat Reader version 9.1
- download the distributable file
- download the Adobe Customization Wizard
- extract the Acrobat Reader MSI file
- customize the MSI file
- install the customized file on your XenApp server
- remove additional menu items using JavaScript